21 Yellow Nail Designs: Trendy Ideas for Every Occasion
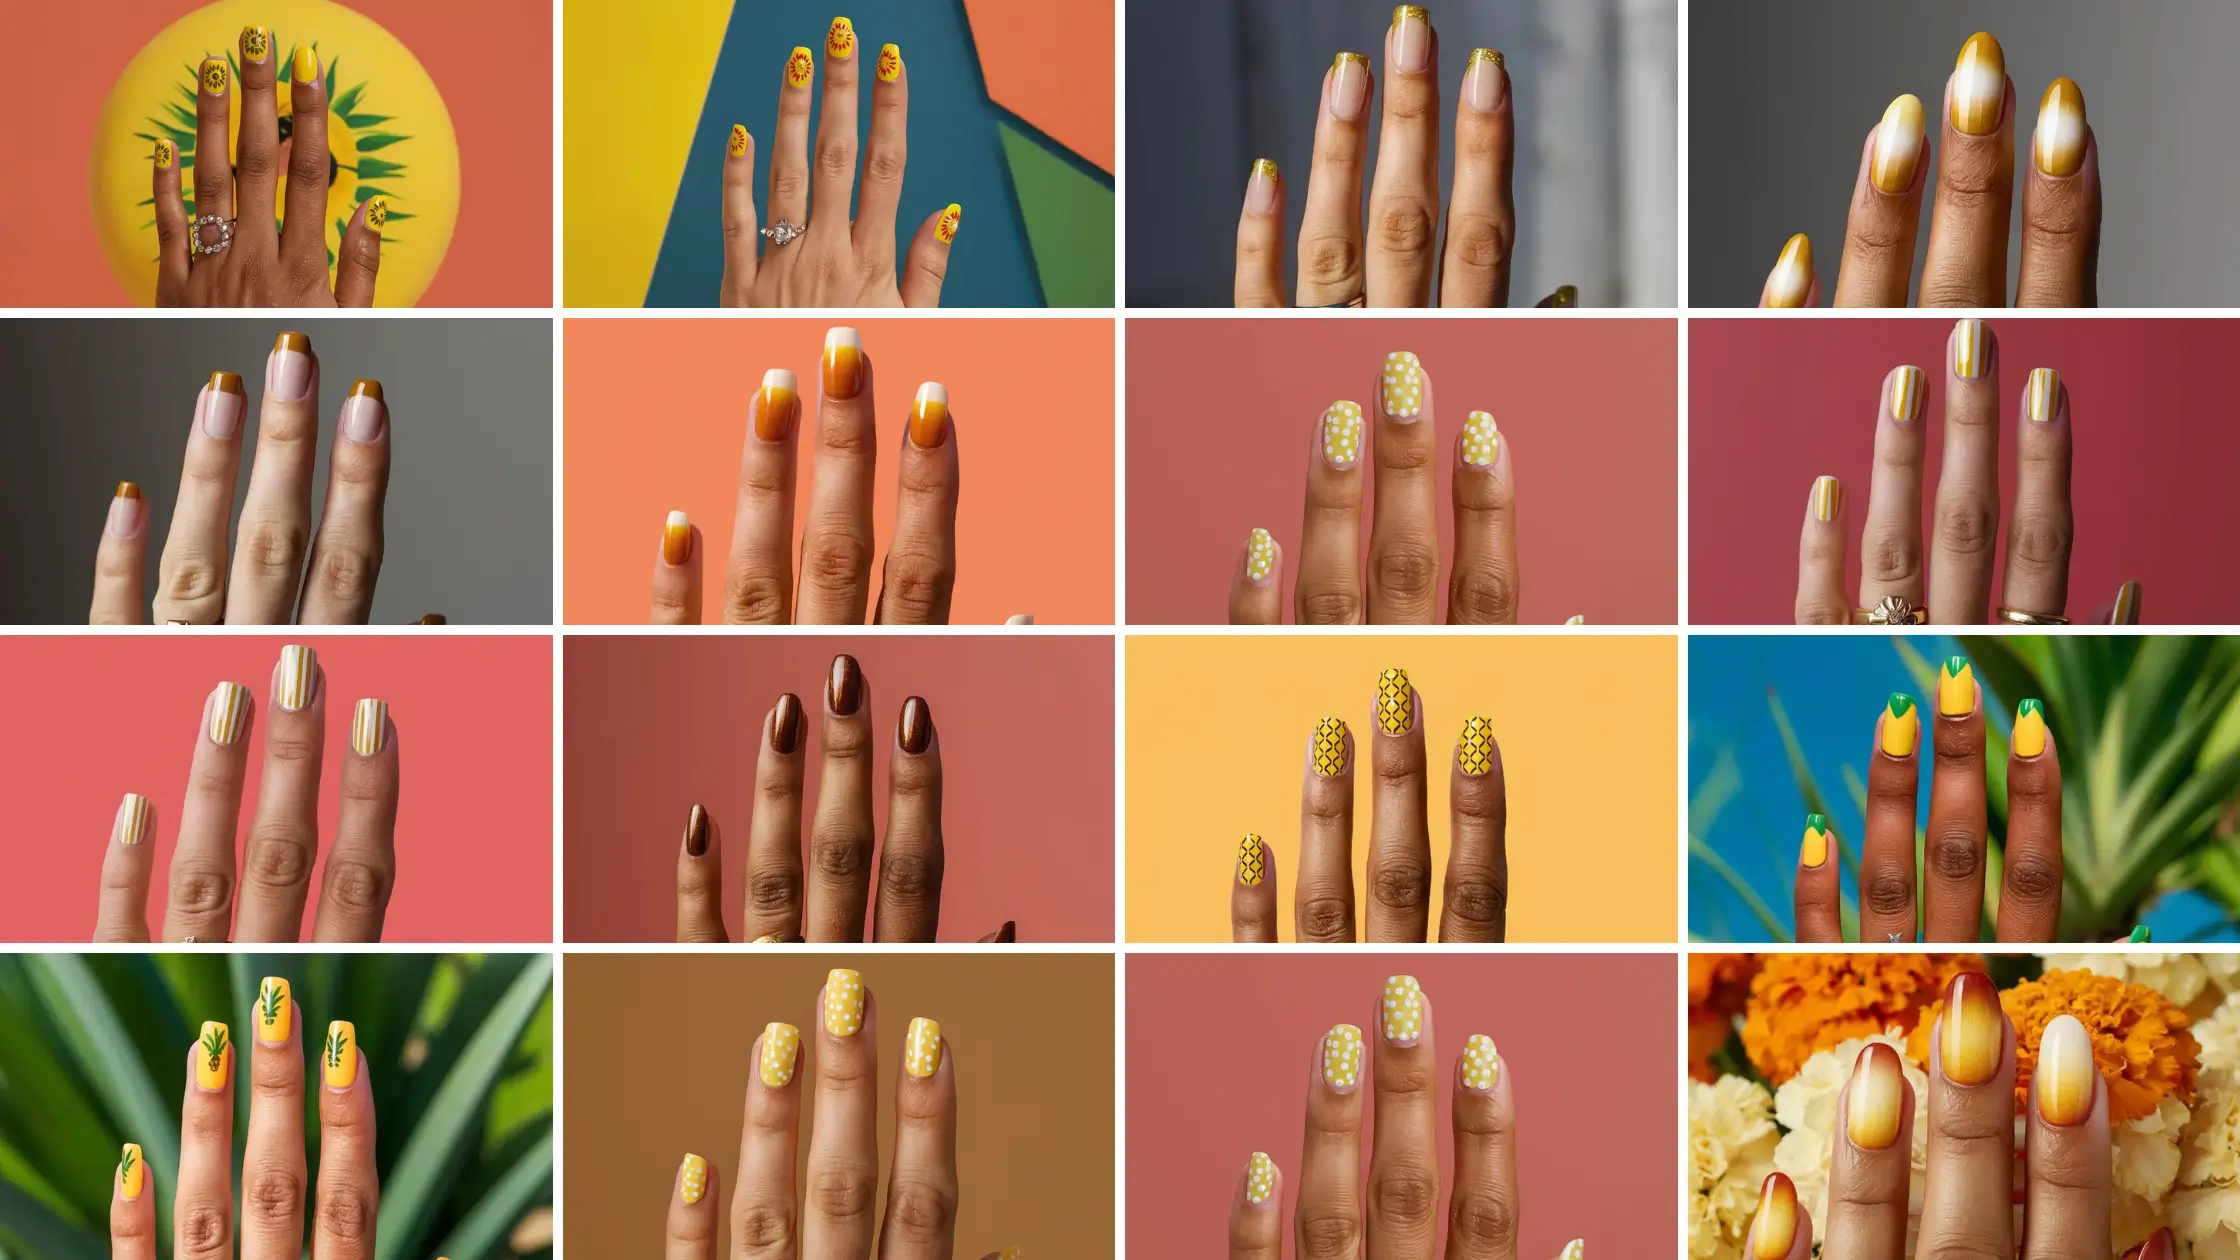
Selecting the right nail design can elevate your look and add a splash of color to your style. In this article, I’ll explore 21 perfect yellow nail designs for any occasion.

Yellow nails bring a cheerful and vibrant touch to any ensemble, making them an excellent choice for brightening up a day.
Whether you prefer subtle pastels or bold neons, there’s a yellow shade and design to match your unique style.
1: Lemon Zest Swirls
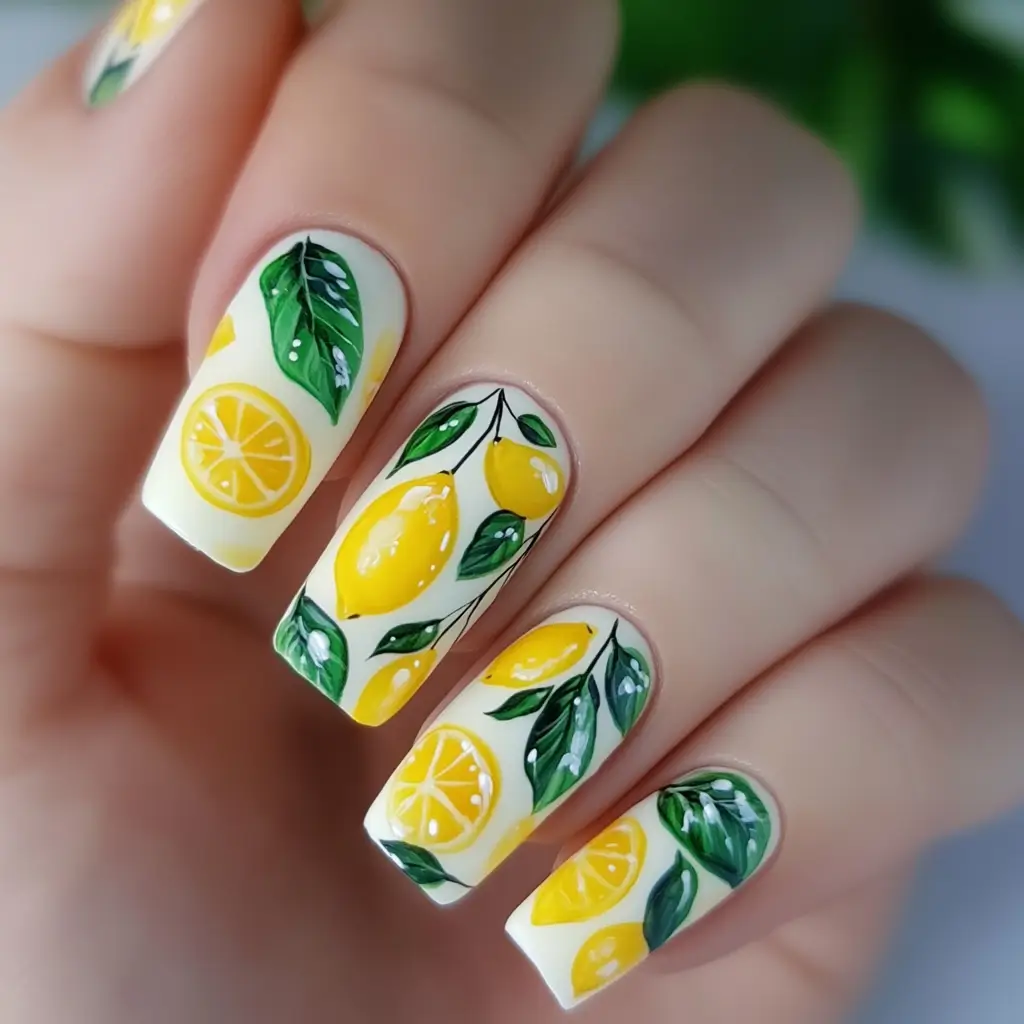

I love the artistic swirl of lemon slices and green leaves on a bright background. Each nail becomes a small canvas with detailed, vibrant lemon motifs. This style truly captures the fresh essence of citrus.
2: Sunflower Burst


Sunflower Burst nails bring a bright and joyful look. I like how the sunflower designs stand out on a yellow or green base. The vibrant petals catch the eye immediately.
I prefer adding small rhinestones to the center of the sunflowers for a sparkly touch. This design is perfect for summer days.
3: Buttercup Glitter Tips
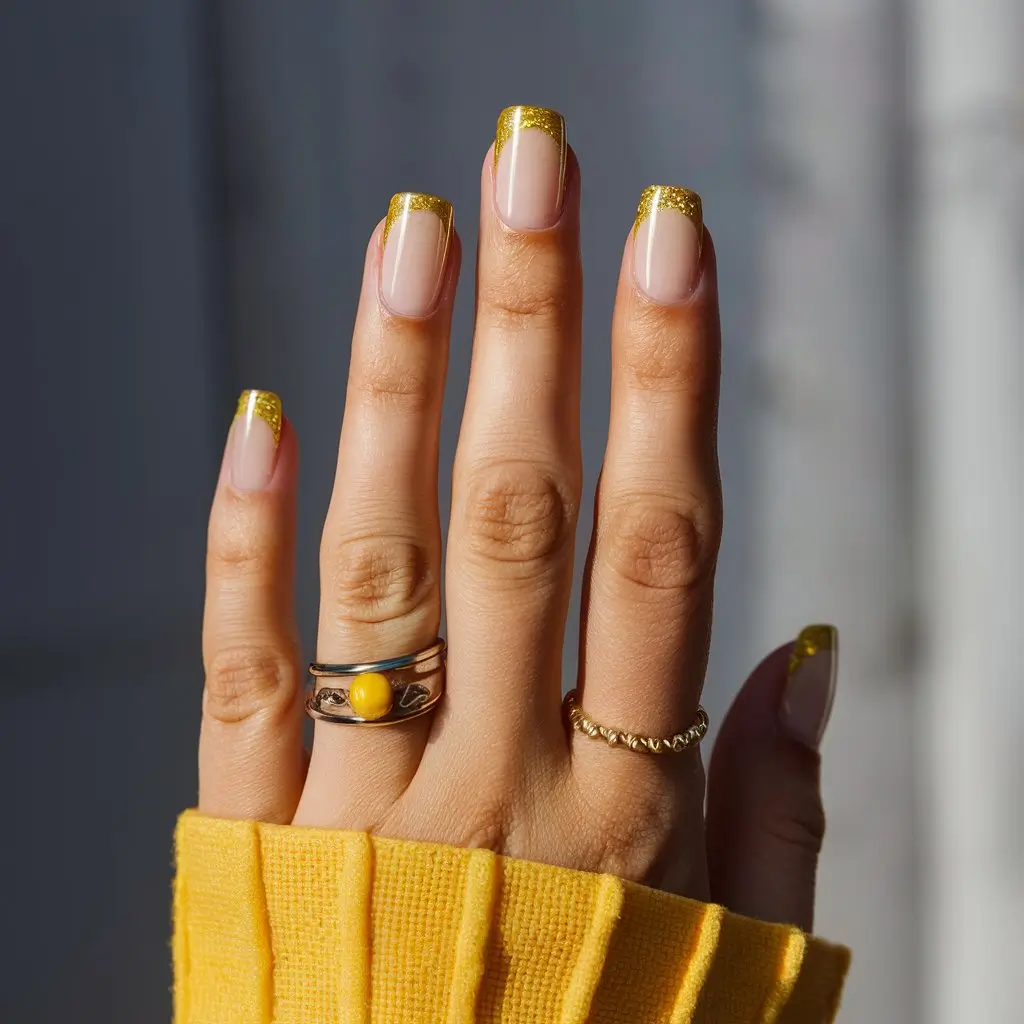
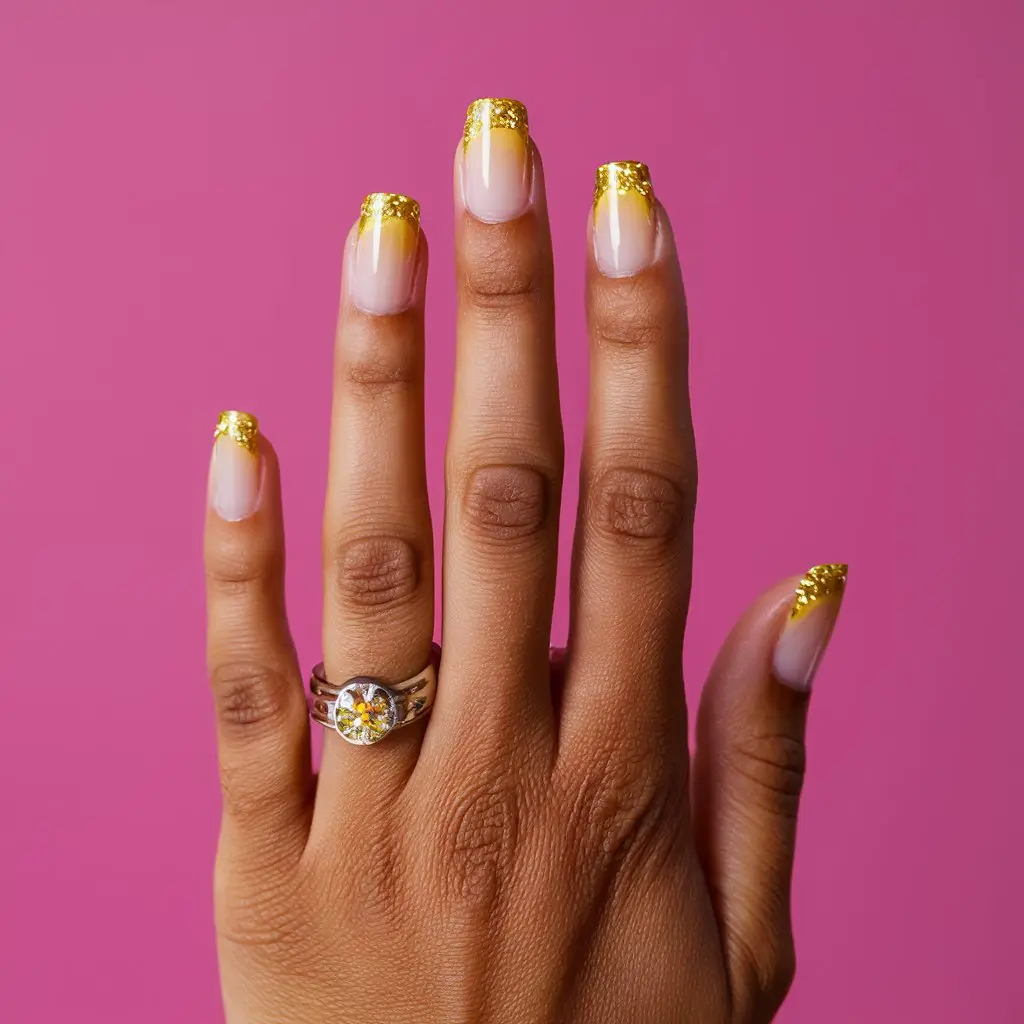
Buttercup glitter tips are a fun way to make your nails shine. I love how the soft yellow color looks with a touch of sparkle. It’s perfect for summer.
I recommend using a fine glitter polish to make the tips pop. It’s an easy design that always looks stunning.
4: Mustard Gradient
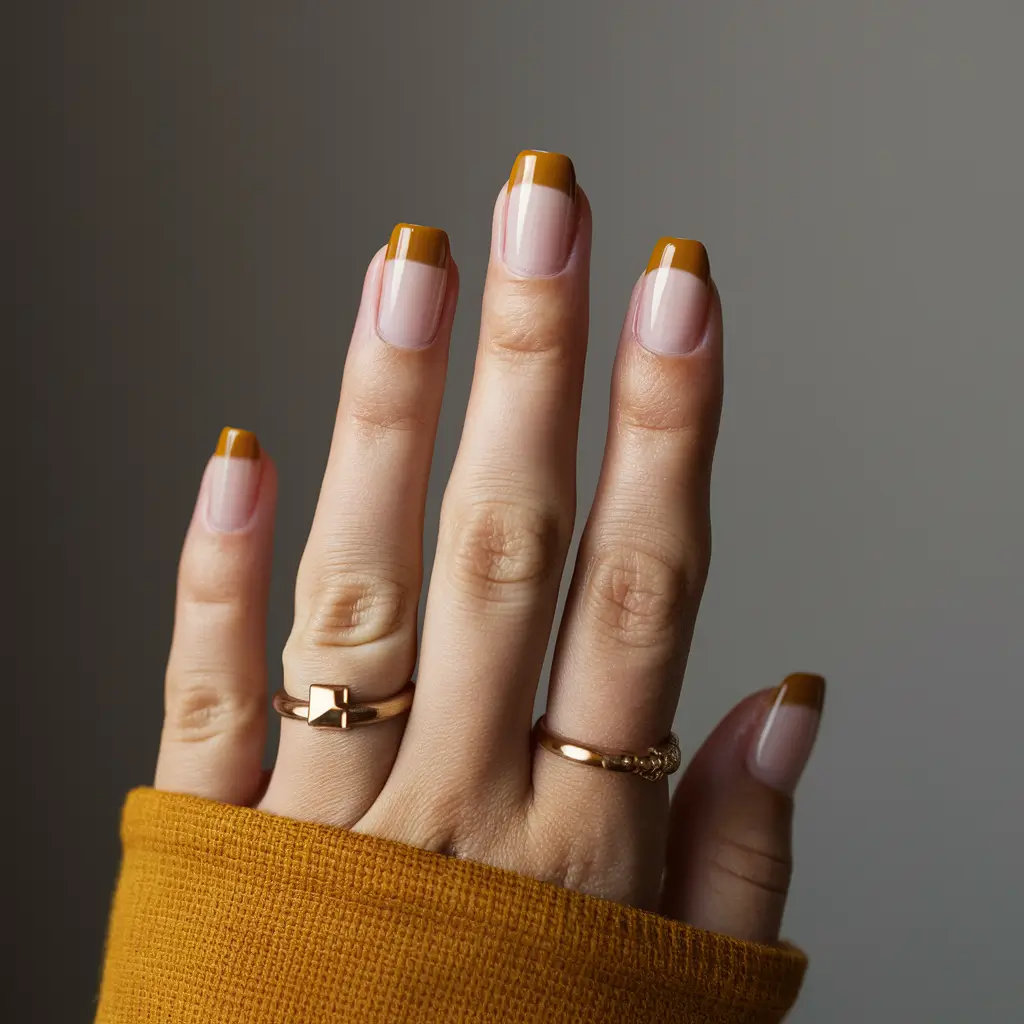
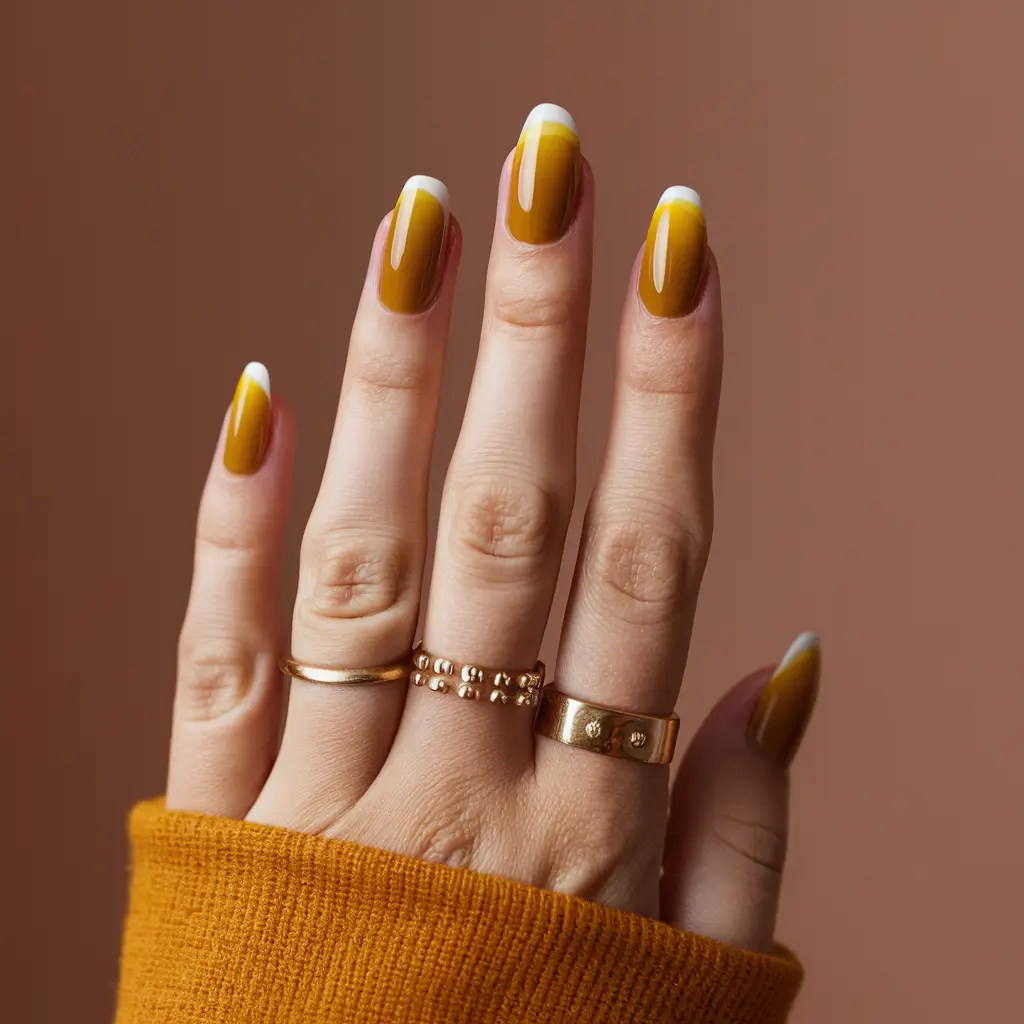
A mustard gradient is a striking way to add depth to your nails. I usually start with a light mustard base that gently transitions to a deeper tone. The result is both elegant and eye-catching.
Playing with shades of mustard adds a stylish twist to your look.
5: Golden Stripes
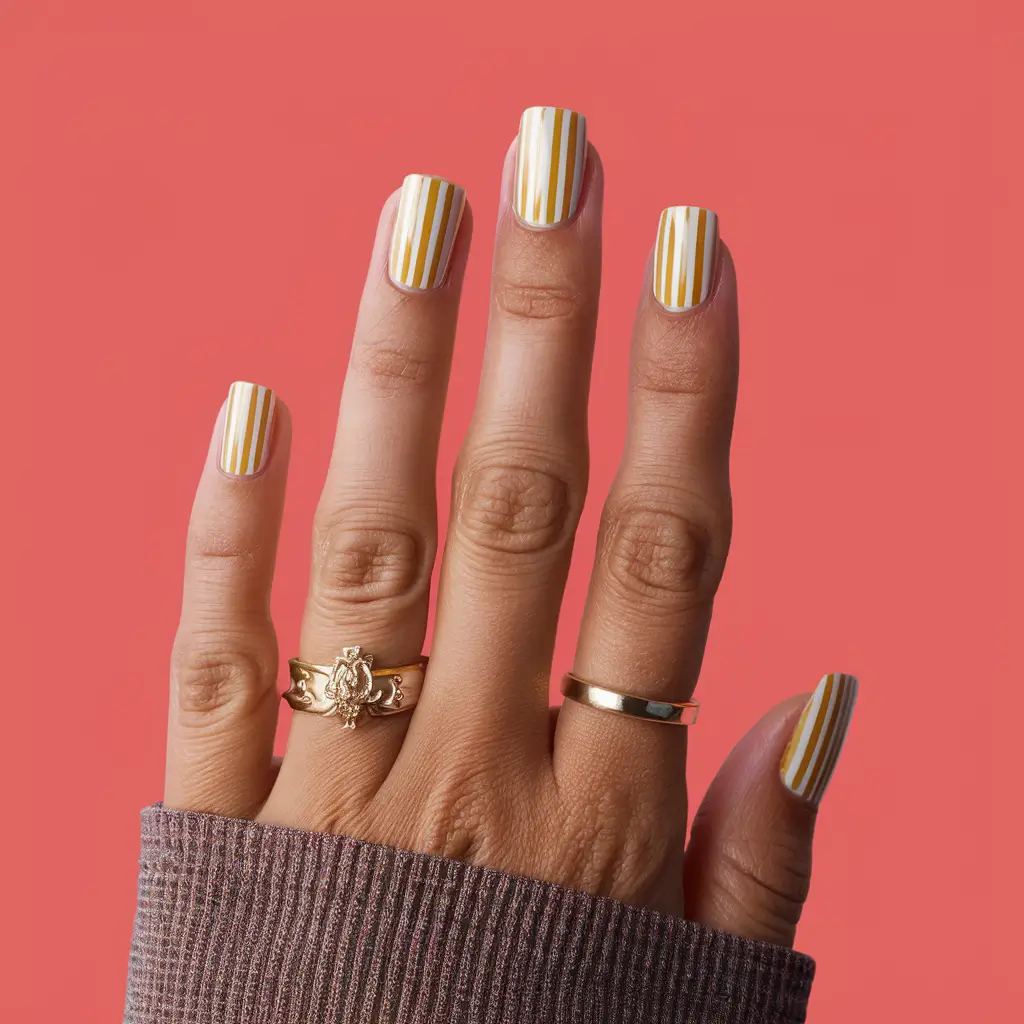
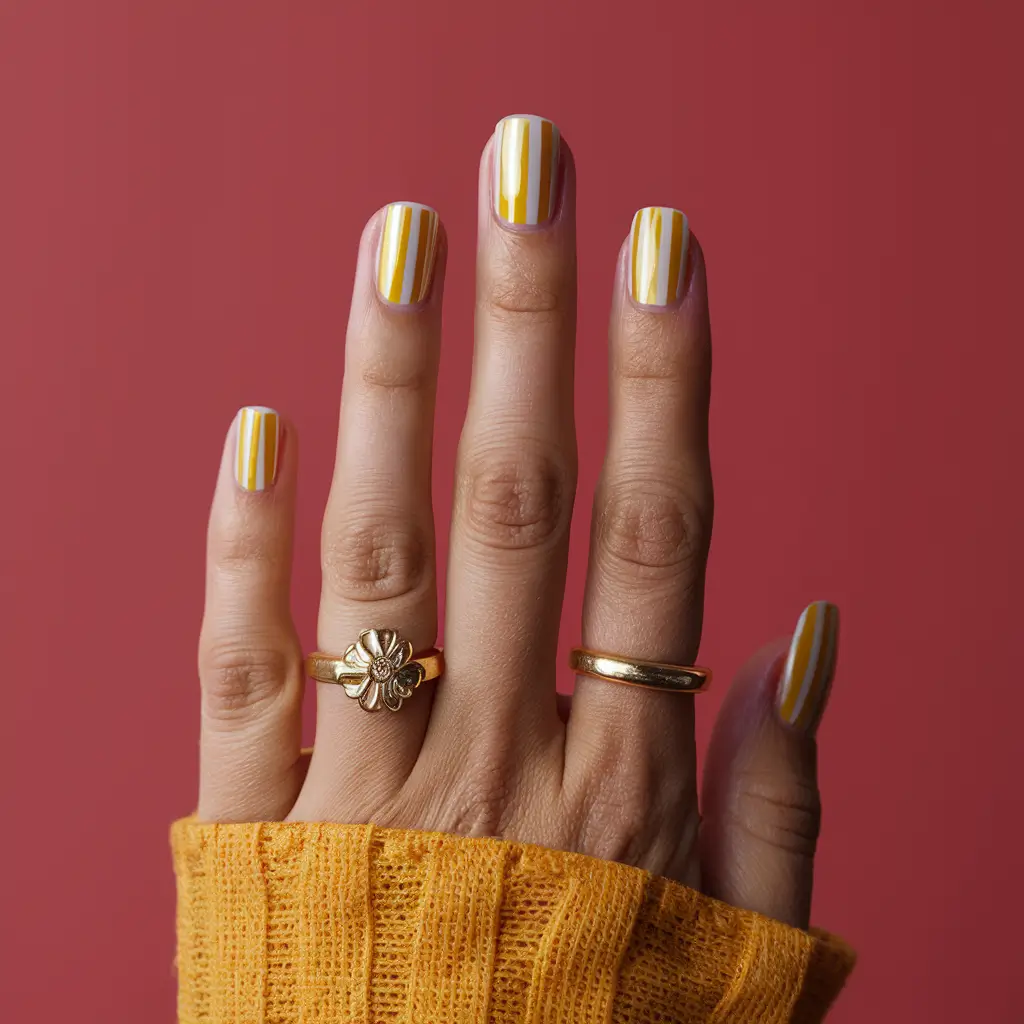
Golden stripes add a touch of elegance to any manicure. I love how they can transform a simple yellow base into something special. This versatile design works well for both casual and formal occasions.
Adding thin gold lines over yellow nails can give a chic, sophisticated look with minimal effort.
6: Pineapple Delight


Pineapple nail designs are a fun way to add a tropical flair to your look. I love how the bright yellow of the pineapple stands out on nails.
A simple way to start is by painting your nails yellow. Then, you can add green leaves at the tips for a classic pineapple look.
7: Marigold Ombre
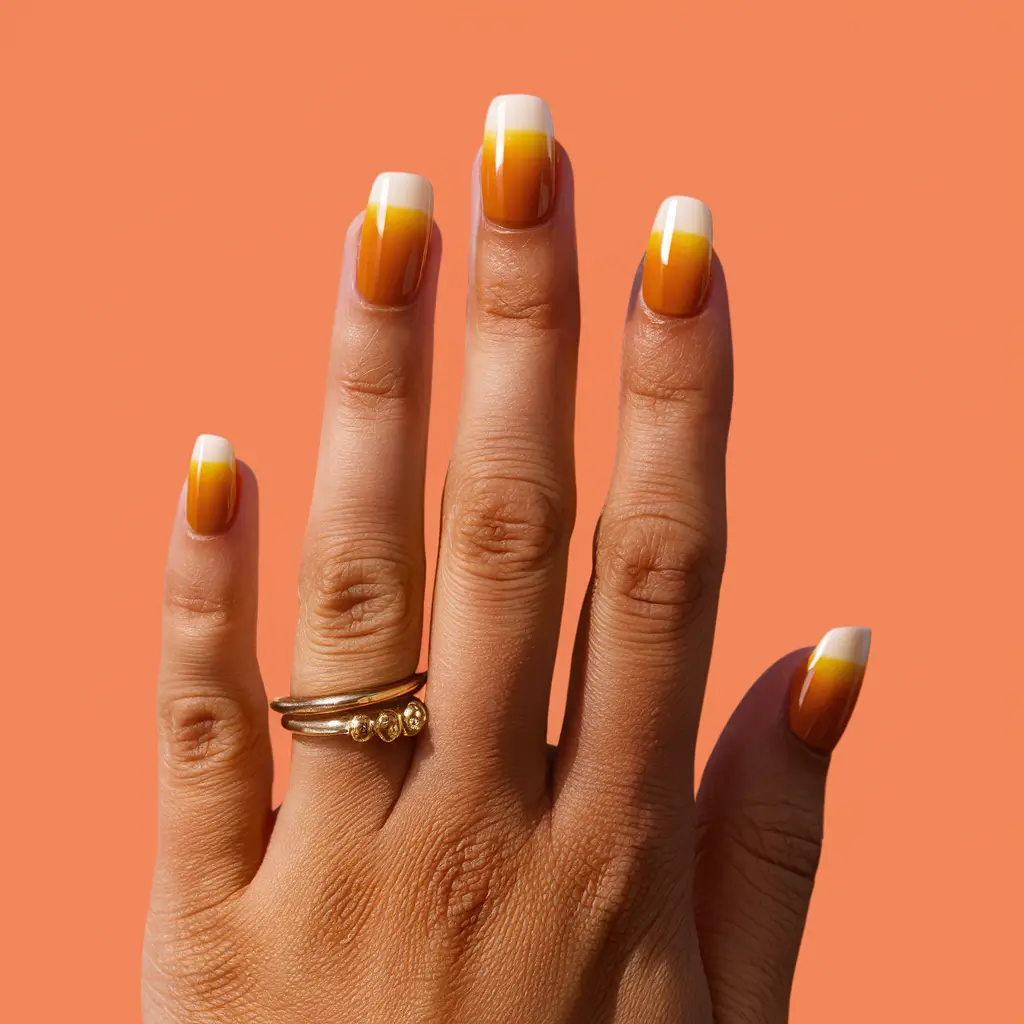
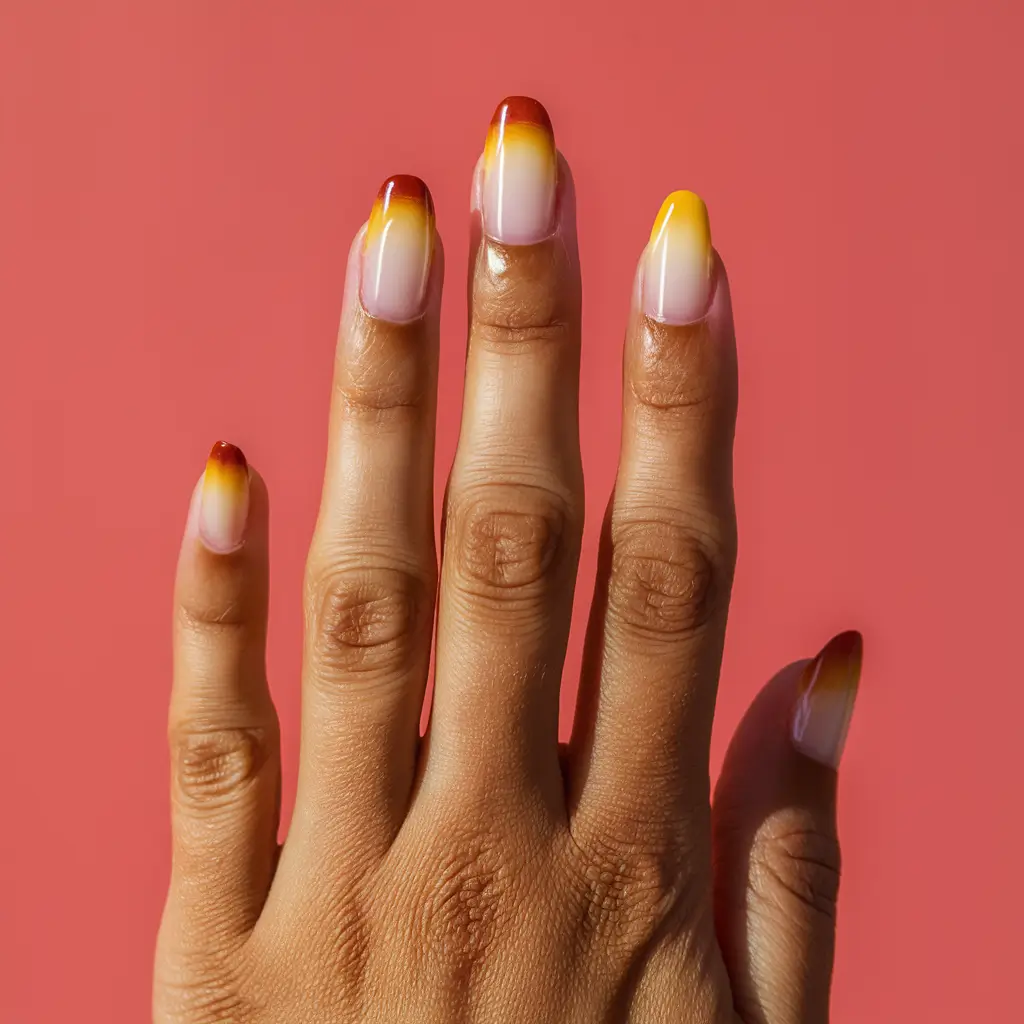
Marigold ombre nails create a beautiful gradient from deep, warm marigold at the tips to a softer, pale yellow at the base. These nails remind me of a blooming marigold flower in the summer.
The colors blend smoothly, creating a warm, sunlit effect. I love how they catch the eye without being too bright.
8: Amber Shimmer
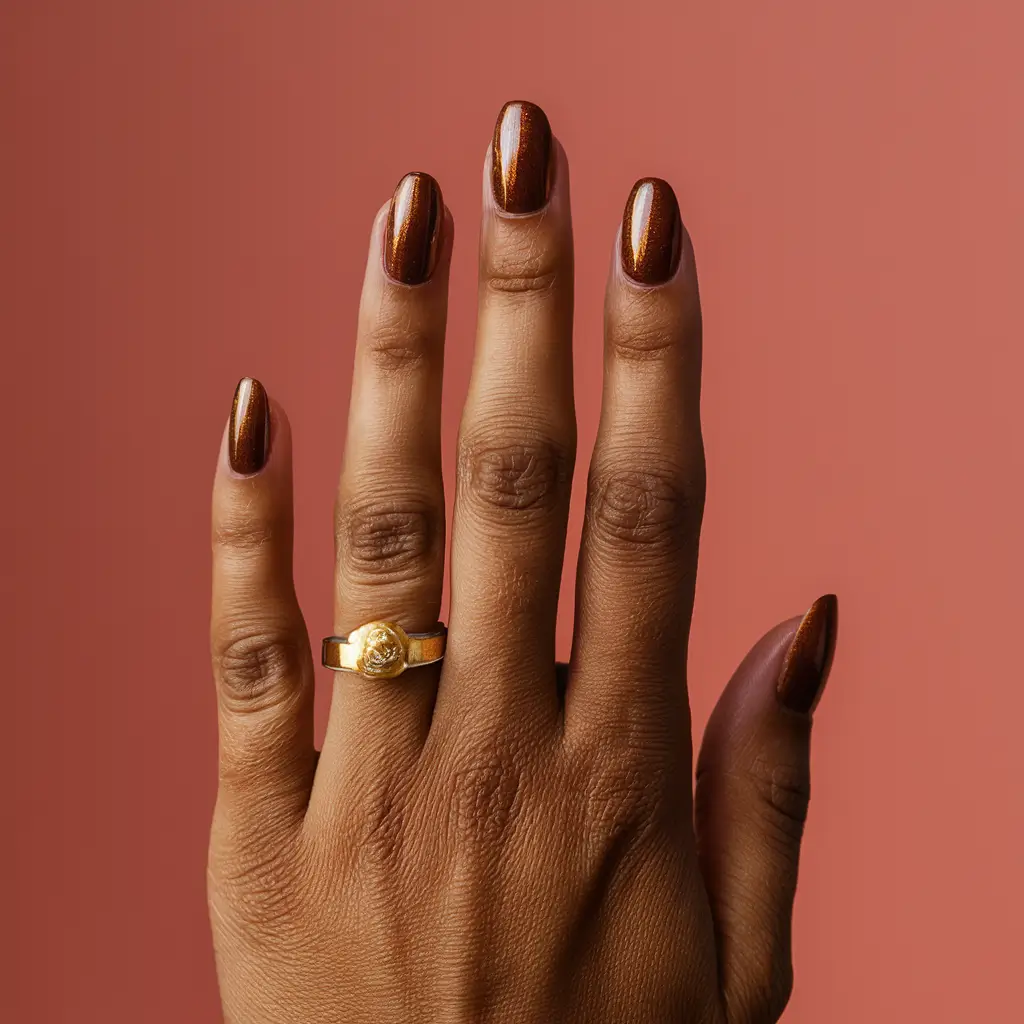
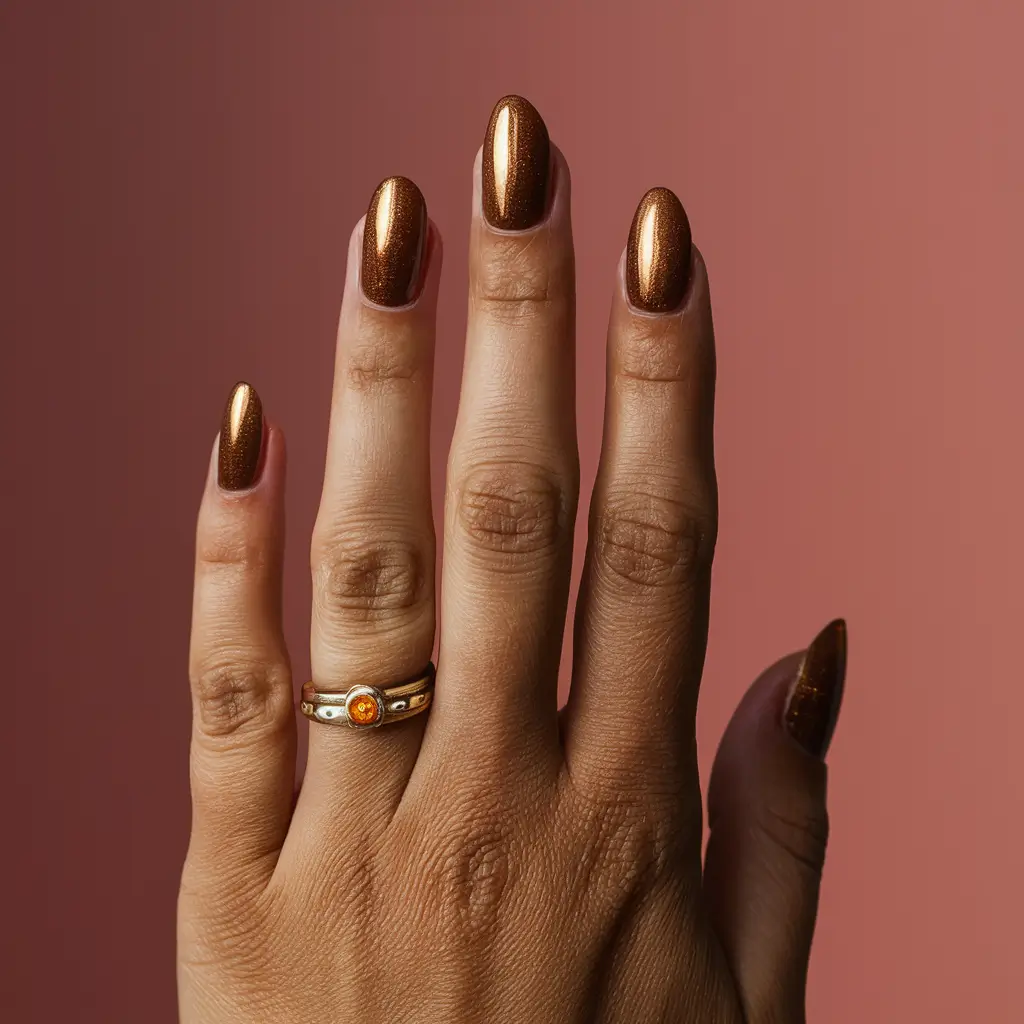
Amber Shimmer is a beautiful choice for any season. The rich, golden hue adds a touch of elegance to my nails. I love how it catches the light and gives a warm, glowing effect.
9: Dandelion Dots
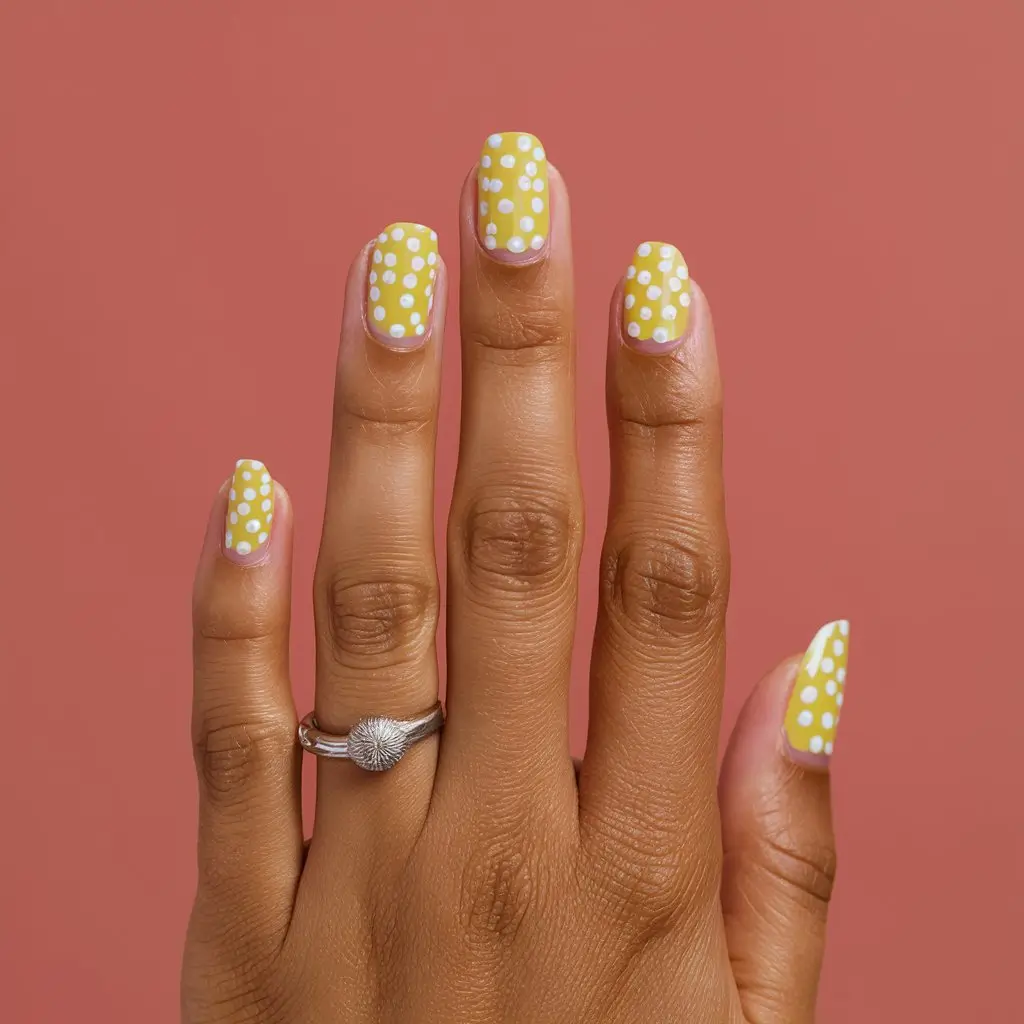

I love how dandelion dots make any nail design feel light and whimsical. The design typically features small, delicate dandelion seeds scattered across a nail.
First, I start with a base coat of yellow polish to mimic the sunny look of a field of dandelions.
Then, I use a fine brush to add tiny white dots representing the dandelion fluffs floating in the wind. This creates a simple yet charming look that’s perfect for any season.
10: Honeycomb Patterns
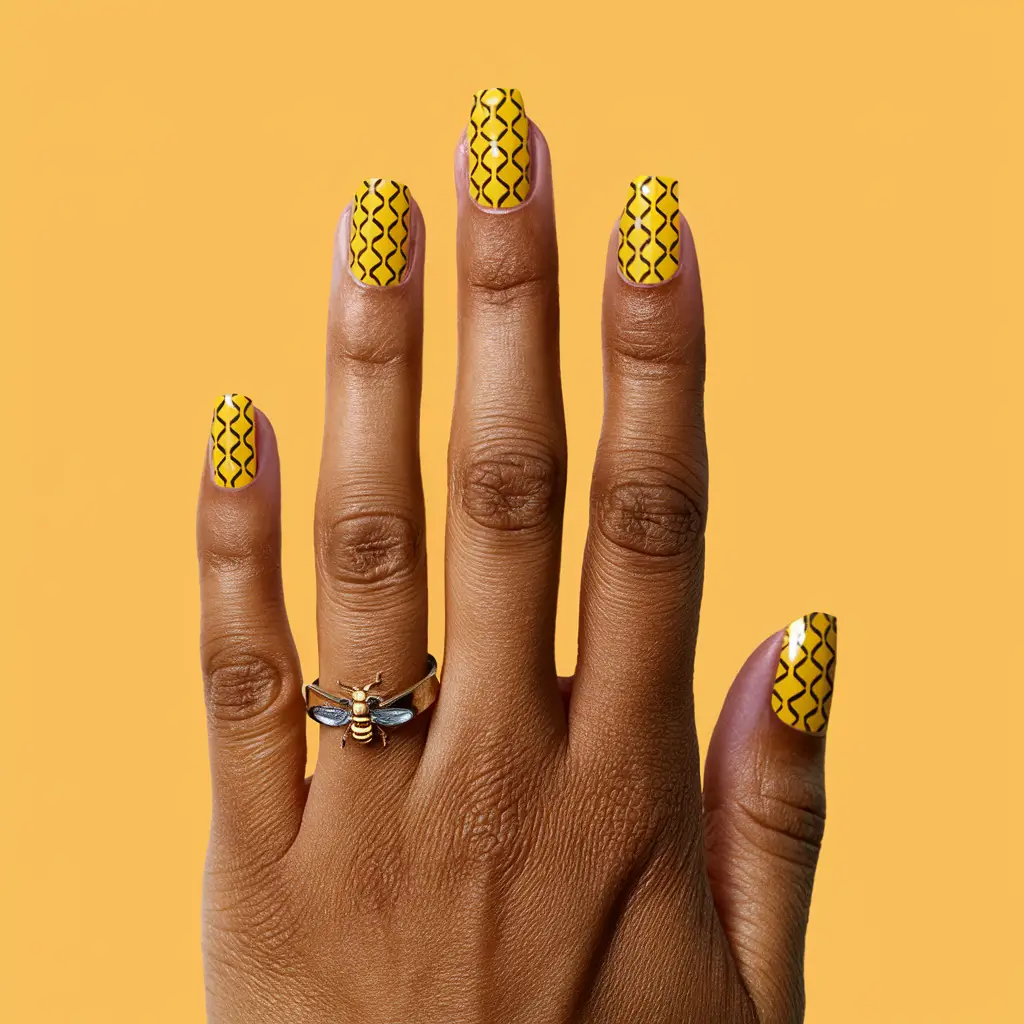

Honeycomb patterns are a classic choice for yellow nail designs. They add an intricate and stylish touch to your manicure.
I often use honeycomb patterns for a versatile look. They can be paired with tiny bee accents or stand alone for a clean and elegant style.
I love how these patterns mimic the natural beauty of honeycombs. They effortlessly fit into a wide range of nail designs.
11: Citrine Sparkle

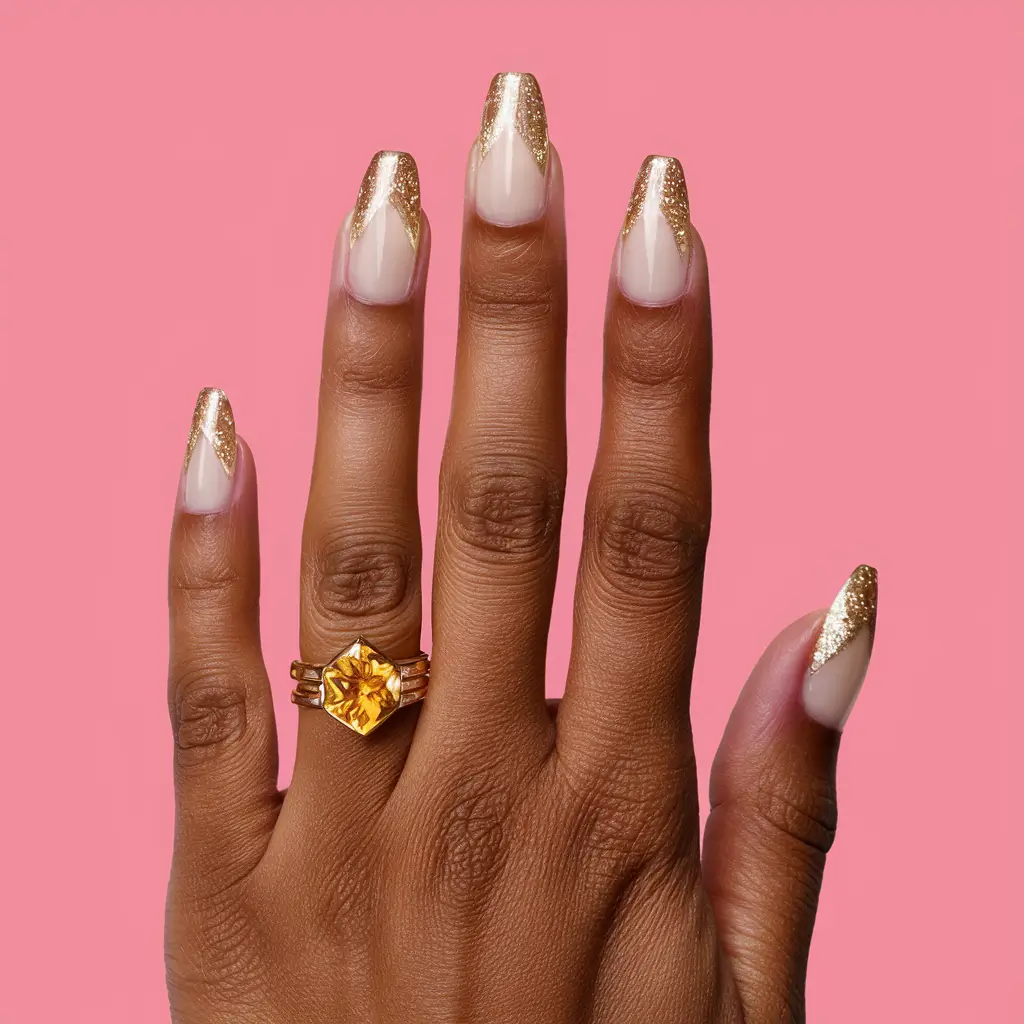
I love the sparkling and eye-catching look of Citrine Sparkle nails. This design combines a soft yellow base with glittery gold accents, creating a dazzling and elegant effect.
The glitter can be applied in various ways, such as tips, an accent nail, or an ombre gradient. This design is perfect for adding a touch of glam to your look.
12: Banana Peel Vibes
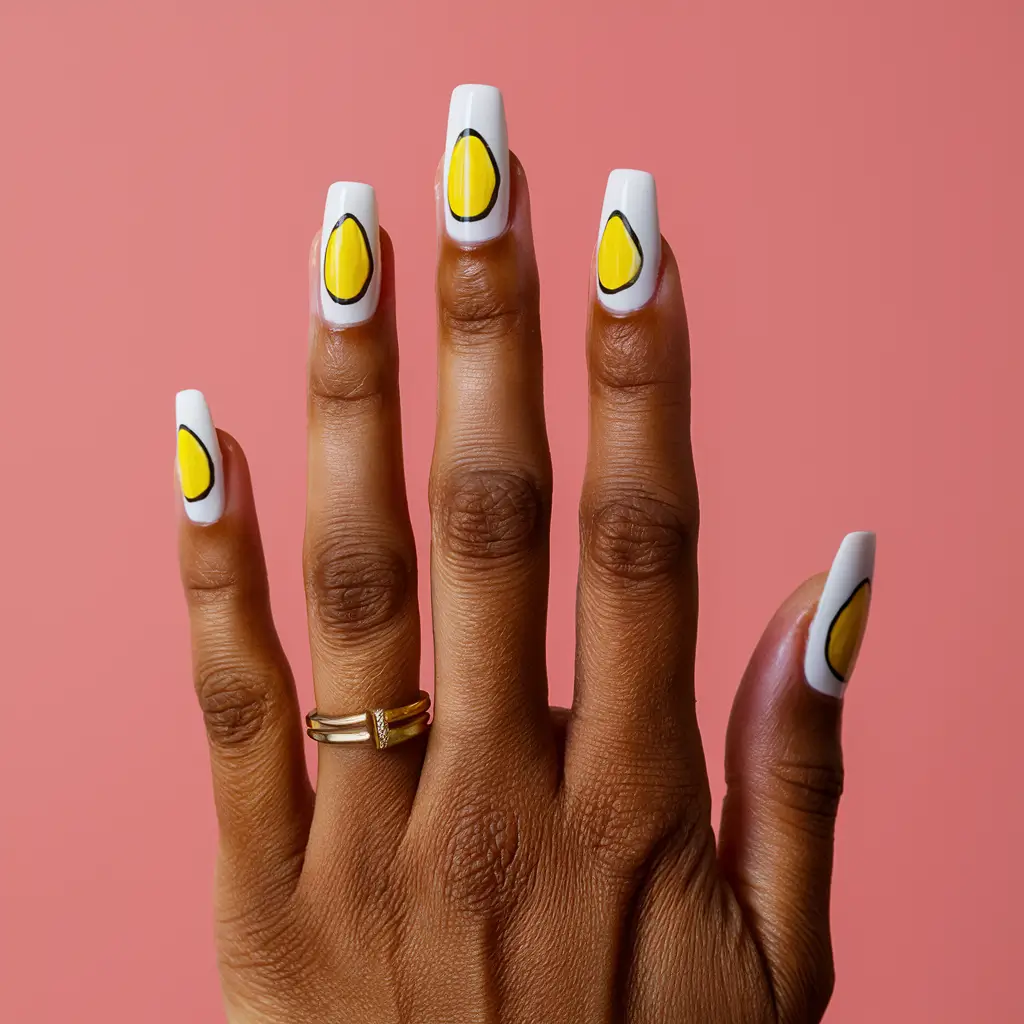
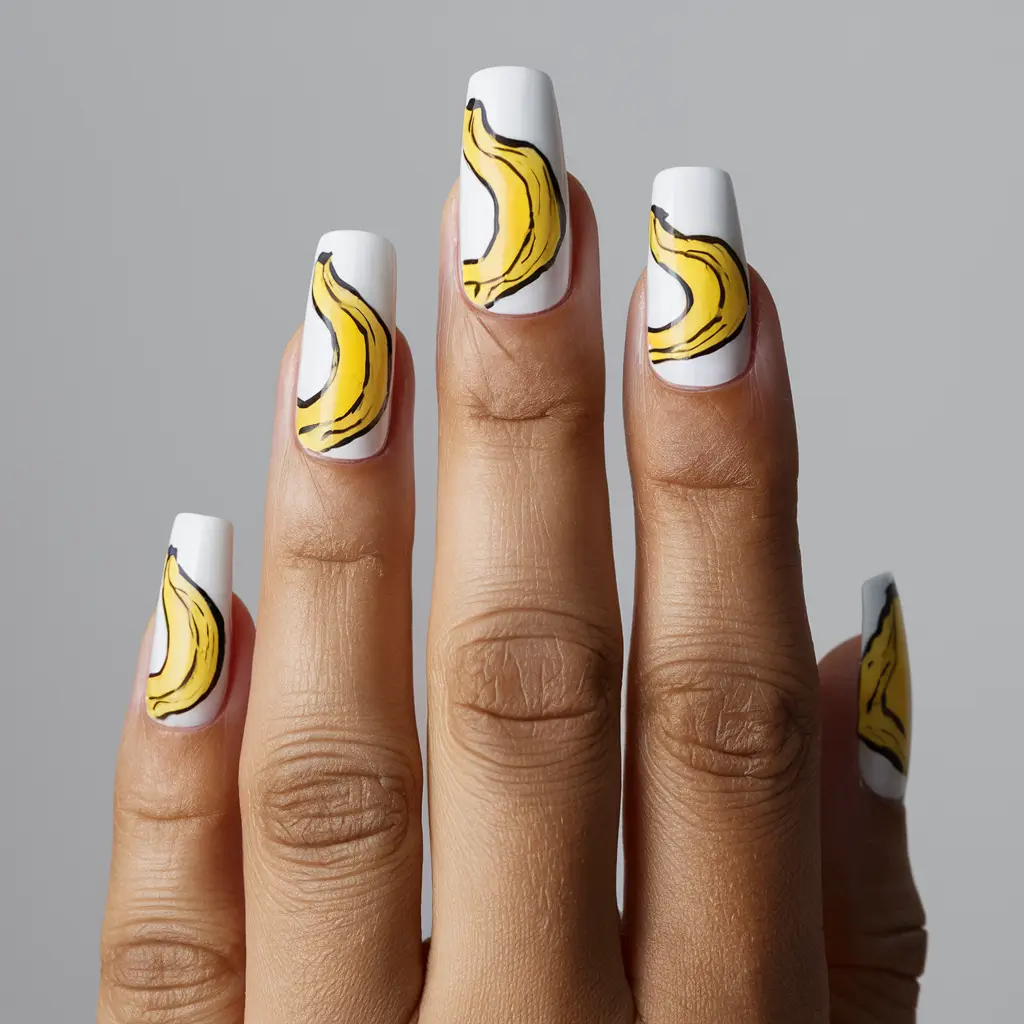
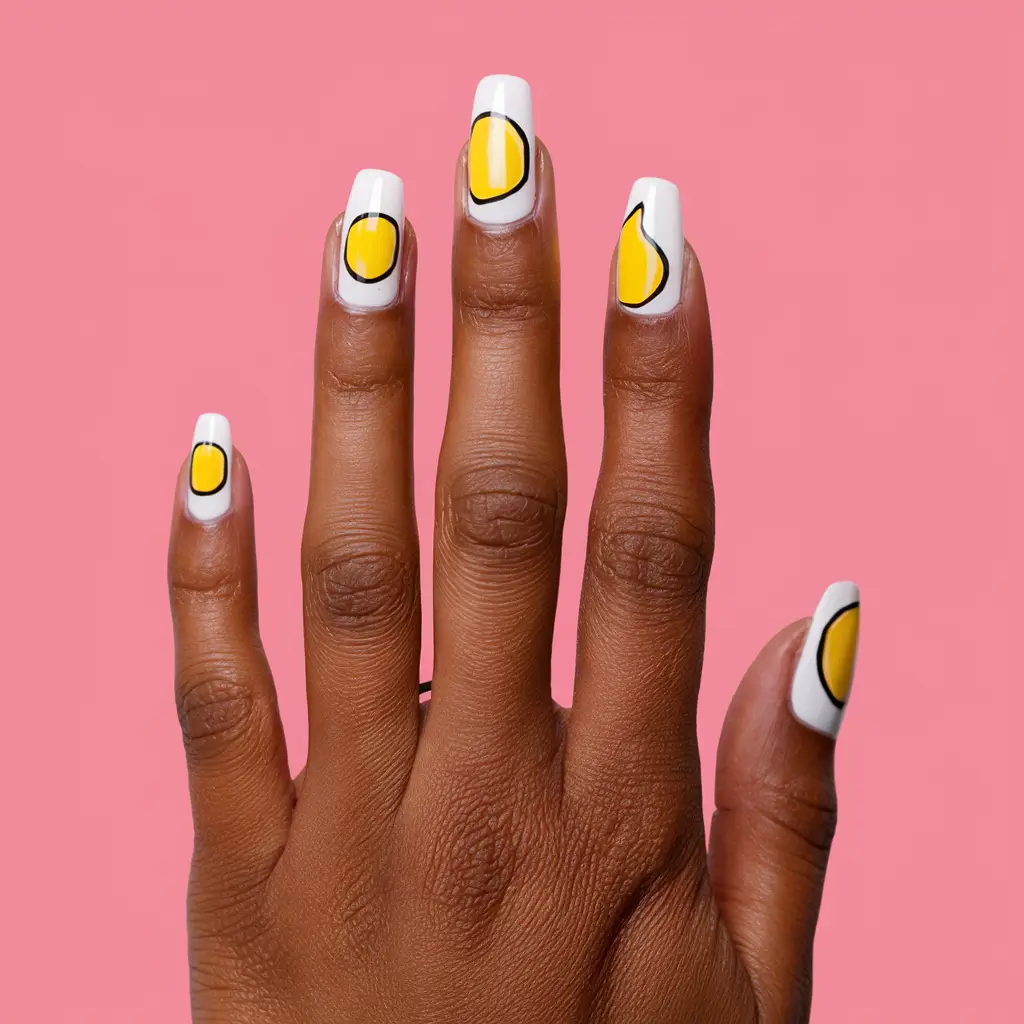
This design focuses on capturing the charm of a banana peel on your nails. I start with a white base. Then, I painted each nail with a yellow banana shape. To make it pop, I add small black lines to imitate the peel’s texture.
13: Canary French Tips
I love the charm of Canary French Tips. They’re bright, fun, and perfect for any season. Starting with a traditional nude or pale pink base, I add a vibrant yellow tip that stands out.
Sometimes, I like adding a touch of shimmer or even small nail decals for extra flair.
14: Yellow Polka Dots
I love how yellow polka dots can instantly brighten up any manicure. Their playful nature adds a fun twist to the vibrant yellow color.
A light yellow base with smaller, delicate dots creates a subtle yet stylish look. Alternatively, bold, larger dots in a contrasting yellow shade make a statement.
Mixing different sizes and shades of yellow can add depth to the design. This combination works well for casual outings or enhancing your everyday style.
15: Blazing Sunshine
Yellow nails can bring a burst of energy to any look. I used a bright, bold yellow shade for the “Blazing Sunshine” design.
This color reminds me of a sunny day and instantly lifts my mood. The simplicity of a solid yellow can be both striking and cheerful.
16: Mellow Yellow Marbles
Mellow yellow marbles on nails create a soft, stylish look. I love how the marble effect adds depth with swirls of white and shades of yellow. It feels elegant yet casual.
To achieve this look, I start with a light yellow base and swirl in white polish. The result is a delicate, marbled pattern that feels modern and chic.
17: Golden Star Accents
Golden star accents are a stunning way to elevate any yellow nail design. The bright gold hue complements a variety of yellow shades, from light lemon to deep mustard. I love how the metallic stars add a touch of elegance and sparkle.
You can place golden stars on a few accent nails or scatter them across all your nails for a more dramatic effect. They look especially charming on matte yellow backgrounds or with other celestial designs like moons or glitter.
I suggest using gold polish or foil for the stars for a cohesive look. This adds a luxurious touch and ensures the stars stand out beautifully against the yellow base.
18: Sunny Side Up
I love the “Sunny Side Up” design because it combines cheerful yellow with the fun look of fried eggs. This quirky design features a bright yellow base coat with white egg shapes dotted across the nails.
Each egg has a tiny yellow yolk in the center, adding a playful touch.
19: Butterfly Dream
This design features delicate yellow butterflies that seem to flutter across your nails.
I love the combination of soft yellow hues with intricate butterfly wings. It’s playful and elegant, perfect for springtime.
20: Neon Yellow Flash
Neon Yellow Flash is bright and bold. I love how this color stands out. It’s perfect for making a statement this summer.
Whether you pair it with a simple outfit or something more adventurous, it will catch your eyes immediately.
21: Soft Daffodil Curls
Soft Daffodil Curls capture the gentle beauty of daffodil flowers. I love creating this look by playing with pale yellow shades.
To achieve these nails, I start with a soft pastel yellow base. Then, I add delicate, swirling flower petals to mimic the curls of a daffodil.
Yellow Nail Designs Short Process
Yellow nail designs require a base coat, two coats of yellow polish, and a top coat for protection. Add designs using a nail art pen or brush.
Yellow nail designs are a stylish and vibrant choice for any season. They can brighten your look and add a cheerful vibe to your overall appearance. Apply a base coat that protects your nails and ensures the polish adheres well.

Apply two thin coats of yellow nail polish, allowing each coat to dry thoroughly. Use a nail art pen or a fine brush to create intricate designs, patterns, or accents.
Finish with a top coat to seal your design and add a glossy finish. This simple process results in stunning nails that capture attention and make a bold fashion statement.
Choosing The Right Shade Of Yellow
Yellow nail designs can bring a burst of sunshine to your fingertips. The process is simple and fun, but choosing the right shade of yellow is crucial for achieving that perfect look.
From bright neons to soft pastels, the variety of yellow shades can make or break your nail design. Let’s explore the best ways to pick the ideal yellow for your nails.
Finding Your Skin Tone
Understanding your skin tone is the first step. Fair skin tones often look stunning with pale yellows. Medium skin tones can handle bolder, more vibrant yellows. Darker skin tones pop with deep, rich yellows.
Occasion Matters
Think about the occasion. Casual outings might call for bright, playful yellows. Formal events could be better suited for more muted, elegant shades.
Seasonal Shades
The time of year can influence your choice. Spring and summer are perfect for bright, sunny yellows, while fall and winter might require more subdued, mustard-like tones.
Personal Preference
Your personal style matters, too. If you love bold looks, go for neon yellows. If you prefer something subtle, choose a pastel yellow.
Trending Shades
Keep an eye on current trends. Popular shades might include neon yellow, lemon yellow, or golden yellow. Following trends can keep your nails looking fresh and fashionable.
| Skin Tone | Suggested Yellow Shades |
|---|---|
| Fair | Pale Yellow, Light Lemon |
| Medium | Bold Yellow, Bright Sun |
| Dark | Rich Yellow, Mustard |
Consider Nail Length
Your nail length can affect the shade choice. Short nails often look best with lighter, softer shades, while longer nails can handle more intense, vibrant yellows.
Mix And Match
Don’t be afraid to mix and match. Combining different shades of yellow can create a unique and eye-catching design.
Test Before You Commit
Always test the shade before applying it to all your nails. A small swatch can help you see how the color looks against your skin and under different lighting.

Prepping Your Nails
Yellow nail designs are a fun way to express your personality. The short process can be quick and easy. Before you start, prepping your nails is crucial. Proper prep ensures a smoother application and a longer-lasting design.
Trim And Shape Your Nails
First, trim your nails to your desired length. Use a nail clipper for this step. Next, shape your nails with a nail file. Rounded or squared edges both work well. Make sure all nails are even in length.
Soak Your Nails
Soak your nails in warm, soapy water for about five minutes. This softens your cuticles. Dry your hands with a clean towel. Pat them gently to avoid damage.
Push Back And Trim Cuticles
Use a cuticle pusher to push back your cuticles gently. Be careful not to hurt yourself. Trim any excess cuticle skin with cuticle clippers. This step ensures a clean nail bed.
Buff Your Nails
Buffing your nails creates a smooth surface. Use a nail buffer for this. Buff in gentle, circular motions. This helps your yellow polish adhere better.
Clean Your Nails
Finally, clean your nails with a nail polish remover. This removes any oils or residue. Your nails are now ready for the yellow polish application.
Applying A Base Coat
Yellow nail designs are a vibrant choice for anyone looking to add some sunshine to their nails. The short process makes it easy for beginners.
Applying a base coat is a crucial step in this process. It helps your nail design last longer and protects your nails. Below, we break down the steps to apply the base coat effectively.
Choosing The Right Base Coat
Not all base coats are the same. Choose one that suits your nail type. If you have brittle nails, go for a strengthening base coat. A regular base coat will work for smooth nails.
Cleaning Your Nails
Before applying the base coat, clean your nails thoroughly. Use a nail polish remover to get rid of any old polish. Wash your hands with soap and water to remove any oils.
Trim and file your nails to your desired shape. Use a buffer to smooth out the surface. This ensures that the base coat adheres properly.
Applying The Base Coat
Shake the base coat bottle well. Apply a thin layer starting from the base of the nail to the tip. Make sure to cover the entire nail surface.
Drying Time
Allow the base coat to dry completely. This usually takes 2-3 minutes. Do not touch anything during this time.
Checking For Imperfections
Once the base coat is dry, look at your nails closely. If you see any streaks or bubbles, apply a second thin layer and allow it to dry again.
Ready For Color
Once the base coat is dry and smooth, you are ready to apply your yellow nail polish. The base coat will help the color go on evenly and last longer.
Creating Yellow Nail Art
Yellow nail designs are perfect for a bright and cheerful look. Creating yellow nail art is a fun and easy way to add color to your style. With a few simple tools and techniques, you can achieve stunning results. Let’s explore some creative methods for creating yellow nail art.

Using Nail Stickers
Nail stickers are a quick and easy way to create intricate designs. They save time and effort while providing professional-looking results. Follow these steps to use nail stickers for your yellow nail art:
- Start with a clean base. Apply a base coat to protect your nails.
- Paint your nails with a yellow base color. Allow it to dry completely.
- Select your desired nail stickers. Carefully peel them off the backing.
- Place the sticker on your nail. Use tweezers for precise placement.
- Press the sticker firmly onto your nail. Smooth out any wrinkles or bubbles.
- Seal the design with a top coat. This ensures longevity and shine.
Pro Tip: Mix and match different stickers for a unique look. Combine floral, geometric, and abstract designs for a personalized touch.
Doing A Gradient Effect
A gradient effect creates a smooth transition between colors. It adds depth and dimension to your yellow nail art. Follow these steps to achieve a beautiful gradient effect:
- Start with a clean base. Apply a base coat to protect your nails.
- Paint your nails with a white base color. This enhances the gradient effect.
- Choose two or more shades of yellow. Light and dark shades work best.
- On a makeup sponge, apply the colors in horizontal stripes. Overlap the edges slightly.
- Dab the sponge onto your nail. Repeat until you achieve the desired gradient.
- Clean up any excess polish around your nails. Use a brush dipped in nail polish remover.
- Seal the design with a top coat. This smooths out the gradient and adds shine.
Pro Tip: Use a latex barrier around your nails for a smoother gradient. This protects your skin from excess polish.
Applying Nail Stencils
Nail stencils are perfect for creating precise and detailed designs. They are easy to use and provide consistent results. Follow these steps to apply nail stencils for your yellow nail art:
- Start with a clean base. Apply a base coat to protect your nails.
- Paint your nails with a yellow base color. Allow it to dry completely.
- Select your desired stencil. Place it carefully on your nail.
- Paint over the stencil with a contrasting color. Ensure even coverage.
- Carefully remove the stencil before the polish dries. This prevents smudging.
- Seal the design with a top coat. This enhances durability and shine.
Pro Tip: Experiment with different stencil patterns. Try stripes, dots, and floral designs for variety.
Painting Yellow Patterns
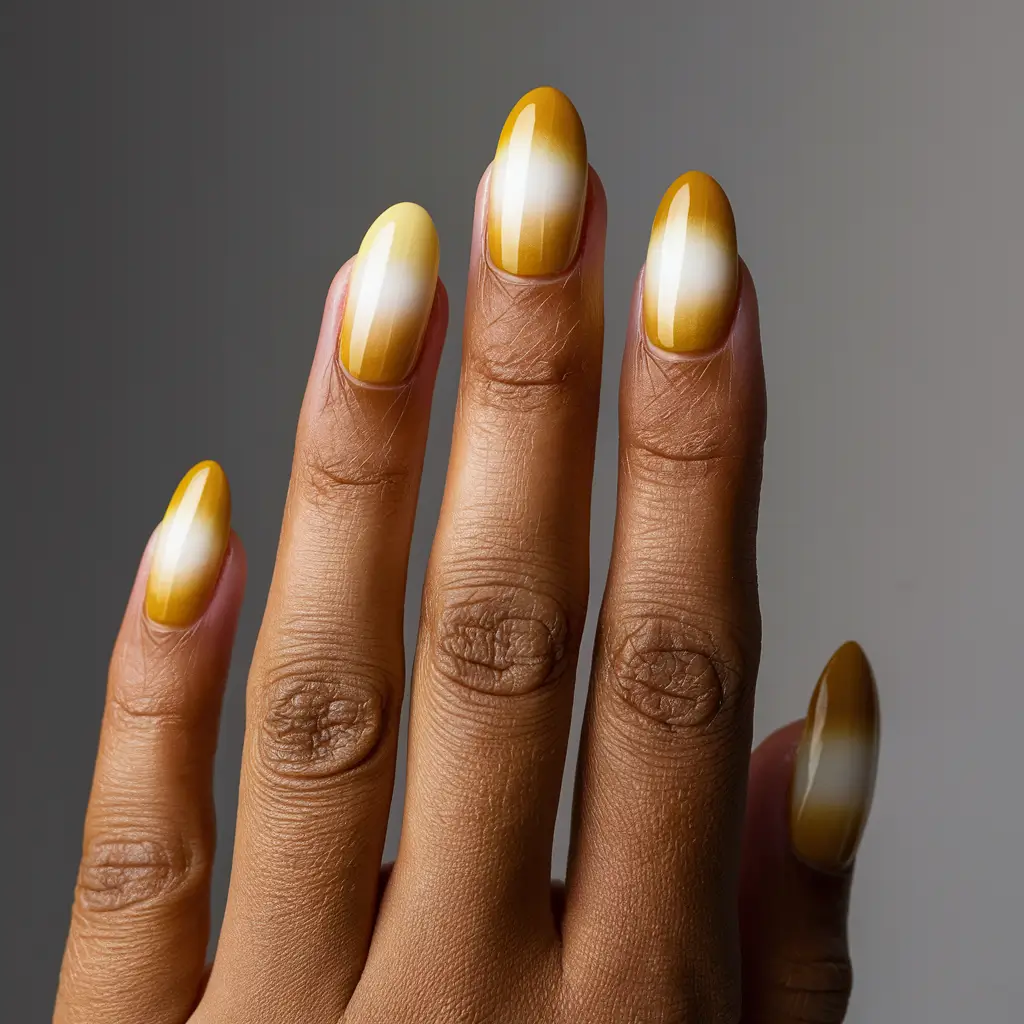
Hand-painted patterns allow for creativity and personalization. You can create unique designs that reflect your style. Follow these steps to paint yellow patterns on your nails:
- Start with a clean base. Apply a base coat to protect your nails.
- Paint your nails with a yellow base color. Allow it to dry completely.
- Use a thin nail art brush. Dip it in a contrasting color.
- Paint your desired pattern. Try stripes, polka dots, or floral designs.
- Allow the pattern to dry. This prevents smudging.
- Seal the design with a top coat. This adds shine and protects the pattern.
Pro Tip: Practice your patterns on a piece of paper first. This helps you perfect your technique before painting your nails.
Adding Accents And Embellishments
Yellow nail designs can be a fun and vibrant way to express your personality. The short process of creating these designs can be easy and enjoyable.
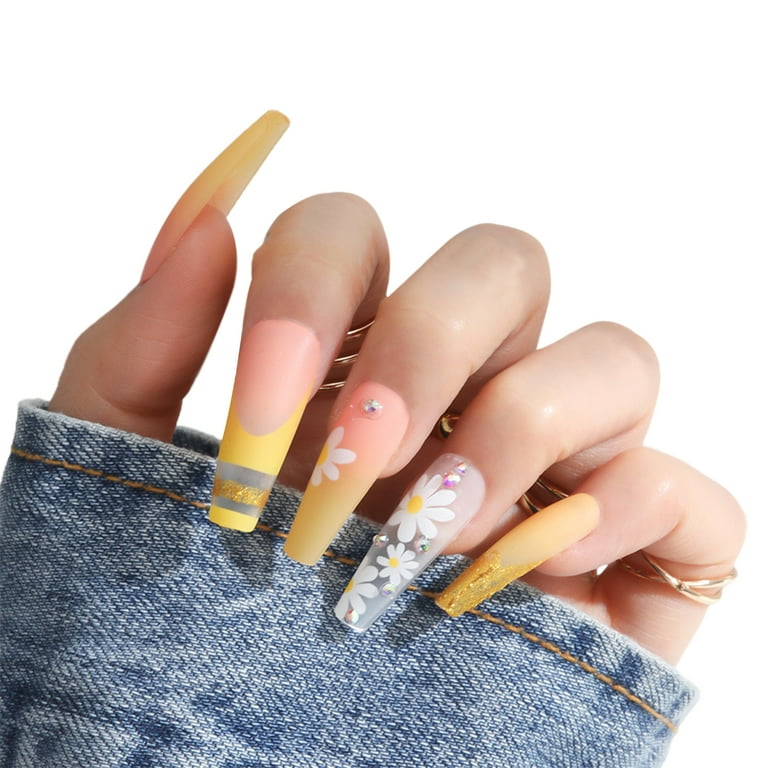
Adding accents and embellishments can elevate your yellow nail designs to the next level, making your nails stand out.
Below, we will explore three popular methods: using glitter, applying rhinestones, and adding nail charms.
Using Glitter
Glitter can add a magical touch to your yellow nail designs. It can make your nails sparkle and shine. Here are some simple steps to apply glitter:
- Choose your glitter: Fine or chunky glitter works best.
- Apply a base coat: This protects your nails.
- Add yellow nail polish: Let it dry completely.
- Use a clear top coat: This will help the glitter stick.
- Sprinkle or dip in glitter while the top coat is still wet.
- Seal with another top coat: This ensures the glitter stays in place.
Using glitter can be messy. It helps to work over a piece of paper. This way, you can easily clean up any excess glitter. Also, remember to let each layer dry completely before moving to the next step.
Glitter comes in different colors and shapes, which you can mix and match for a unique look. Use gold glitter on yellow nails for a sunny effect or silver glitter for a more subtle sparkle.
Applying Rhinestones
Rhinestones can add a touch of elegance to your yellow nails. They come in various sizes and colors. Here is how you can apply rhinestones:
- Start with a base coat: This protects your nails.
- Apply yellow nail polish: Let it dry completely.
- Use nail glue: Apply a small dot where you want the rhinestone.
- Place the rhinestone: Use tweezers for precision.
- Press gently: Make sure the rhinestone sticks.
- Seal with a top coat: This keeps the rhinestone in place.
Rhinestones can be arranged in various patterns. You can create simple or complex designs. Here are some ideas:
| Design | Description |
|---|---|
| Single Accent | One rhinestone on each nail |
| French Tips | Rhinestones along the tip of the nails |
| Flower Pattern | Arrange rhinestones in a flower shape |
Rhinestones can fall off if not applied correctly. Always use strong nail glue. Avoid using too many rhinestones on one nail, as this will make the design look crowded.
Adding Nail Charms
Nail charms can give your yellow nails a unique and playful look. Charms come in many shapes and sizes. Here’s how to add nail charms:
- Apply a base coat: This protects your nails.
- Paint with yellow polish: Let it dry completely.
- Use nail glue: Apply a dot where you want the charm.
- Place the charm: Use tweezers for accuracy.
- Press gently: Ensure the charm is secure.
- Seal with a top coat: This helps the charm stay in place.
Nail charms can be reused if removed carefully. Some popular charm designs include:
- Stars: Perfect for a celestial theme.
- Hearts: Adds a sweet touch to your nails.
- Butterflies: Great for a whimsical look.
Charms can be combined with other embellishments, like glitter or rhinestones, to create a layered effect. However, make sure the charms are not too big, as this can make your nails feel heavy.
Using glitter, rhinestones, and nail charms, you can make your yellow nail designs unique. These embellishments add personality and flair to your nails.
Frequently Asked Questions
What Is The Best Nail Design For Short Nails?
Minimalist designs work best for short nails. Opt for nude shades, simple lines, or tiny geometric shapes. Pastel colors and subtle glitter also look chic.
What Is The Yellow Nail Trend In 2024?
The yellow nail trend in 2024 features vibrant, sunny hues, often paired with minimalist designs or playful patterns, making a bold statement.
What Does 1 Yellow Nail Mean?
A single yellow nail can indicate a fungal infection, psoriasis, or a respiratory condition. Seek medical advice for accurate diagnosis.
What Colors Go With Yellow Nails?
Great colors to pair with yellow nails include white, navy blue, gray, and black. Pastel shades like lavender or mint also complement yellow.
Conclusion
Creating stunning yellow nail designs doesn’t have to be complicated. With simple steps, you can achieve beautiful results. Experiment with different shades and patterns.
Enjoy the creativity and fun of nail design. Transform your short nails effortlessly into a vibrant fashion statement.

