15+ Short Summer Nail Design Ideas to Try Now
When summer rolls around, I know it’s time to refresh my look from head to toe, and nails are no exception.
Short nails are the perfect canvas for fun, vibrant designs that capture the season’s essence.

Choosing the right nail design can brighten my mood and add a playful touch to my summer style.
From classic pastels to trendy neon hues, a short summer nail idea matches any outfit or occasion.
1: Floral Pastels

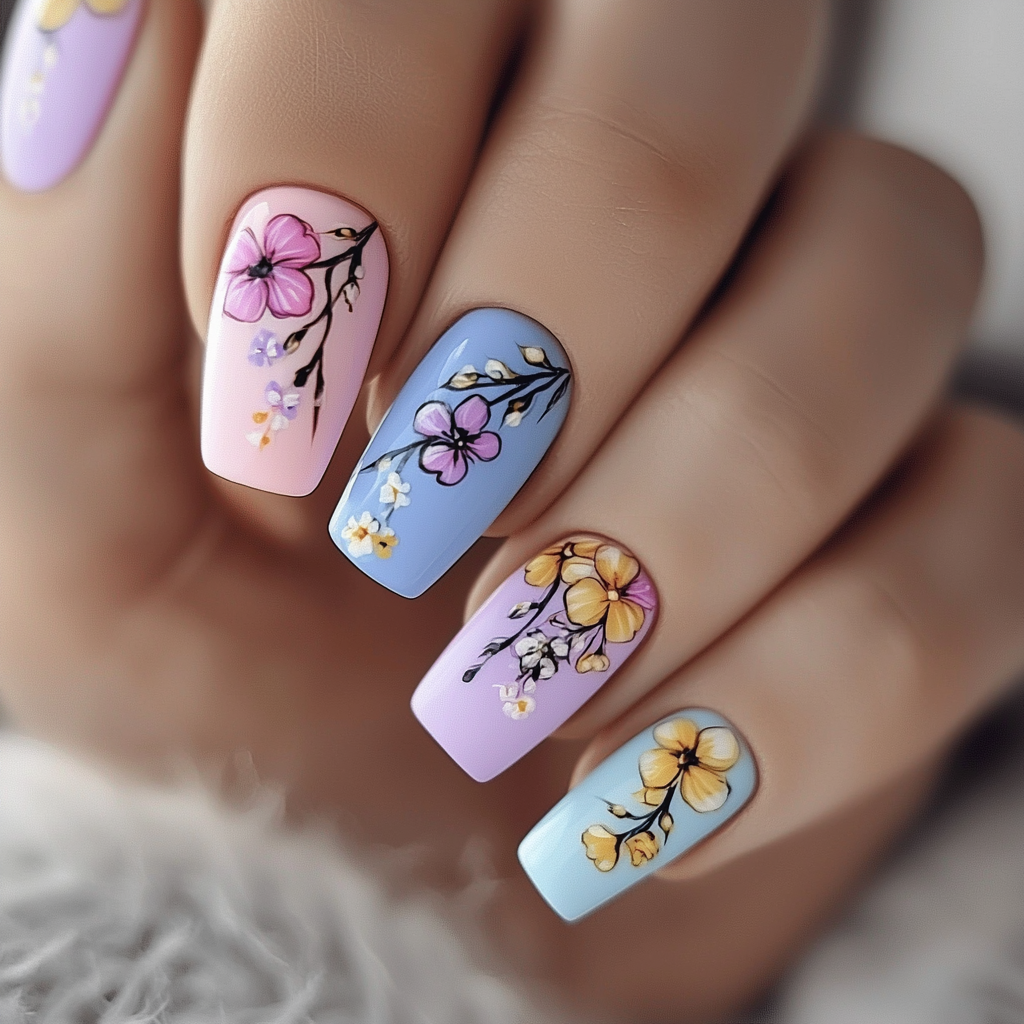
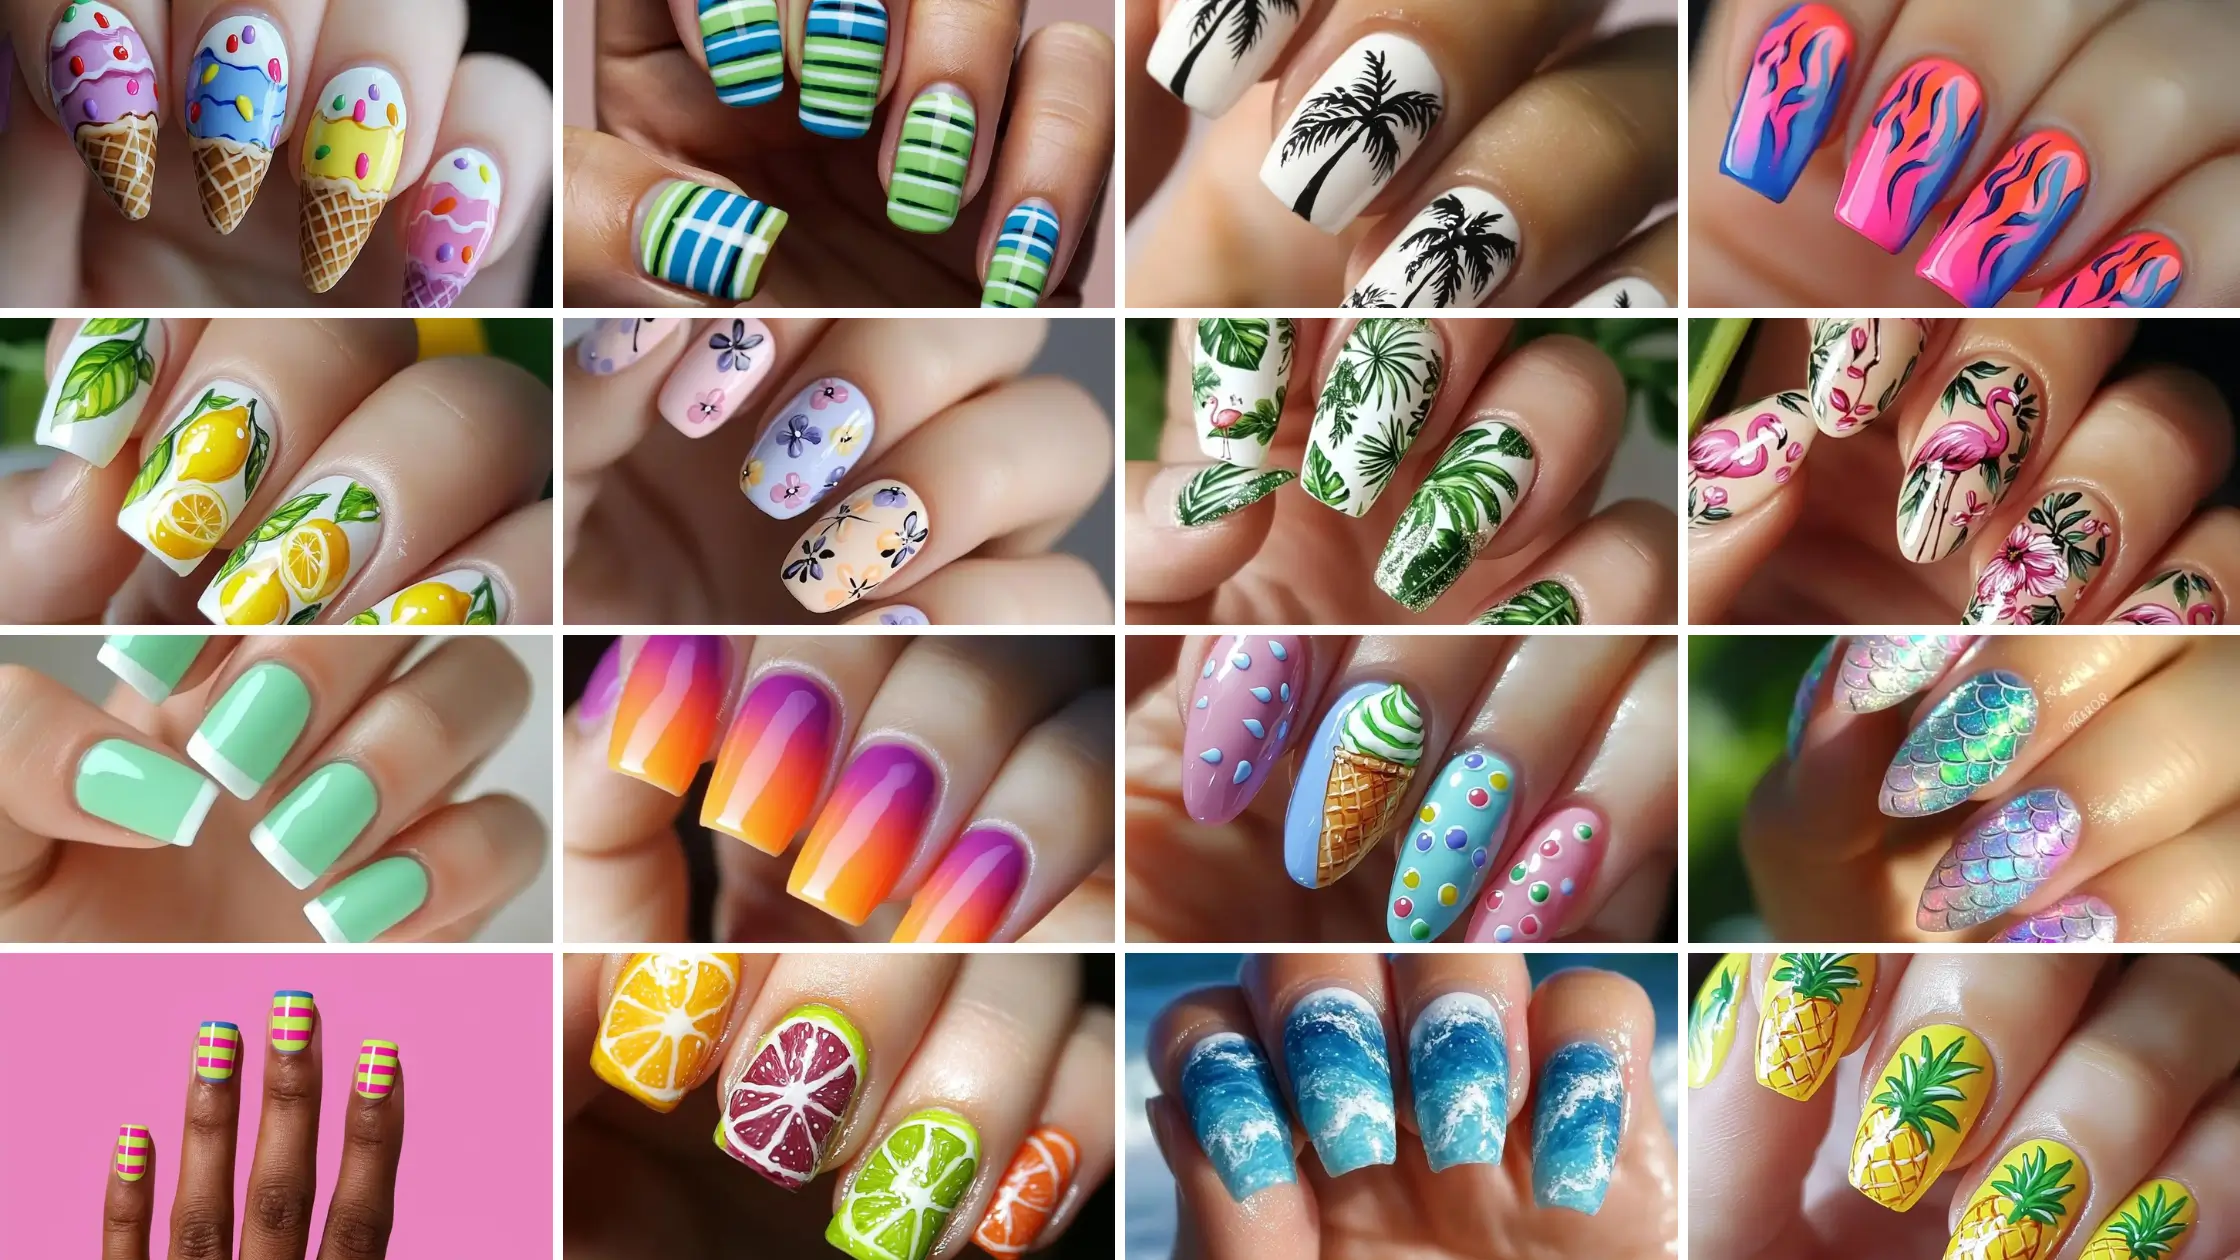
I love the charm of floral pastels for short summer nails. They bring a delicate and refreshing vibe to any look.
A soft lavender base paired with tiny floral accents adds a whimsical touch. This combination is both playful and elegant.
Pairing pastel colors like pink, blue, and yellow with floral designs can create an enchanting effect.
2: Tropical Leaves

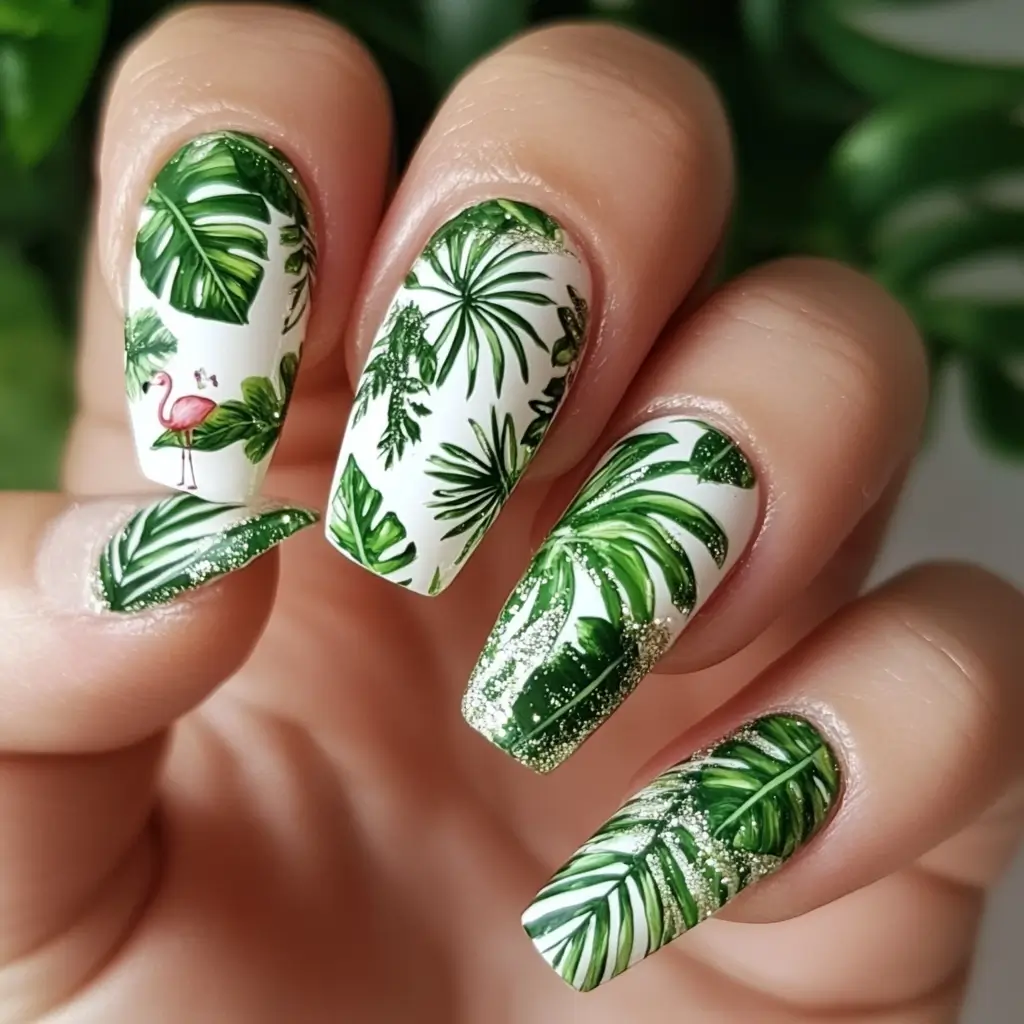
Tropical leaves are a fantastic choice for short summer nails. They give off a lush, vibrant vibe that fits perfectly with the season.
I love using shades of green and white for this design. Simple palm leaf patterns can create a stunning, elegant, and refreshing look. A touch of glitter can add some sparkle, elevating the overall design.
Try pairing tropical leaves with other nail art elements like flamingos, flowers, or fruity accents to create a unique, beach-ready nail design.
3: Seashell Accents

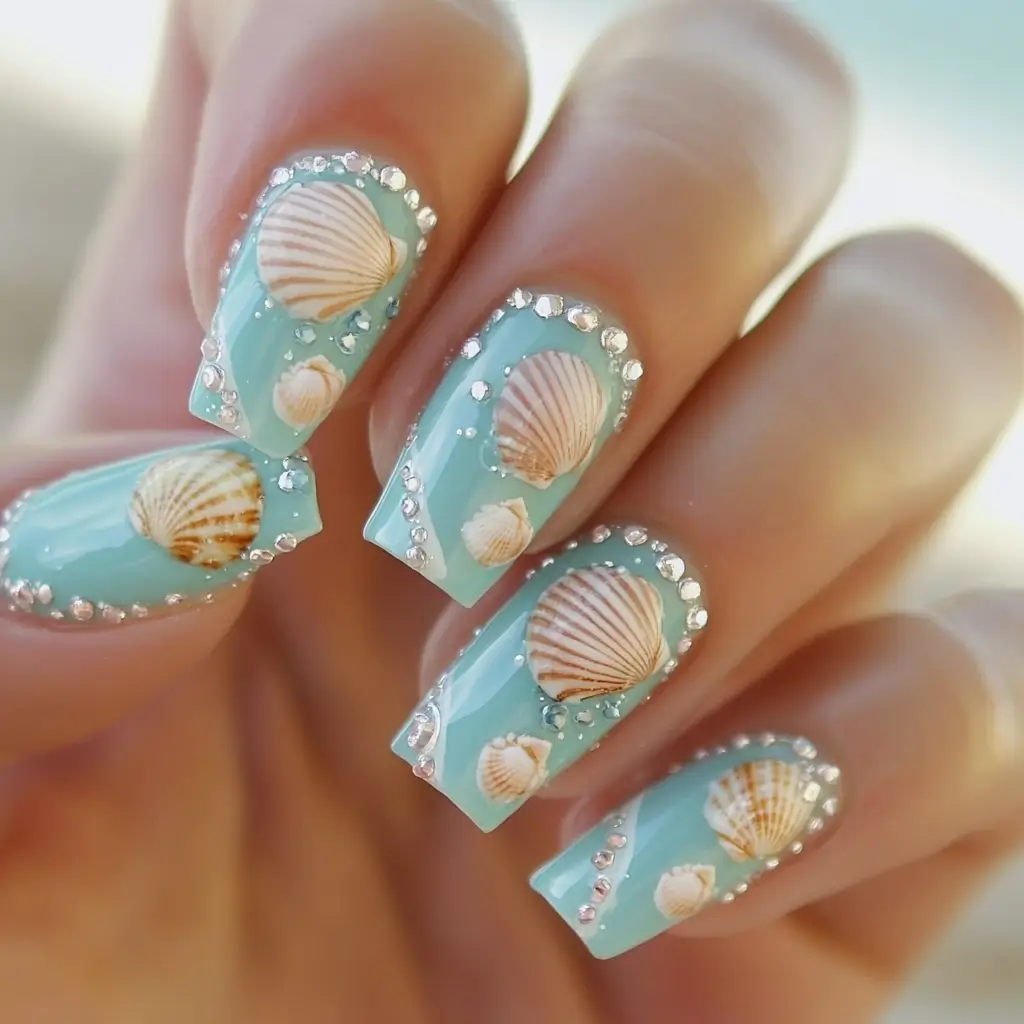
Seashell accents are perfect for adding a touch of the beach to your summer look. They look great on short nails and bring a hint of the ocean to your fingertips. To achieve this effect, you can use tiny seashell stickers or nail art stamps.
Incorporating seashell designs is simple. Start with a base coat, then choose a soft color like pastel blue or pink. Place the seashell stickers or use a nail art brush to paint shells onto your nails.
Finish with a top coat to seal your design and give it a shiny finish. The seashell accents will remind you of the ocean’s beauty all summer.
4: Sunset Ombre
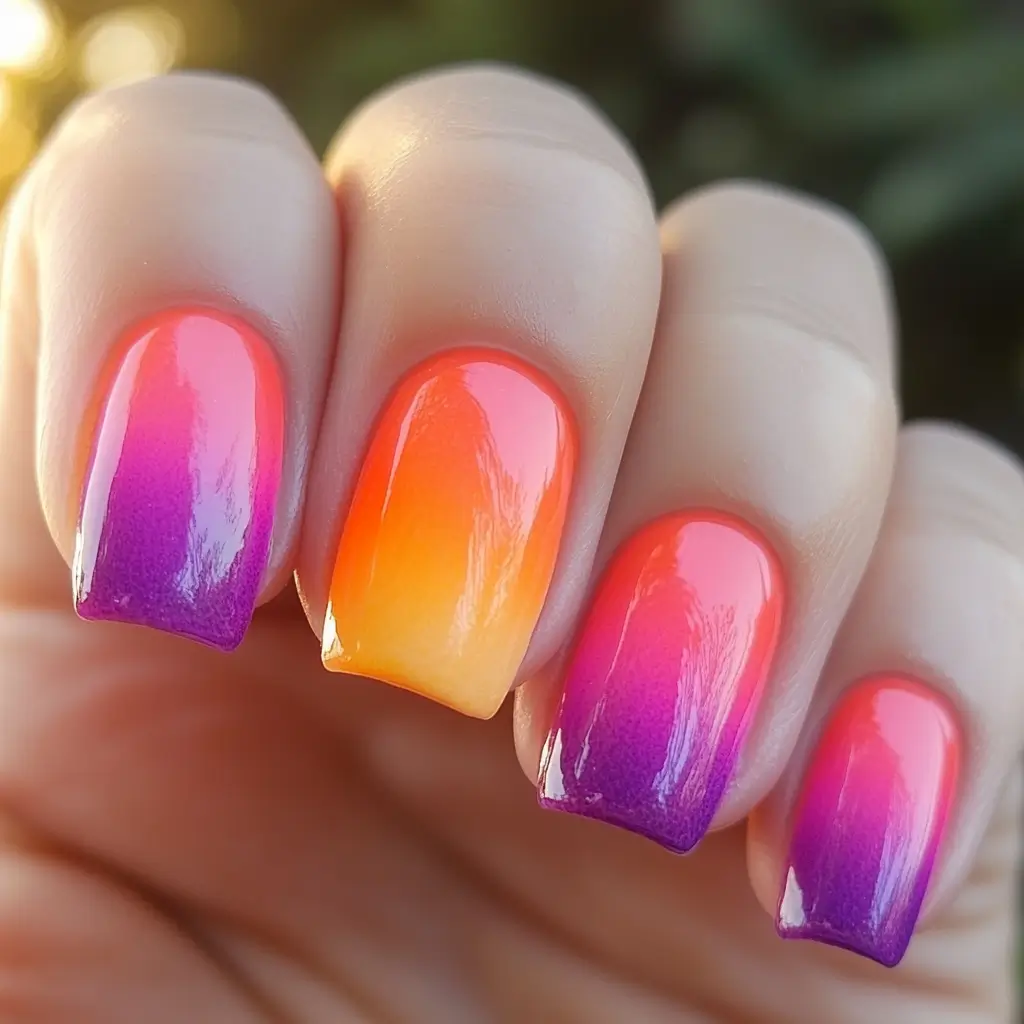
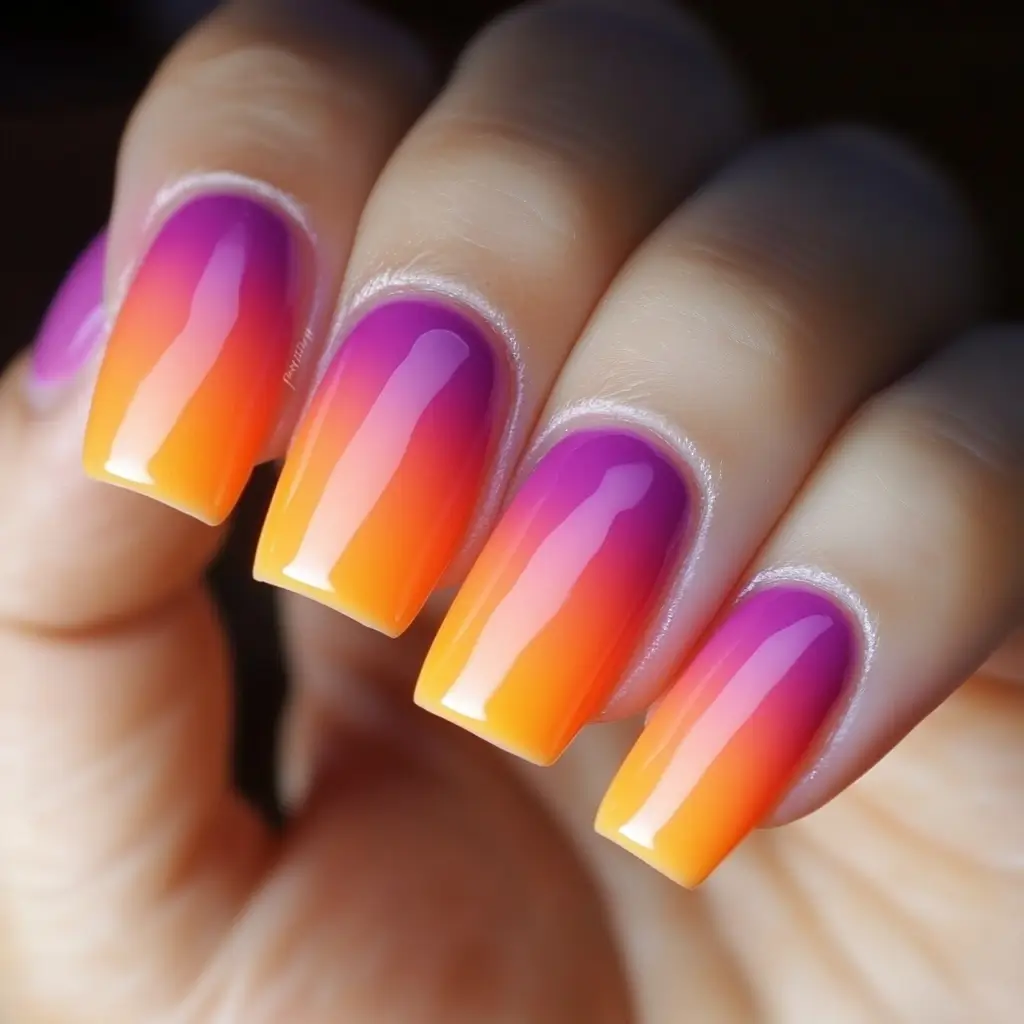
One of my favorite short summer nail designs is the Sunset Ombre. The blend of colors captures the warm hues of a summer sunset, transitioning smoothly from one shade to another.
I recommend using pastel colors like pink, orange, and yellow. These shades work best on short nails, creating a subtle, classy gradient effect.
Adding a touch of glitter to the design can elevate the look, giving it a shimmering finish that mimics the sun’s last rays. The Sunset Ombre is perfect for anyone looking to embrace the summer vibes.
5: Fruit Slices
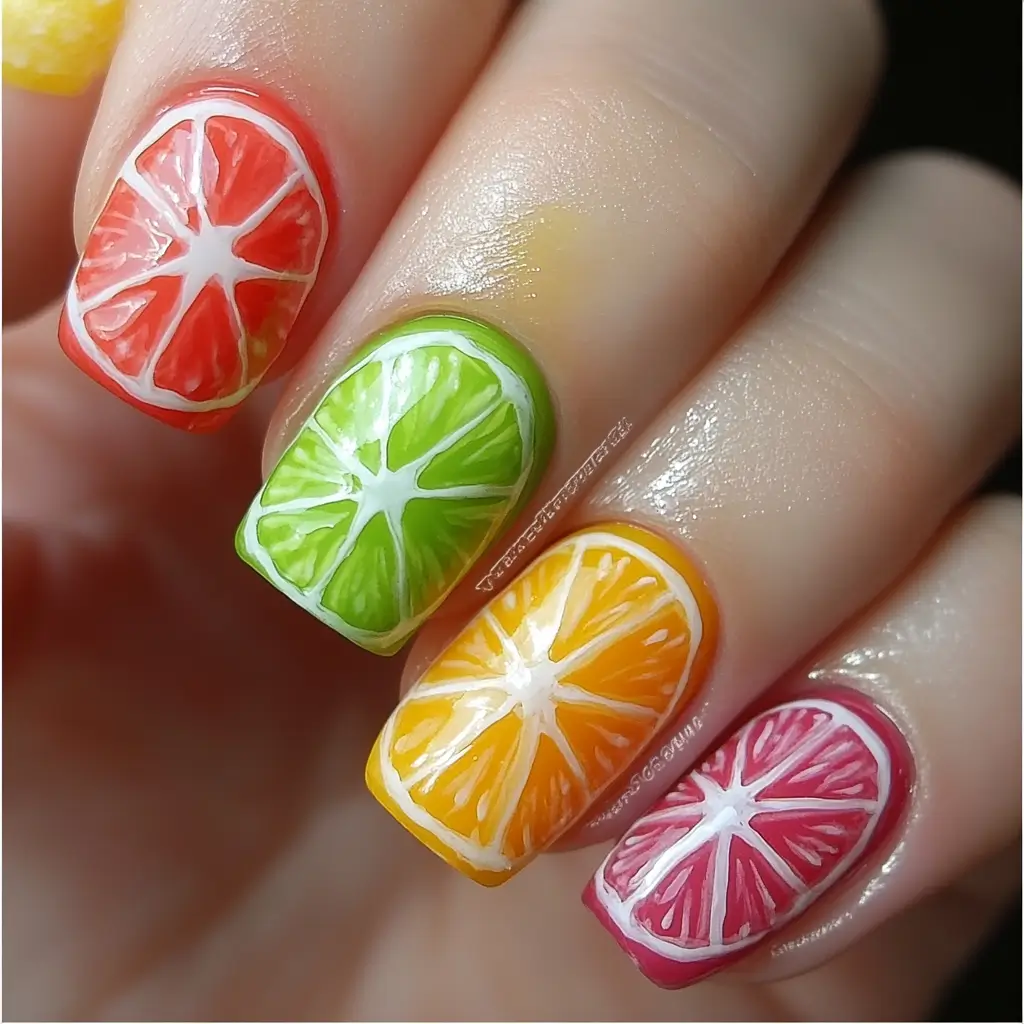
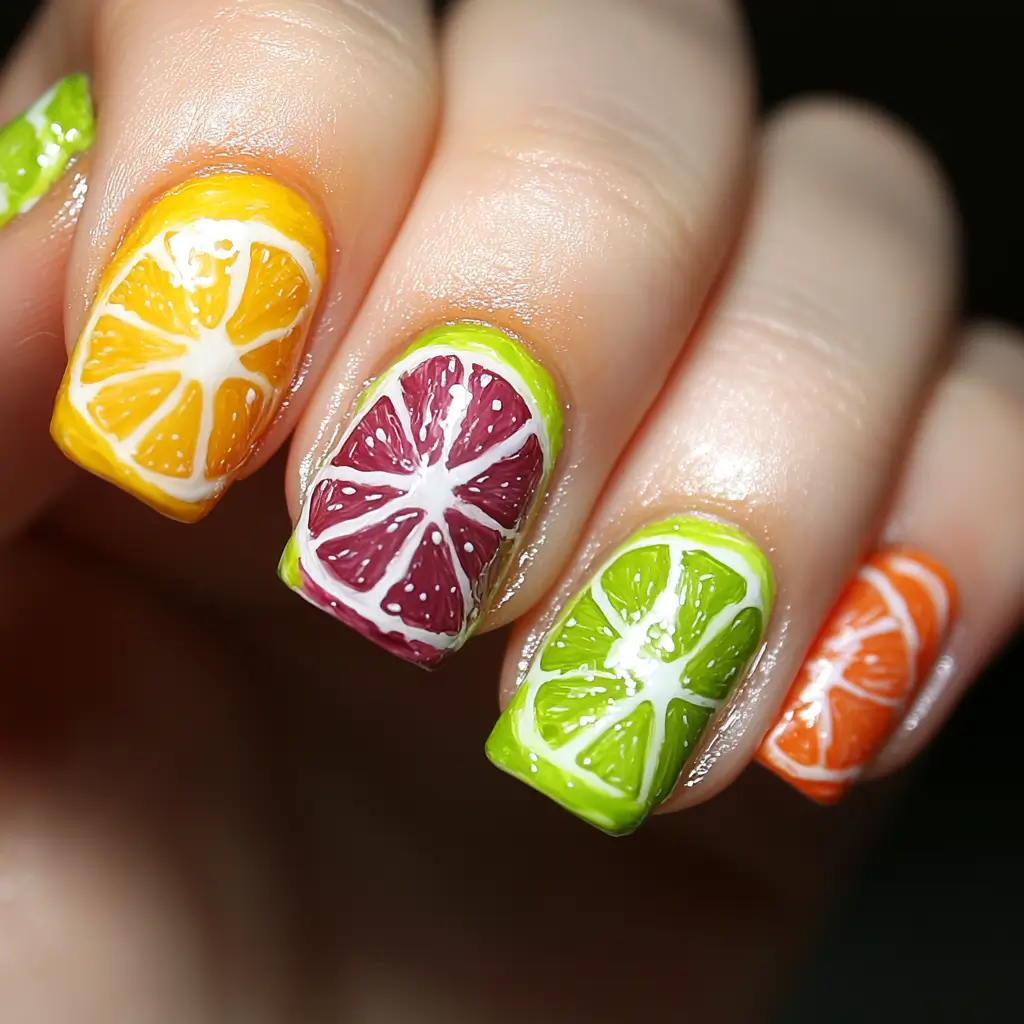
I love how fruit slice nails can bring a refreshing feel to any summer look. Think about bright lemons, juicy watermelons, or vibrant oranges.
These designs are fun and fairly easy to create. You need some bright nail polish and a bit of patience.
6: Beach Waves
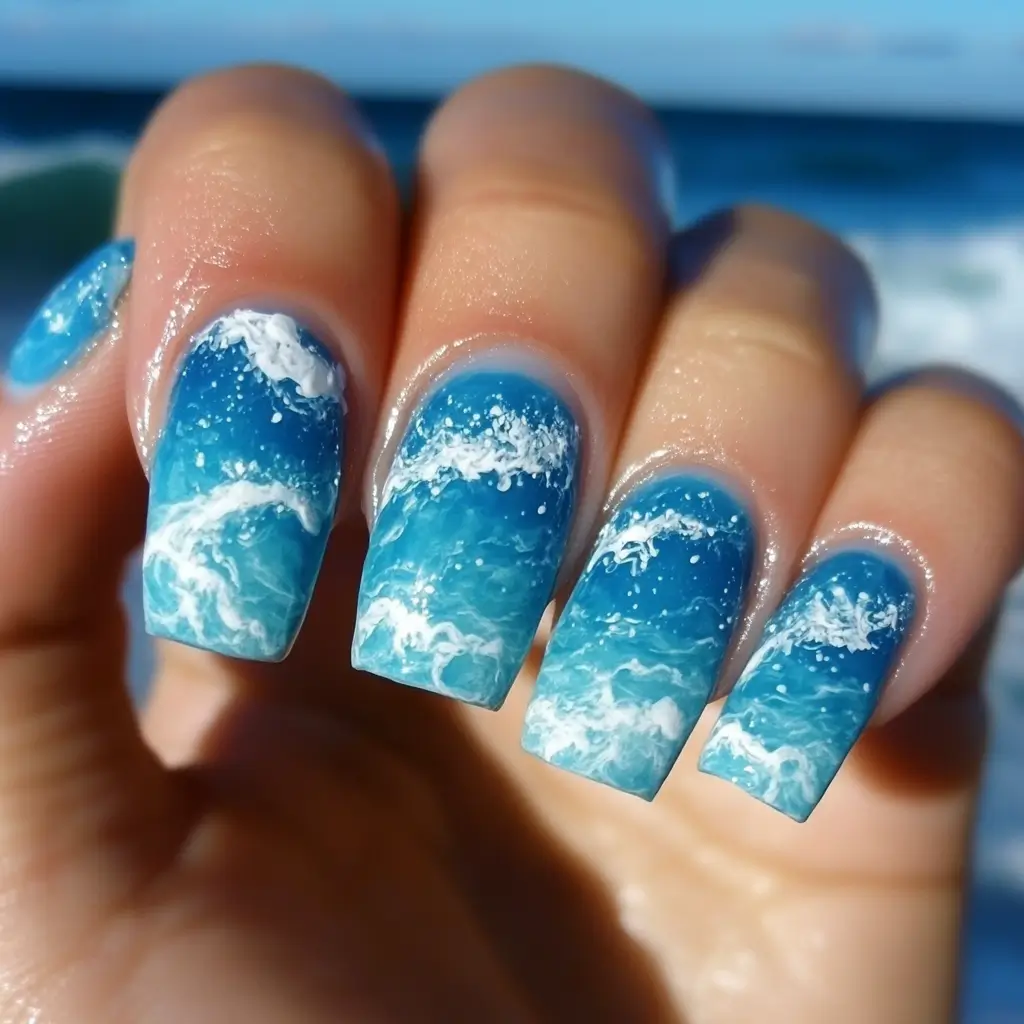
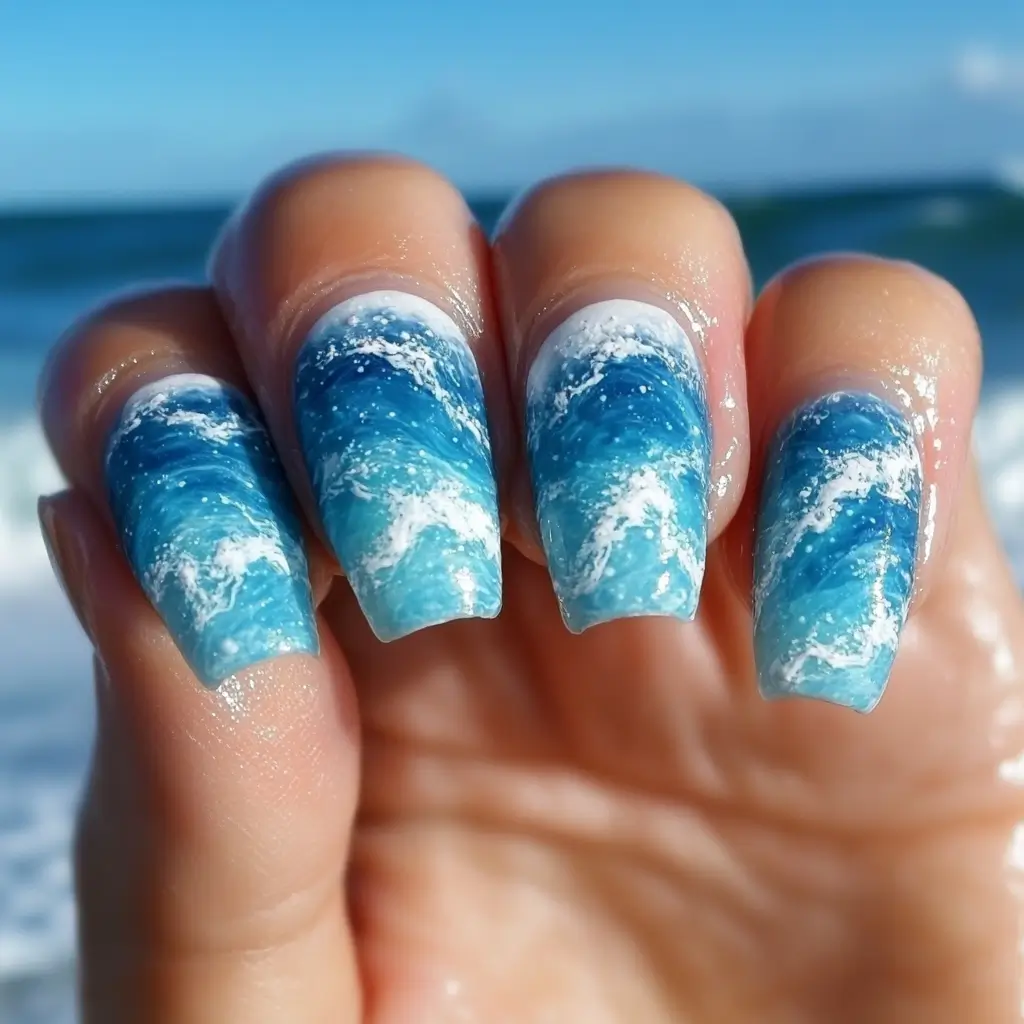
Beach wave nail designs are perfect for summer. They remind me of the sea and sunny days and often use shades of blue and white.
I love how some designs mix blue and white to look like ocean waves breaking on the shore. It feels like having the beach right at my fingertips.
7: Mermaid Scales
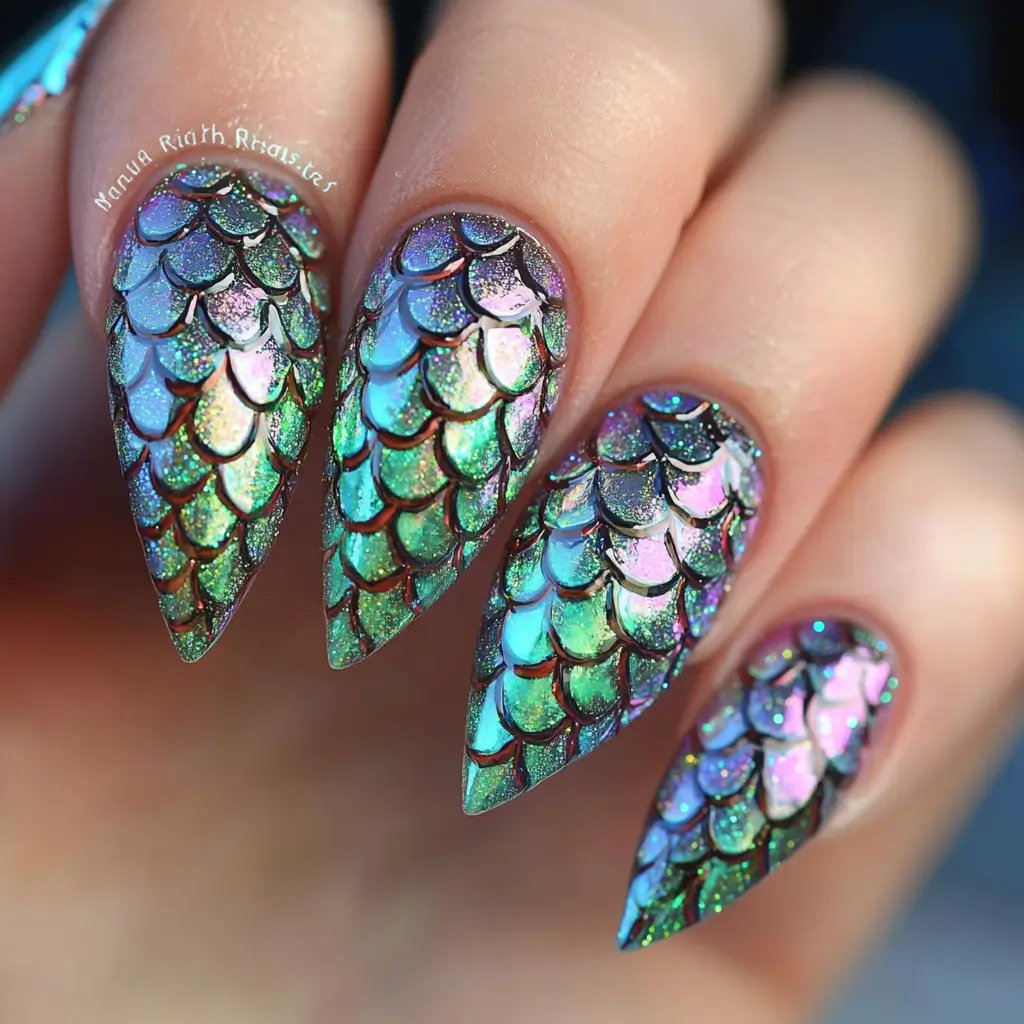

Mermaid scales are a stunning way to capture the magic of the sea on your nails. These designs often feature a shimmering, scale-like pattern that beautifully reflects light.
I love how adding holographic or iridescent colors can make the scales pop even more. It’s like having a little piece of the ocean at your fingertips.
I usually create this look using a base color, like teal or purple. Then, I use a fine brush to paint the scale patterns with a contrasting shimmer polish. This adds depth and interest to the design.
8: Pineapple Patterns


One of my favorite summer nail designs is the pineapple pattern. It’s bright and fun, perfect for warm weather.
I love adding a touch of yellow with green accents. This mix gives my nails a tropical feel and makes them stand out.
You can keep it simple or add details like geometric shapes to outline the pineapple.
9: Flamingo Print
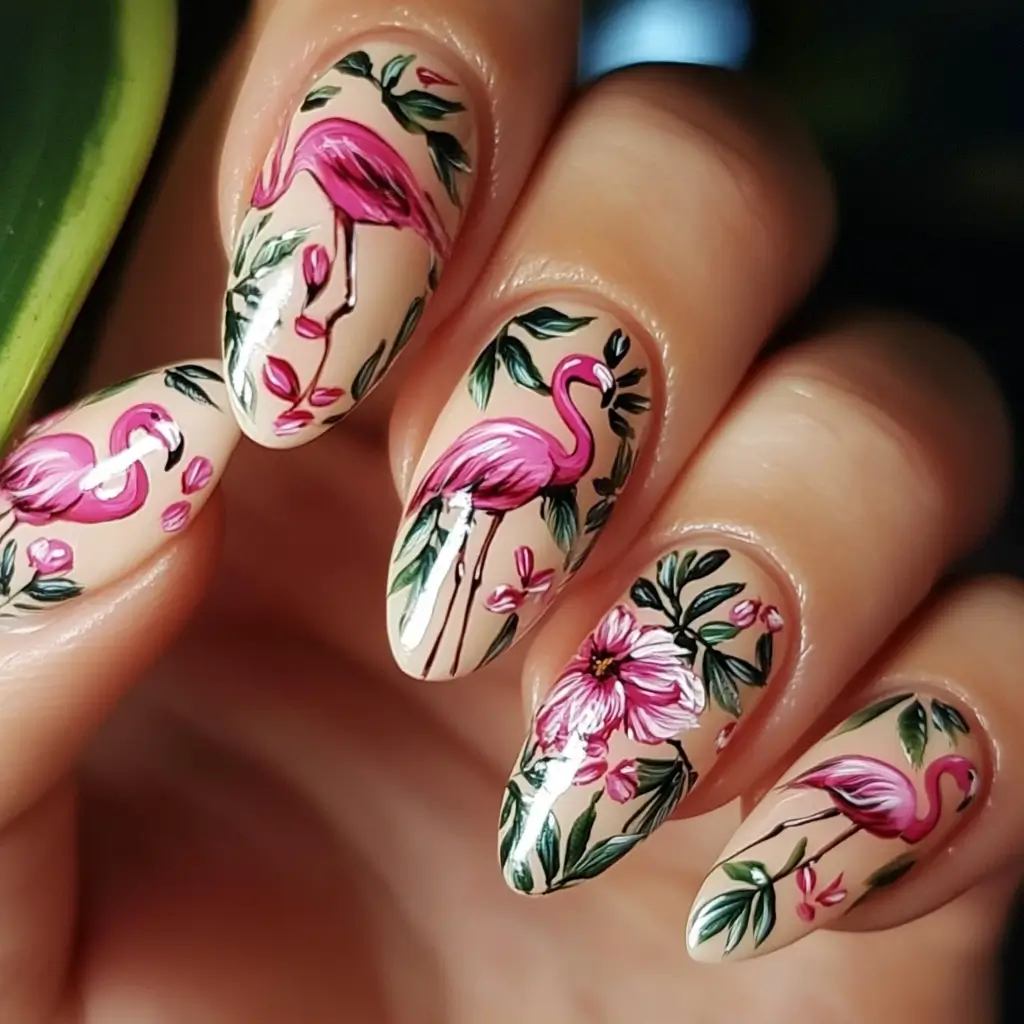
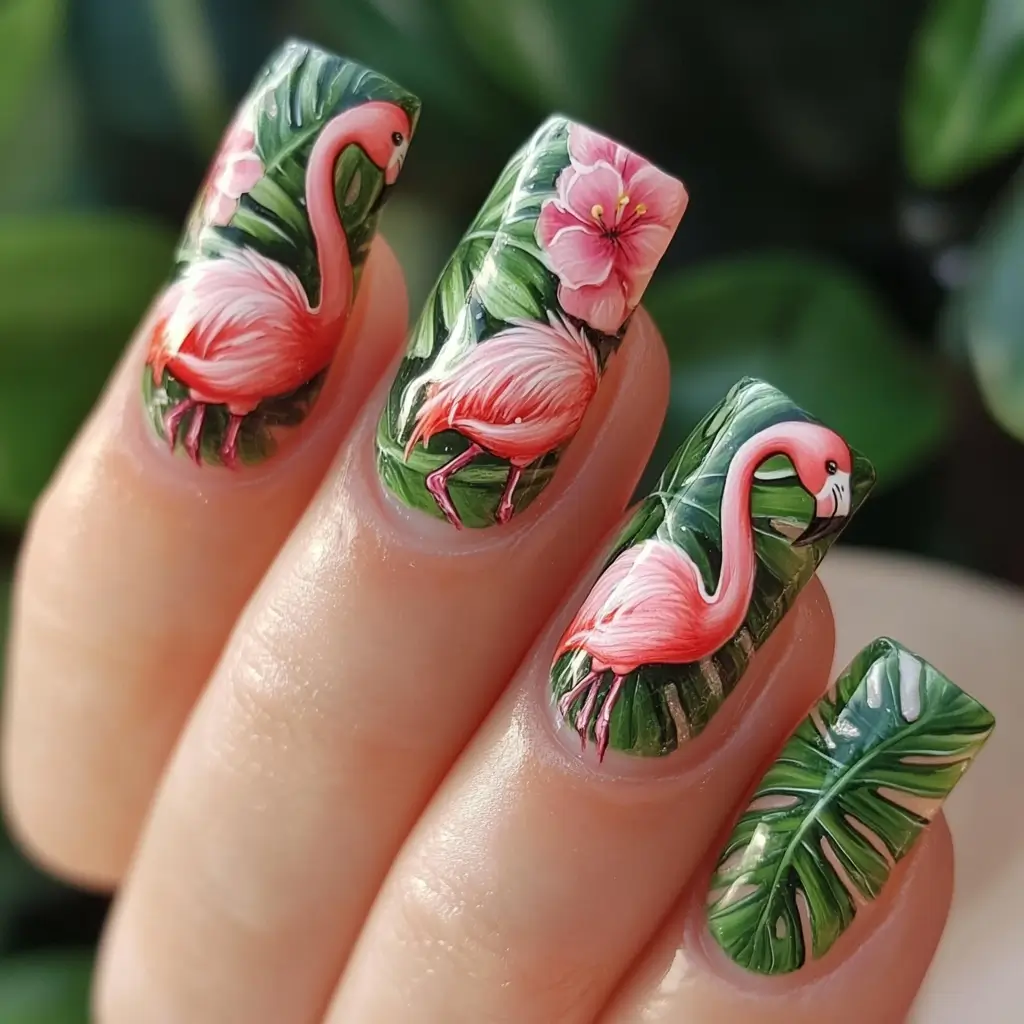
Flamingo prints are perfect for adding a splash of summer to your nails. The bright pink shades and elegant bird designs create a chic look.
I like the combination of flamingo art with tropical leaves. It captures a tropical vibe.
These prints can be bold or subtle, fitting any style.
10: Coral Contrast


I love the vibrant energy coral nails bring to summer. They pair beautifully with contrasting shades. One striking combo is coral and blue. Start with a base of electric blue polish.
Then, use a nail art liner brush to add hot pink and coral ombré flames. This design pops with color and style.
11: Palm Tree Silhouette

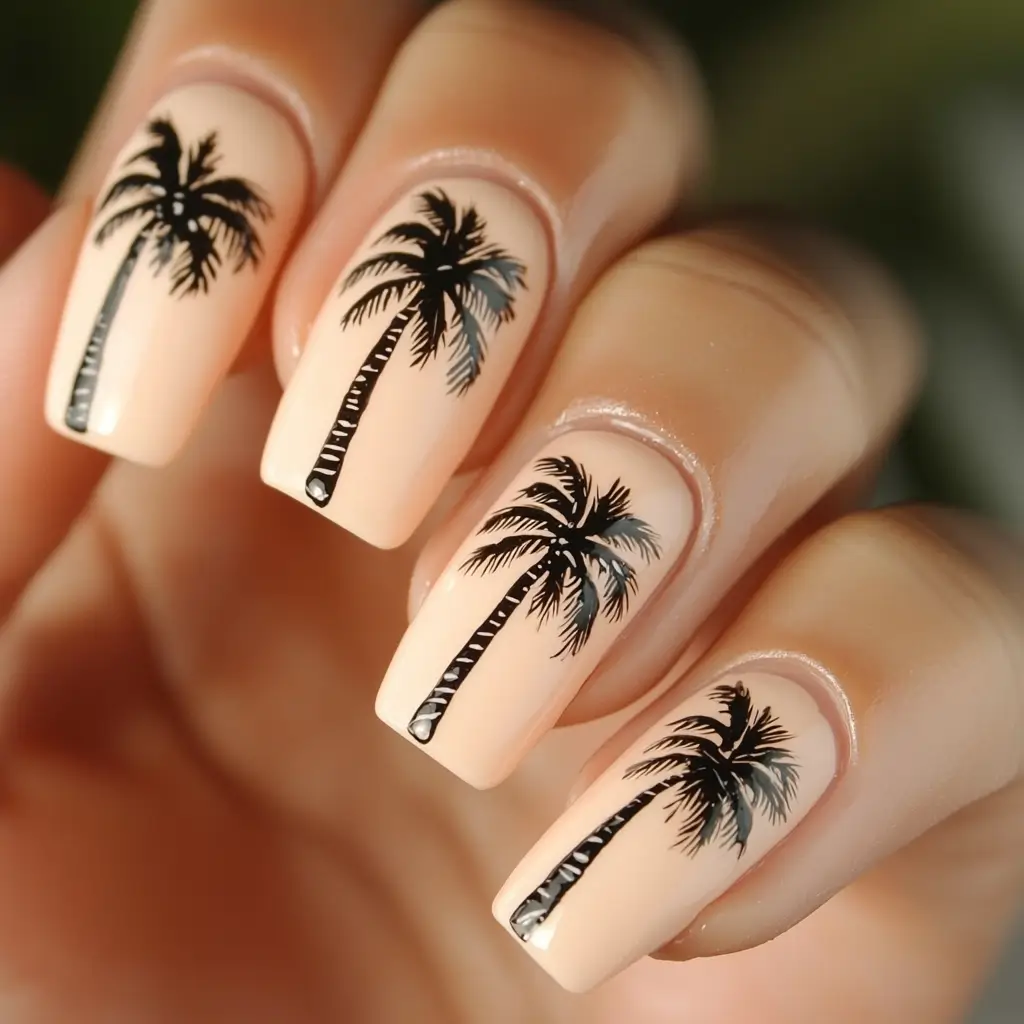
I love how the palm tree silhouette design brings a touch of the tropics to my nails. This sleek and simple design captures the essence of summer.
I draw the tree trunk using a slightly curved black polish line. Then, I add short horizontal lines for the leaves.
The result is a chic, island-inspired look perfect for summer fun.
12: Neon Stripes
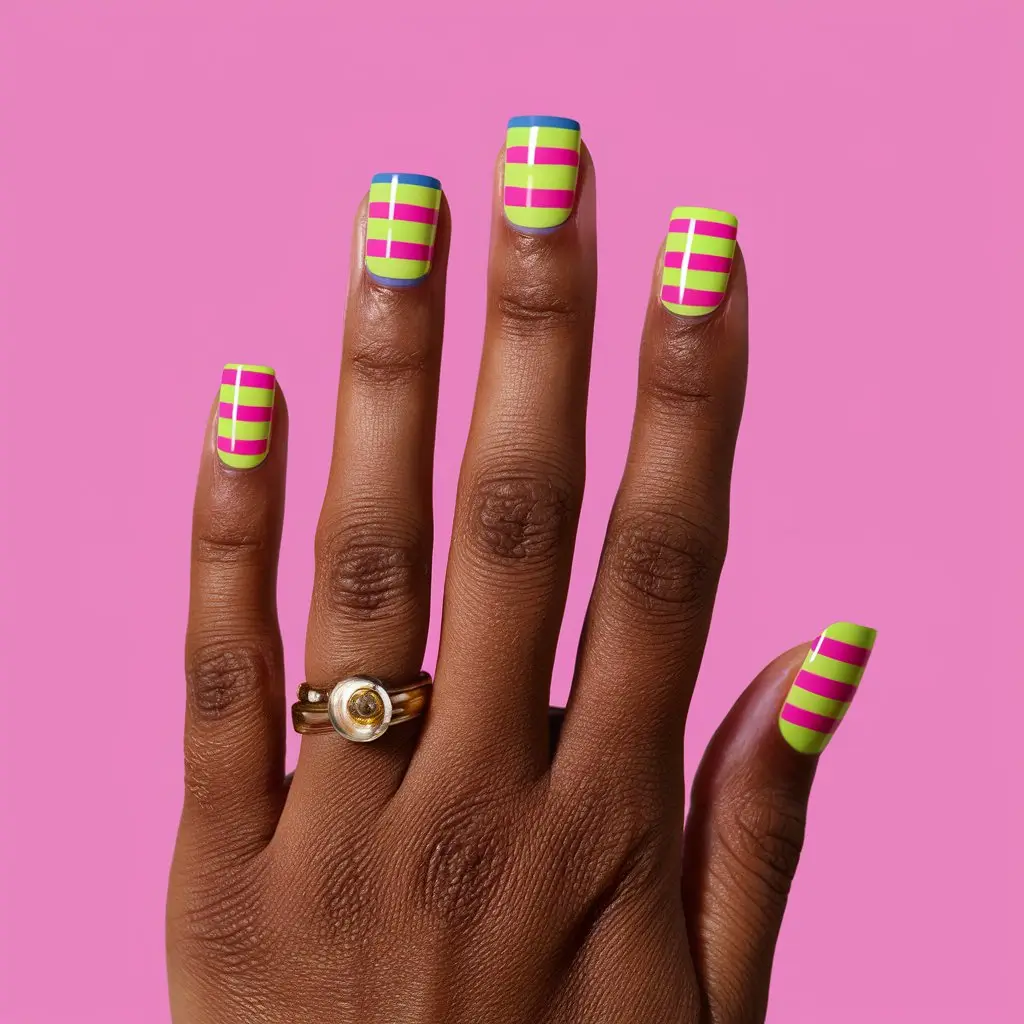

Neon stripes are a fantastic way to excite your nails this summer. I love how the vibrant colors really pop against a neutral base. It’s a simple design that anyone, even beginners, can try.
Start with a clean, nude base to make the neon colors stand out. Paint stripes of your favorite neon shades horizontally or vertically on each nail using a thin brush. You can mix and match different colors for a fun, playful look.
Finish with a clear top coat for extra shine and durability. Neon-striped nails will catch attention and add a fun twist to any summer outfit.
13: Mint French Tips
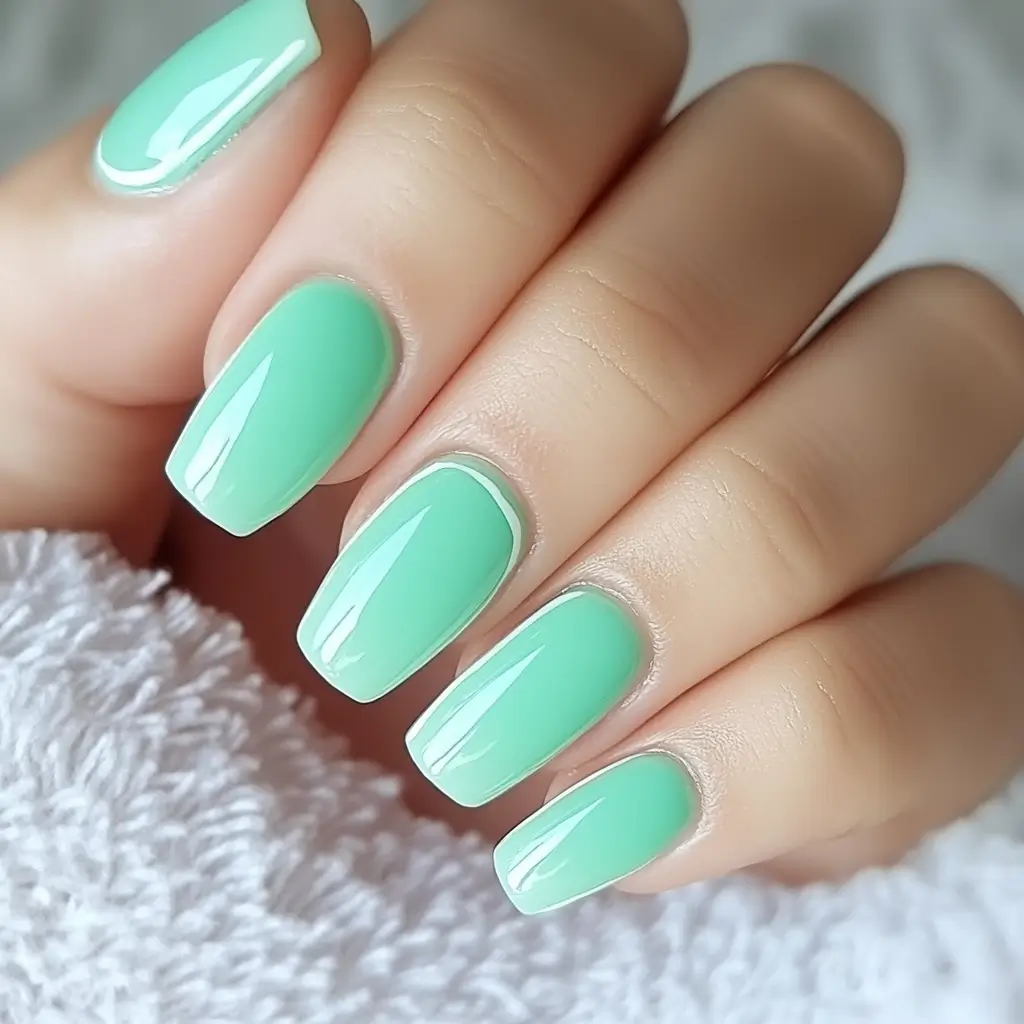
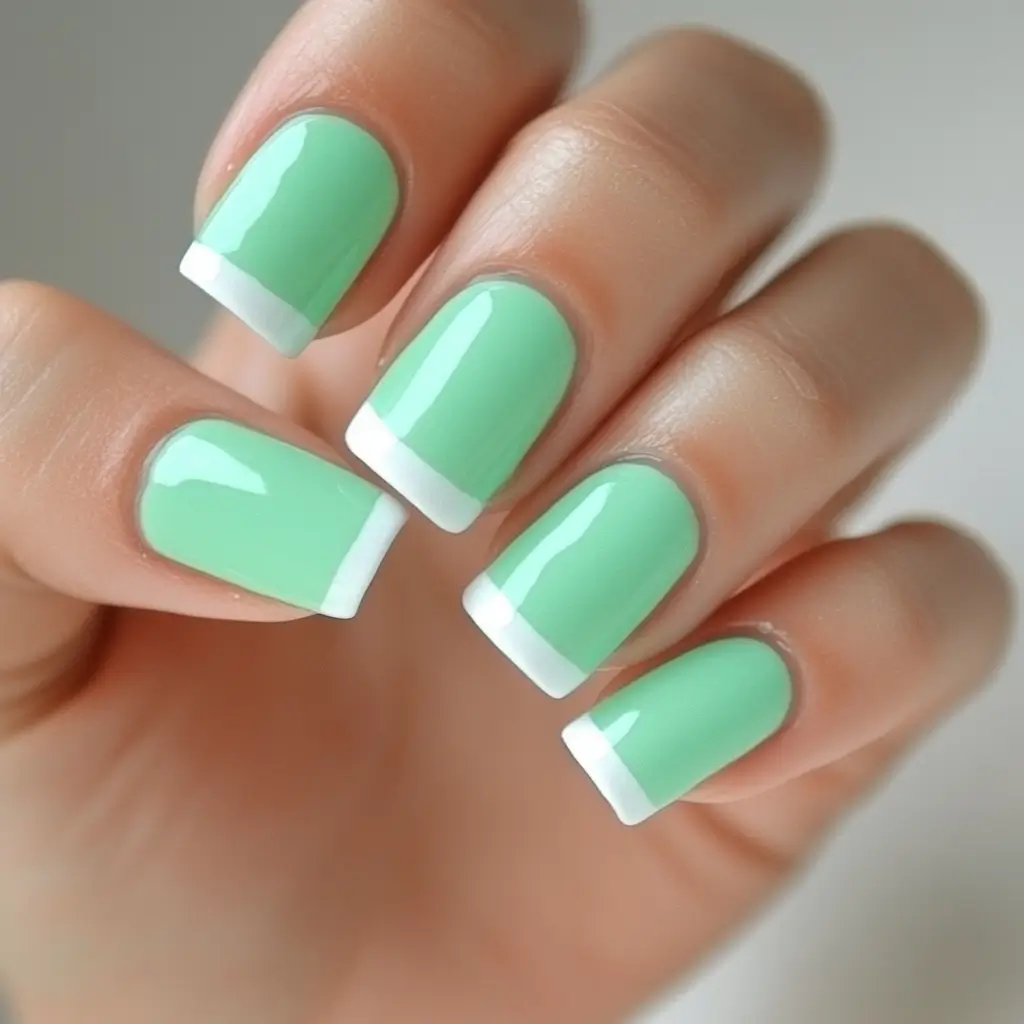
I love the fresh look of mint French tips for summer. The light green shade feels cool and refreshing, perfect for warm weather.
Mint pairs well with various outfits and adds a soft pop of color to your nails.
Try it with a glossy top coat for extra shine.
14: Lemon Zest
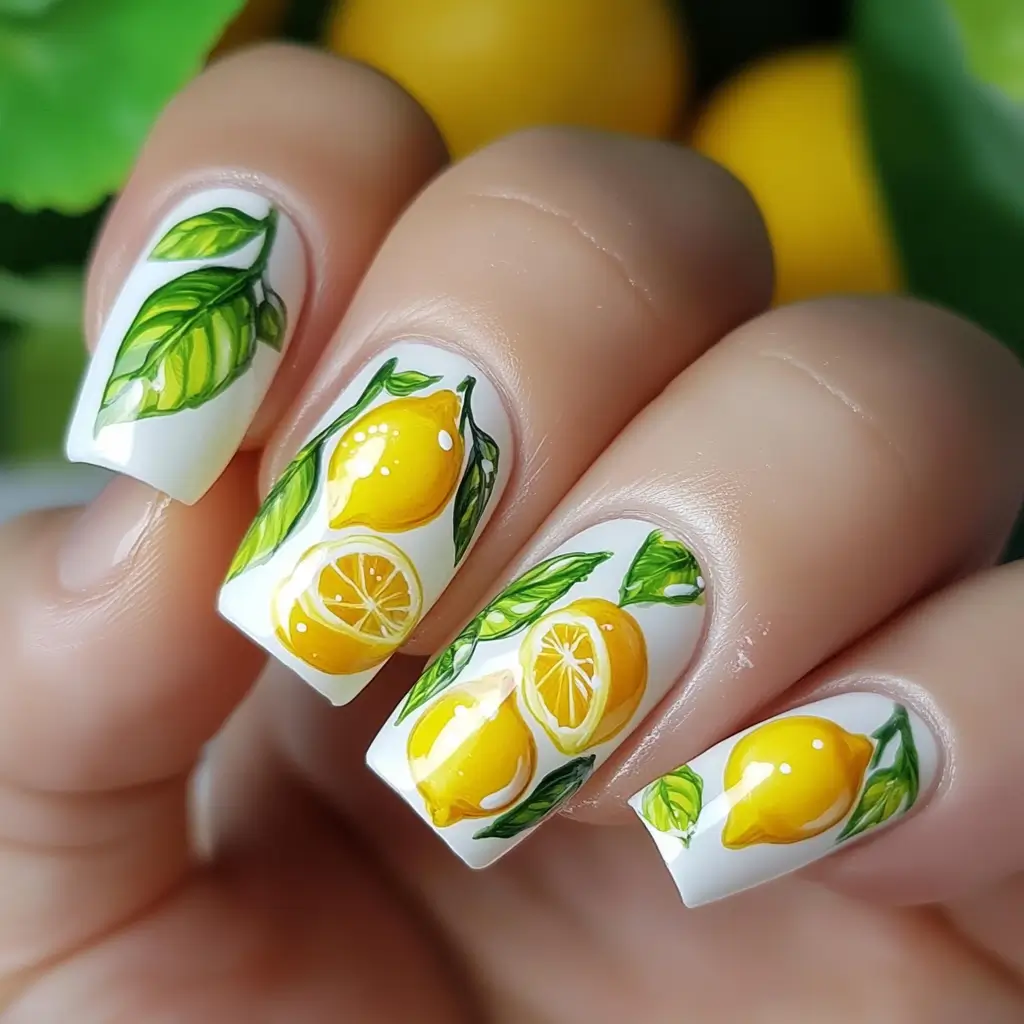

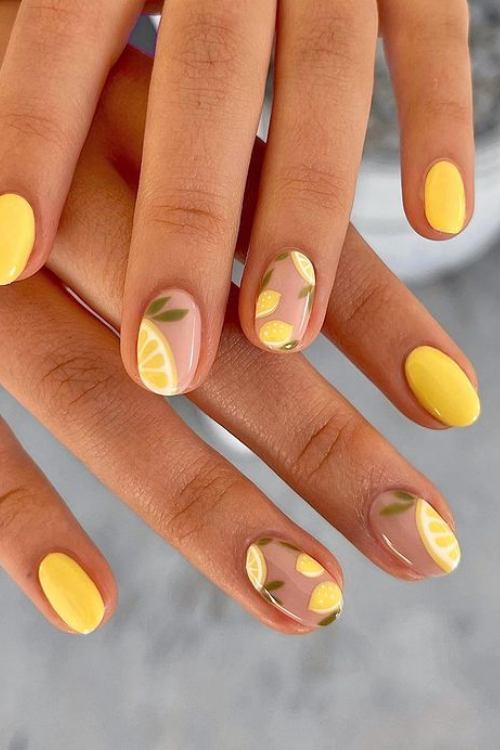
Lemon Zest nails are perfect for a bright and cheerful summer look.
I love how the vibrant yellow lemons paired with green leaves capture the lively essence of the season. With a light, crisp base color, these designs pop and bring a fresh feel to any outfit.
Simple yet striking, Lemon Zest nails are a must-try.
15: Ice Cream Cones
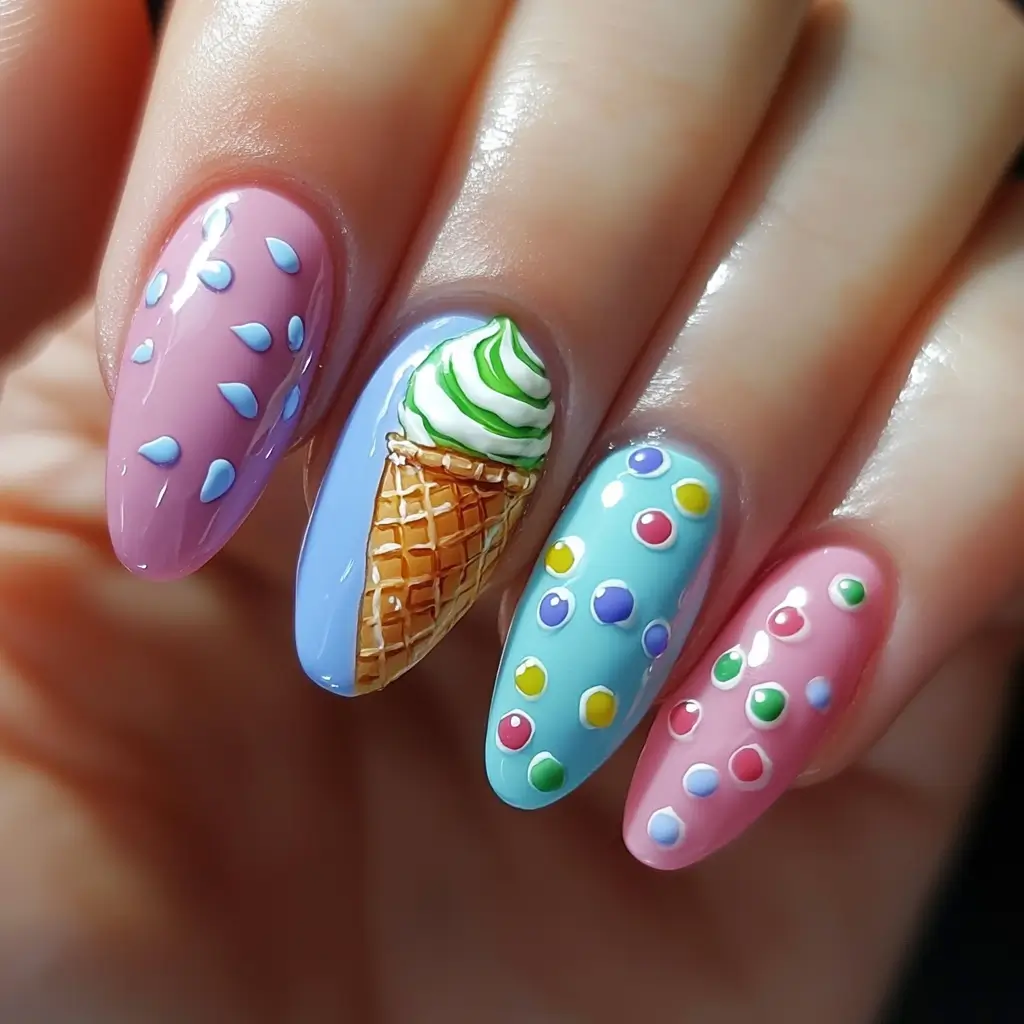

I love the idea of ice cream cone nails for summer. They are both fun and playful.
These designs often feature cone shapes, colorful scoops, and sprinkles.
You can easily DIY these at home with a few nail polish colors and a steady hand.
How To Do Short Summer Nail Design
Choose bright, vibrant colors to create short summer nail designs. Add simple, fun patterns or decals. Use a top coat to seal the design.
Summer is the perfect time to experiment with bold and playful nail designs. Short nails are not only practical but also serve as a great canvas for creative ideas.
You can opt for bright hues like neon pinks, sunny yellows, or ocean blues to reflect the season’s vibrancy.
Adding simple patterns such as stripes, polka dots, or floral accents can elevate your look effortlessly. Nail stickers and decals offer an easy way to add intricate details without the fuss.
Finish your design with a glossy top coat to ensure longevity and shine. With these tips, your nails will be summer-ready in no time.
Choosing The Right Colors
Summer is perfect for showing off your nails with fun and vibrant designs. Choosing the right colors for your short summer nail design can make all the difference.
It’s important to pick colors that complement your style and skin tone. With the right shades, your nails will look stunning and summer-ready.
Consider Your Skin Tone
Choosing the right color starts with understanding your skin tone. Different colors look better on different skin tones. Here’s how you can match your nail color to your skin tone:
- Fair Skin: Soft pastels like baby pink, light blue, and lavender look great. Avoid very dark colors, as they can be too harsh.
- Medium Skin: You can go for brighter colors like coral, bright pink, and mint green. These shades highlight your skin beautifully.
- Olive Skin: Rich colors like orange, gold, and emerald green work well. They enhance your natural glow.
- Dark Skin: Bold colors like deep red, purple, and navy blue are stunning. Bright colors also pop wonderfully against dark skin.
Refer to the table below for a quick guide:
| Skin Tone | Recommended Colors |
|---|---|
| Fair | Baby Pink, Light Blue, Lavender |
| Medium | Coral, Bright Pink, Mint Green |
| Olive | Orange, Gold, Emerald Green |
| Dark | Deep Red, Purple, Navy Blue |
Experiment With Bright Shades
Summer is the best time to experiment with bright shades. Bright colors add a fun and lively vibe to your nails. Consider trying out these popular bright shades:
- Neon Colors: Neon pink, green, and yellow are exciting. They make your nails stand out.
- Bright Blue: A vibrant blue shade feels refreshing. Perfect for beach days and pool parties.
- Hot Pink: This color screams summer. It’s playful and trendy.
- Sunny Yellow: Yellow nails look cheerful. They remind you of sunny days.
Here are some tips to make your bright shades pop:
- Use a white base coat to make the colors more vivid.
- Pair bright shades with simple designs for a chic look.
- Experiment with color-blocking and ombre effects.
Bright shades can be mixed and matched to create unique designs. Don’t be afraid to try new combinations. Your summer nails should reflect your fun and adventurous side!
Prepping Your Nails
Summer is the perfect time to show off your short nail designs. But before you start painting, prepping your nails is essential.
Proper prep ensures your nail design lasts longer and looks more polished. Follow these simple steps to prepare your nails for a fantastic summer look.
Trim And Shape Your Nails
Start by trimming your nails to your desired length. Short nails are ideal for summer as they are easy to maintain and look chic.
- Use a good quality nail clipper to cut your nails.
- Trim straight across to avoid ingrown nails.
- Use a nail file to shape the edges. Choose between a rounded, squared, or oval shape.
When filing, use gentle strokes in one direction to avoid splitting. Here’s a simple table for nail shapes:
| Nail Shape | Description |
|---|---|
| Rounded | Soft edges, natural look |
| Squared | Flat top, sharp corners |
| Oval | Elongated, elegant shape |
Shaping your nails properly creates a perfect canvas for your summer design.
Push Back Your Cuticles
Healthy cuticles are key to a neat nail design. Here’s how to take care of them:
- Soak your nails in warm, soapy water for 5 minutes.
- Use a cuticle pusher to push back the cuticles gently.
- Be gentle to avoid damaging your cuticles.
Cuticles protect your nails from infections, so never cut them. If they are too thick, use a cuticle remover. To maintain their health, keep your cuticles moisturized with cuticle oil or cream.
Regular cuticle care ensures your nail design looks clean and professional.
Buff The Surface
Buffing your nails creates a smooth surface for your nail polish. Follow these steps:
- Use a nail buffer with different grits.
- Start with the roughest side to smooth out ridges.
- Move to the finer side to polish the surface.
Buffing also helps your base coat adhere better. Do not over-buff, as this can weaken your nails. Buffing once a month is usually enough.
Smooth nails ensure a flawless finish for your summer designs.
Apply A Base Coat
The base coat is crucial for a long-lasting nail design. It also protects your nails from staining. Follow these tips:
- Choose a high-quality base coat.
- Apply a thin, even layer on each nail.
- Allow it to dry completely before applying color.
A base coat provides a smooth surface for your nail polish. It also helps your polish adhere better, reducing chipping.
Investing in a good base coat ensures your summer nail designs look perfect and last longer.
Design Inspiration
Summer is the perfect time to experiment with fresh and fun nail designs. With the right design inspiration, short nails can still make a big statement.
Whether you prefer bold colors or subtle patterns, there’s something for everyone. In this section, we’ll explore some exciting sources of design inspiration to help you create stunning short summer nail designs.
Look For Summer Trends
Keeping up with the latest summer nail trends can give you a fresh and modern look. Several styles are making waves this season, and they are perfect for short nails. Here are some of the top trends:
- Bright Neon Colors: Neon shades like electric blue, hot pink, and lime green are in vogue. These colors can make your nails pop and stand out.
- Pastel Hues: Soft pastel colors are also trending. Think of mint green, lavender, and baby blue for a delicate and chic look.
- Minimalist Designs: Simple geometric shapes and lines can create a sophisticated yet playful effect, making minimalist designs perfect for short nails.
- Fruit-Inspired Nails: Designs featuring fruits like watermelons, strawberries, and pineapples are popular. These can add a fun and fresh vibe to your nails.
To stay updated with the trends, consider following popular nail artists on Instagram. They often showcase the latest styles and techniques. You can also browse fashion magazines and websites dedicated to beauty and nail art.
Draw From Nature
Nature provides endless inspiration for beautiful nail designs. From floral patterns to beach themes, the possibilities are vast. Here are a few ideas to get you started:
- Floral Designs: Flowers like daisies, sunflowers, and roses can create a stunning look. Use a fine brush to paint delicate petals and leaves on your nails.
- Beach Themes: Seashells, starfish, and waves can bring the beach to your nails. Opt for shades of blue, sandy beige, and white to complete the look.
- Animal Prints: Animal prints, such as leopard spots, zebra stripes, and butterfly wings, can be very eye-catching. These designs can add a wild and adventurous touch to your nails.
Walking in the park or a trip to the beach can spark new ideas. Observe the colors, shapes, and patterns around you.
You can also use natural elements like leaves and flowers to create unique nail art by pressing them onto your nails before applying a top coat.
Get Inspired By Patterns
Patterns can turn your short nails into a canvas for creativity. From stripes to polka dots, the options are endless. Here are some pattern ideas to try out:
- Stripes: Horizontal, vertical, or diagonal stripes can create a sleek and modern look. Use nail tape to achieve clean lines.
- Polka Dots: Polka dots can be playful and fun. Use a dotting tool or a bobby pin to create perfect dots.
- Chevron Patterns: Chevron patterns are trendy and stylish. They can be achieved using nail tape or stencils.
- Geometric Shapes: Triangles, squares, and hexagons can add an edgy and contemporary feel to your nails. Mix and match different shapes for a unique look.
Experimenting with different patterns can be a lot of fun. You can use nail stamping kits for intricate designs or freehand your patterns with a steady hand.
Combining different patterns on each nail can also create a cohesive yet varied look.
Tools And Techniques
Summer is the perfect season to flaunt vibrant and playful nail designs. Short nails can look just as stunning with the right tools and techniques.
Whether you prefer intricate patterns or simple elegance, having the right tools can make a difference. Let’s explore popular techniques that elevate your short summer nail designs.
Use Nail Stencils
Nail stencils are a fantastic way to achieve precise and intricate designs without professional skills.
They come in various shapes and patterns, making it easy to create stunning looks. Using nail stencils is simple and effective:
- Choose a stencil pattern that complements your summer theme.
- Apply a base coat and let it dry completely.
- Place the stencil carefully on your nail.
- Paint over the stencil with your desired color.
- Remove the stencil while the polish is still wet.
- Finish with a top coat to seal the design.
Pro Tip: Use a tweezer to position the stencil accurately. This ensures you don’t smudge the base coat.
| Type of Stencil | Best For |
|---|---|
| Vinyl Stencils | Geometric Patterns |
| Adhesive Stencils | Floral Designs |
Try Dotting Tools
Dotting tools are versatile and perfect for creating playful summer designs. They come in different sizes, allowing you to make dots of various diameters. Here’s how to use them:
- Select the dotting tool size according to your design.
- Dip the tool into the nail polish.
- Gently press the tool onto your nail to create a dot.
- Repeat with different colors for a vibrant look.
- Polka Dots: Simple and classic.
- Flowers: Use smaller dots for petals.
- Abstract Art: Mix and match colors for a unique design.
Pro Tip: Clean the tool after each use to prevent colors from mixing.
Experiment With Nail Stamping
Nail stamping is a quick way to transfer detailed designs onto your nails. It involves using a stamping plate, a scraper, and a stamper. Follow these steps:
- Apply nail polish on the chosen design of the stamping plate.
- Scrape off the excess polish with the scraper.
- Press the stamper onto the design to pick it up.
- Transfer the design onto your nail by rolling the stamper.
- Seal with a top coat for longevity.
- Tropical Patterns: Palms, pineapples, and flamingos.
- Geometric Shapes: Triangles, squares, and lines.
- Animal Prints: Leopard and zebra patterns.
Pro Tip: Use a lint roller to clean the stamper between uses.
Master The Water Marble Technique
The water marble technique creates beautiful, swirled patterns using water and nail polish. It may seem complex, but with practice, it becomes easier. Here’s how to do it:
- Fill a cup with room-temperature water.
- Drop nail polish colors into the water to create a bullseye pattern.
- Use a toothpick to swirl the colors gently.
- Dip your nail into the water to pick up the design.
- Clean the excess polish off the surface with a toothpick.
- Remove your nail and let it dry before applying a top coat.
- Sunset Theme: Orange, yellow, and red.
- Ocean Waves: Blue, turquoise, and white.
- Floral Fantasy: Pink, purple, and green.
Pro Tip: Use tape or liquid latex around your nails to make cleanup easier.
Adding Extra Flair
Short summer nail designs can be simple yet stylish. Adding extra flair to your nails makes them pop even more. Bright colors and fun patterns are great, but extra details make your nails stand out. Let’s explore some ways to add flair to your short summer nails.
Accent Nails
Accent nails are a fantastic way to add a unique touch to your manicure. They draw attention and add a special touch without overwhelming the overall look. Here are some tips for accent nails:
- Choose a different color: Paint one nail a contrasting color to create an eye-catching effect.
- Use patterns: Stripes, polka dots, or geometric shapes work great for accent nails.
- Apply stickers or decals: Easy to use and available in many designs, they instantly add flair.
To make it even easier, here’s a simple table to guide you on creating accent nails:
| Step | Description |
|---|---|
| 1 | Choose your base color and paint all nails. |
| 2 | Select an accent color or design for one or two nails. |
| 3 | Apply the chosen color or pattern to the accent nails. |
| 4 | Seal with a top coat for a long-lasting finish. |
Glitter And Sparkle
Glitter and sparkle add a fun and festive look to your summer nails. You can use them in various ways to create different effects:
- Full glitter nail: Paint the nail with glitter polish for a bold look.
- Glitter tips: Apply glitter only to the tips for a subtle sparkle.
- Glitter gradient: Start with a dense glitter at the tip and fade it towards the base.
Here are some tips for applying glitter polish:
- Use a sponge to dab glitter polish for better coverage.
- Apply a peel-off base coat for easy removal.
- Seal with a top coat to smooth the surface and prevent chipping.
3d Embellishments
3D embellishments can transform your nails from ordinary to extraordinary. These tiny decorations add texture and dimension to your manicure. Here are some popular 3D embellishments:
- Rhinestones: These add a touch of glamour and sparkle.
- Studs: Metallic studs give a chic and edgy look.
- Flowers: Tiny flower decals or 3D stickers create a cute and feminine design.
To apply 3D embellishments:
- Apply a small dot of nail glue where you want the embellishment.
- Use tweezers to place the embellishment onto the glue.
- Press gently and hold for a few seconds to secure.
- Seal with a generous layer of top coat to keep the embellishments in place.
3D embellishments make your nails stand out and are perfect for special occasions or daily wear.

Finishing Touches
Creating the perfect short summer nail design is a fun and creative process. Once you’ve applied your colorful polish and added intricate designs, it’s time to focus on the finishing touches.
These steps ensure your nails look polished and last longer. Pay attention to the final details to get that salon-quality finish at home.
Seal Your Design With A Top Coat
Sealing your nail design with a top coat is essential. It protects your artwork and adds a beautiful shine. Here’s how to apply it:
- Choose a high-quality top coat. This ensures durability and a glossy finish.
- Apply a thin layer. A thick coat may cause bubbles or smudges.
- Start from the cuticle and move to the tip. This method ensures even coverage.
- Seal the edges. Brush along the tip of your nail to prevent chipping.
Let your nails dry completely. This may take about 10-15 minutes. To prevent dents or smudges, avoid using your hands during this time. A quick-dry top coat can speed up this process.
Clean Up Any Smudges
Smudges can happen, but you can easily clean them up. Here’s how to do it:
- Use a small brush. A thin, angled brush works best.
- Dip it in nail polish remover. Avoid soaking the brush; just a little is enough.
- Gently wipe around the edges. Focus on the cuticle and sides of the nails.
- Use a cotton swab for larger areas. This helps clean up bigger mistakes.
Be gentle to avoid removing too much polish. If you make a mistake, you can always touch up with a bit of your chosen nail color. Patience is key to achieving a clean, professional look.
Moisturize Your Cuticles
Moisturizing your cuticles is a crucial step. It keeps your nails healthy and adds to the overall look. Follow these steps:
- Choose a good cuticle oil or cream. Look for products with natural ingredients.
- Apply a small amount. A little goes a long way.
- Massage it into your cuticles. Use circular motions for better absorption.
- Let it soak in. Give it a few minutes before touching anything.
Regular moisturizing prevents your cuticles from becoming dry and cracked and helps maintain the health of your nails. Healthy cuticles mean stronger, better-looking nails, perfect for showing off your summer design.

Frequently Asked Questions
How Do You Make Short Nails Designs?
To make short nail designs, choose your preferred colors and tools. Apply a base coat, then add your chosen design using nail polish, stamps, or stickers. Finish with a top coat for durability. Keep designs simple for a chic look.
What Nail Design Is Ideal For Short Nails?
Minimalist designs with nude or pastel colors work best. Geometric patterns or tiny floral accents add charm. Keep it simple.
How To Make Short Stubby Nails Look Good?
Trim and shape nails neatly. Use a nude or pastel polish. Opt for vertical stripes or simple nail art. Moisturize cuticles regularly. Keep nails clean and polished.
What Is The Best Summer Nail Color For Short Nails?
Bright coral is the best summer nail color for short nails. It adds a pop of vibrant, seasonal flair.
Conclusion
Creating short summer nail designs can be fun and easy. With simple tools and creative ideas, you can achieve beautiful results.
Experiment with colors, patterns, and accessories to showcase your unique style. Enjoy your summer with fresh, vibrant nails that stand out.

