17+ Orchid Nail Designs: Stunning Ideas
If you want to elevate your manicure game, orchid nail designs are perfect.
With their vibrant colors and intricate patterns, these designs can add a touch of elegance and beauty to any set of nails.
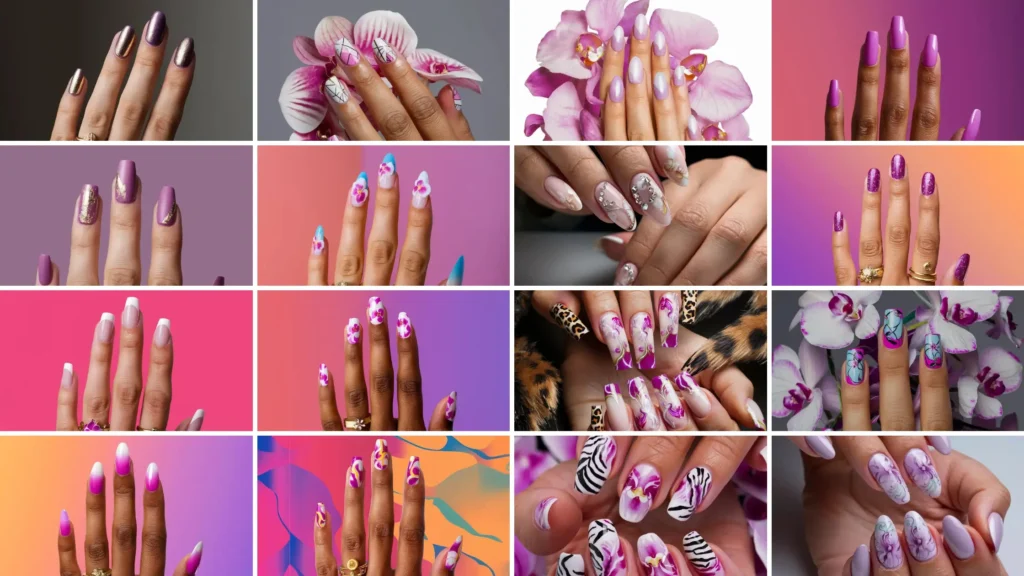
Orchid nails are versatile and suitable for casual outings and special occasions.
There’s an orchid design, whether you’re aiming for a sophisticated look or something more playful.
1: Classic French Tips with Orchid Accents
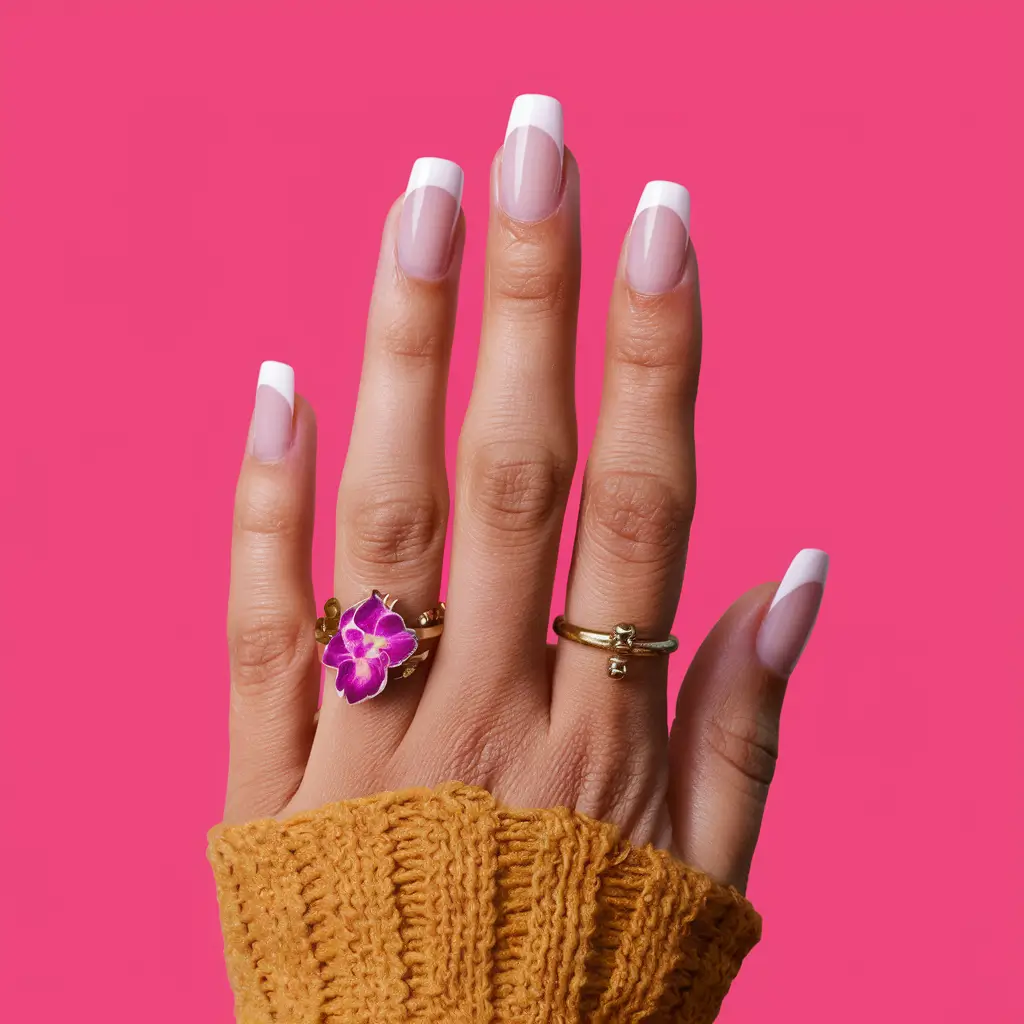
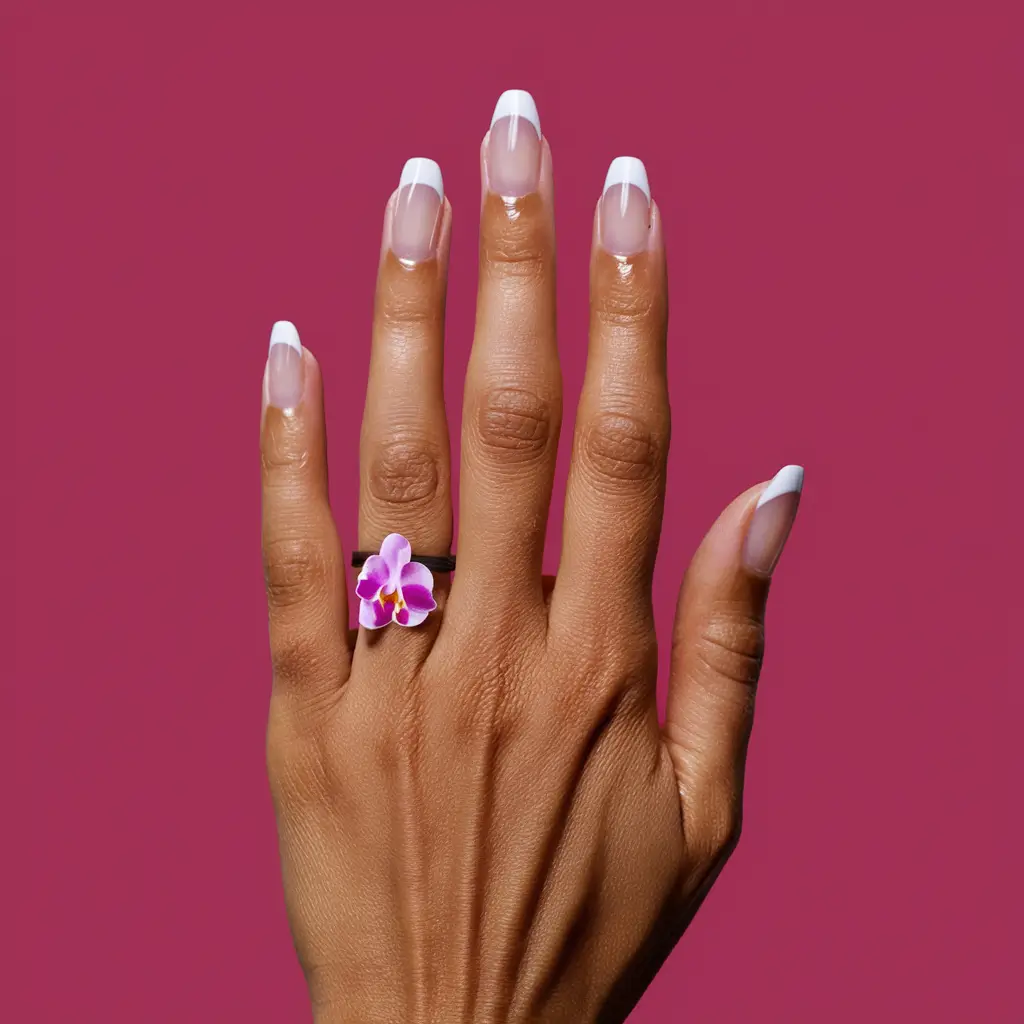
I love combining classic French tips with orchid accents. The French manicure is timeless with its clean white tips and pink or nude base.
Adding orchid details makes the nails stand out. Orchids can be hand-painted on the tips or applied as small decals.
The contrast between the white tips and the vibrant orchids looks stunning.
2: Matte Orchid with Gold Foil
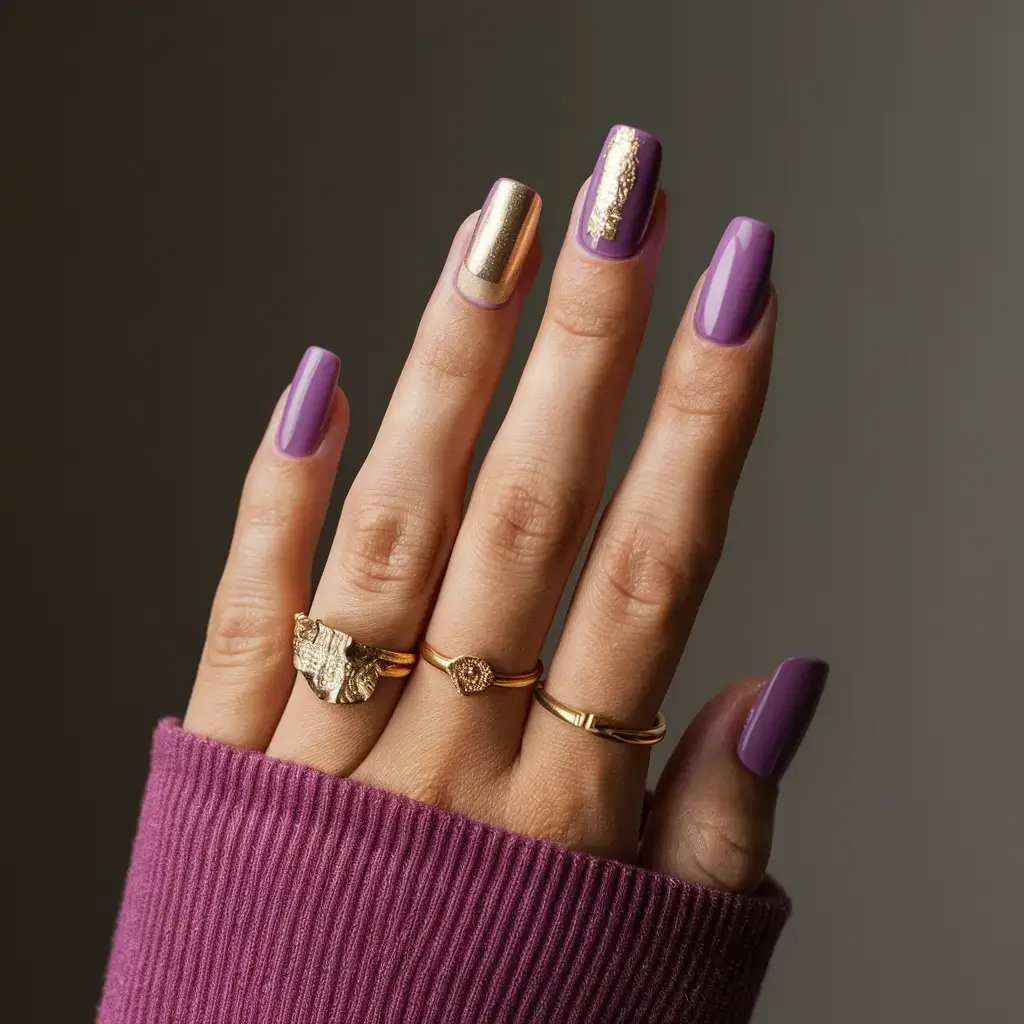

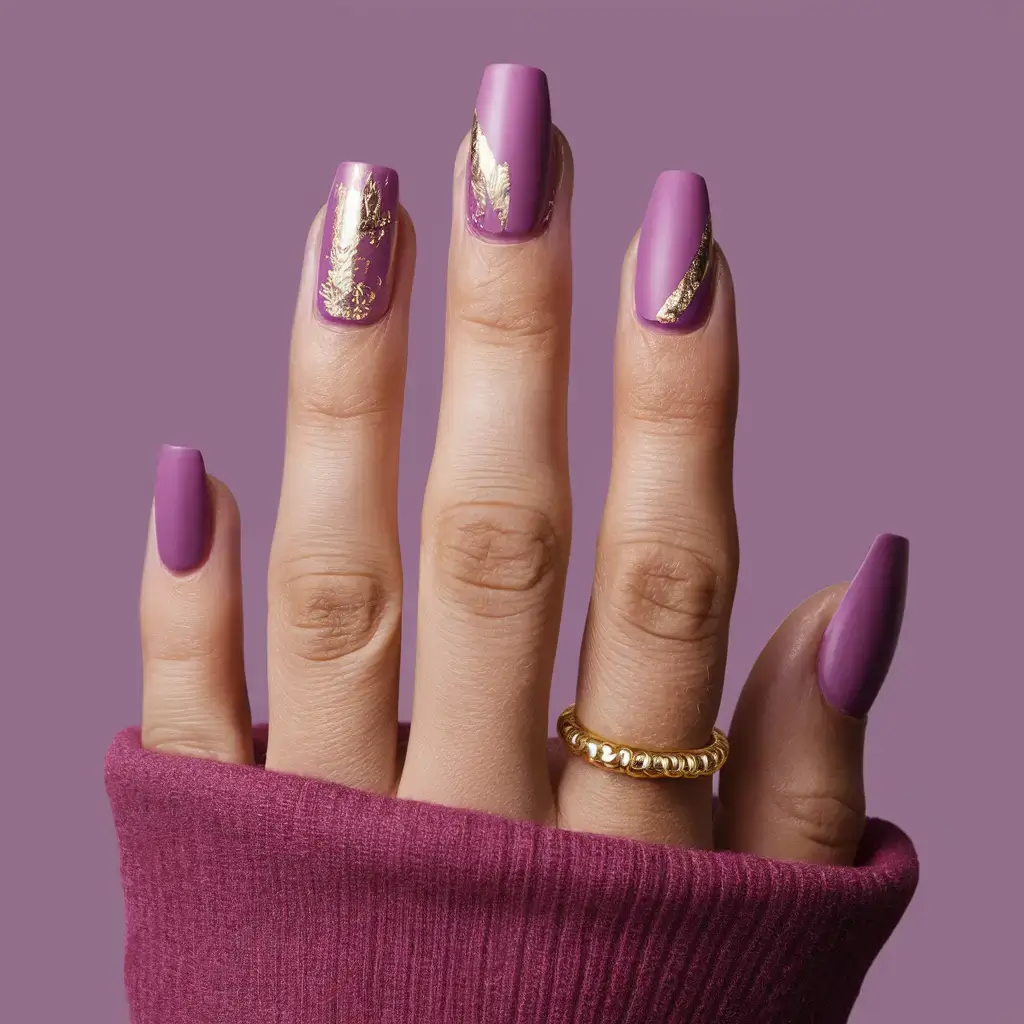
I love how the matte finish updates the classic orchid color. The matte texture adds a touch of modernity to the nails, making them look smooth and sophisticated.
Adding gold foil takes this design to another level. The metallic accents give a luxurious feel, perfect for any occasion.
For a subtle look, you can use gold foil on just one or two nails. Alternatively, apply it across all nails for a bold statement. The contrast between the matte orchid and shiny gold is stunning.
I recommend using a matte top coat over your orchid polish to create this design. Then, apply the gold foil using tweezers while the top coat is still tacky.
This style works well for both short and long nails. Whether for understated elegance or full-on glam, matte orchids with gold foil won’t disappoint.
Pairing this design with gold jewelry can help tie the whole look together. I find that it complements both casual and formal outfits beautifully.
3: Orchid Petal Gradient
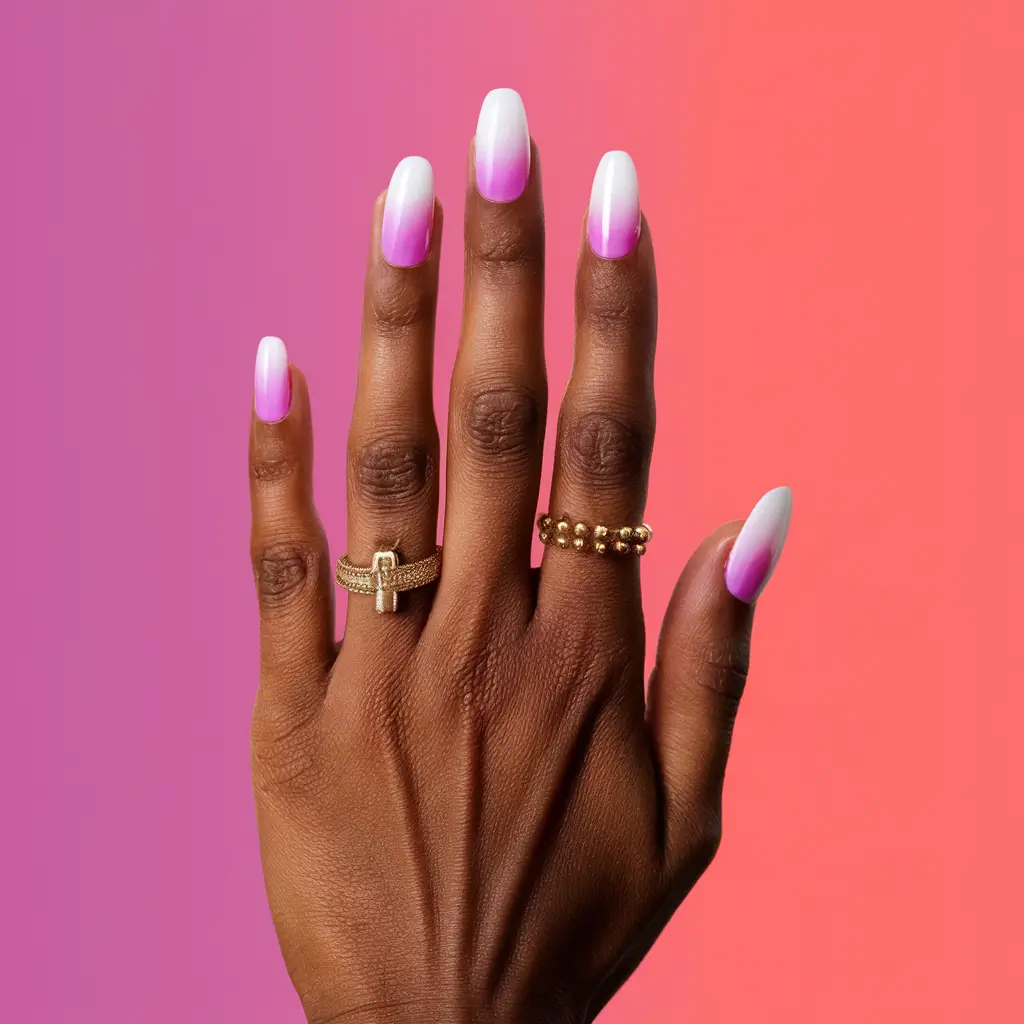

When creating an orchid petal gradient, I start with a soft white base and add shades of pink and purple to mimic the gradual color change seen in orchid petals.
Using a sponge, I blended these hues gently to create a seamless gradient, which gives the nails a sophisticated look.
I finish with a top coat to add shine and protect the design.
4: Orchid-themed Geometric Designs

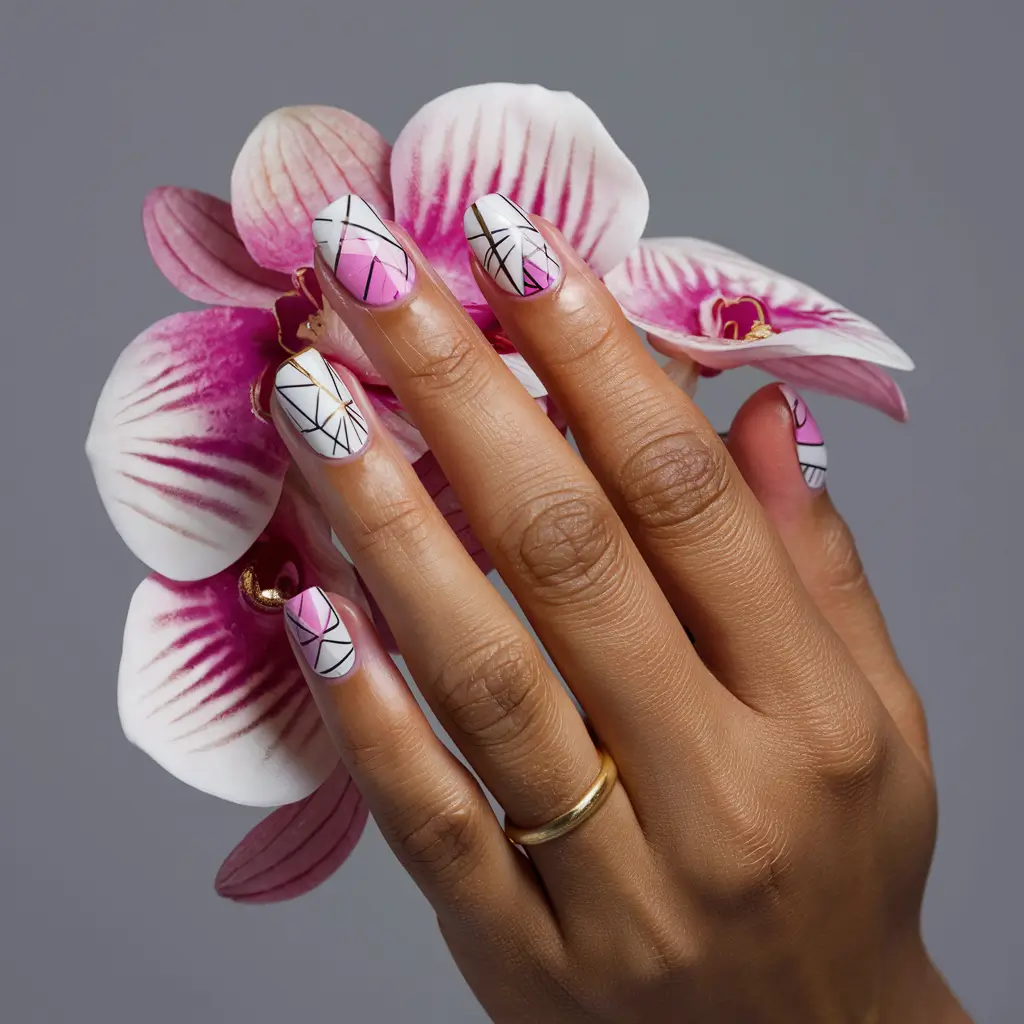
Orchid-themed geometric designs combine the natural beauty of orchids with crisp, modern shapes. I love how this pairing creates a stunning contrast.
You can mix orchid colors like pink, purple, and white with geometric patterns like triangles, lines, and hexagons. Muted tones or bright hues both work well.
These designs can be simple or complex, with even a few geometric shapes adding a sophisticated touch. Try using negative space to highlight the orchid elements.
Adding gold or silver accents to the geometric shapes can really make the design pop. This brings elegance and a bit of sparkle to the look.
5: 3D Orchid Flower Nails


I find 3D orchid flower nails a lovely choice for anyone wanting to add a touch of nature to their manicure. These nails feature sculpted orchid flowers that stand out from the nail surface, creating a three-dimensional effect.
Creating these nails involves using acrylic or builder gel to shape the petals. The detail and vibrant colors make the flowers look lifelike. Each flower can be designed to mimic the soft and elegant nature of real orchids.
Perfect for special occasions or everyday wear, 3D orchid flower nails are both versatile and stunning. They bring a fresh, chic look to your nails that can transition easily from spring to summer.
6: Orchid Watercolor Effect

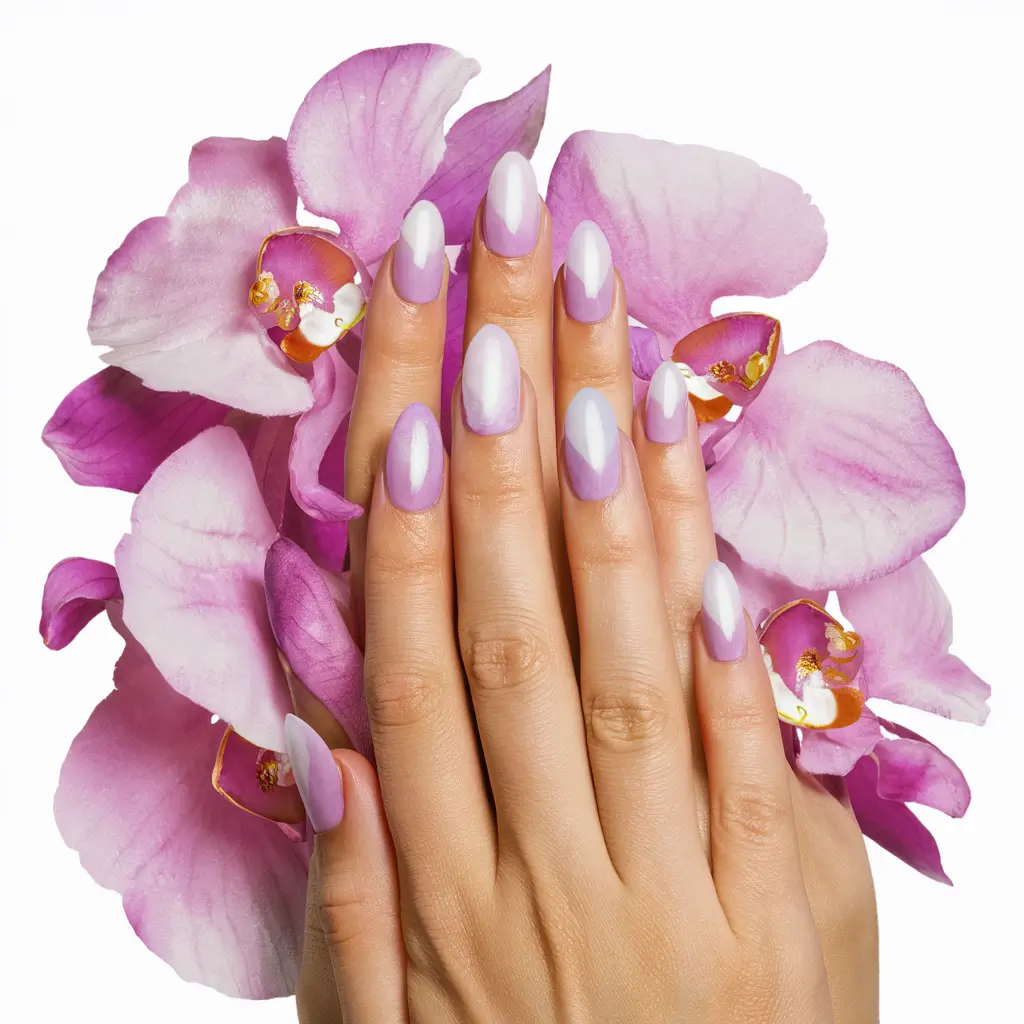
I love using the Orchid Watercolor Effect for an elegant look. This style mimics the look of watercolor paintings.
To achieve this, I start with a base coat. Then, I use thin brushes to apply light layers of orchid-colored polish.
By blending the colors gently, I create a soft, dreamy finish.
7: Orchid and Marble Combination

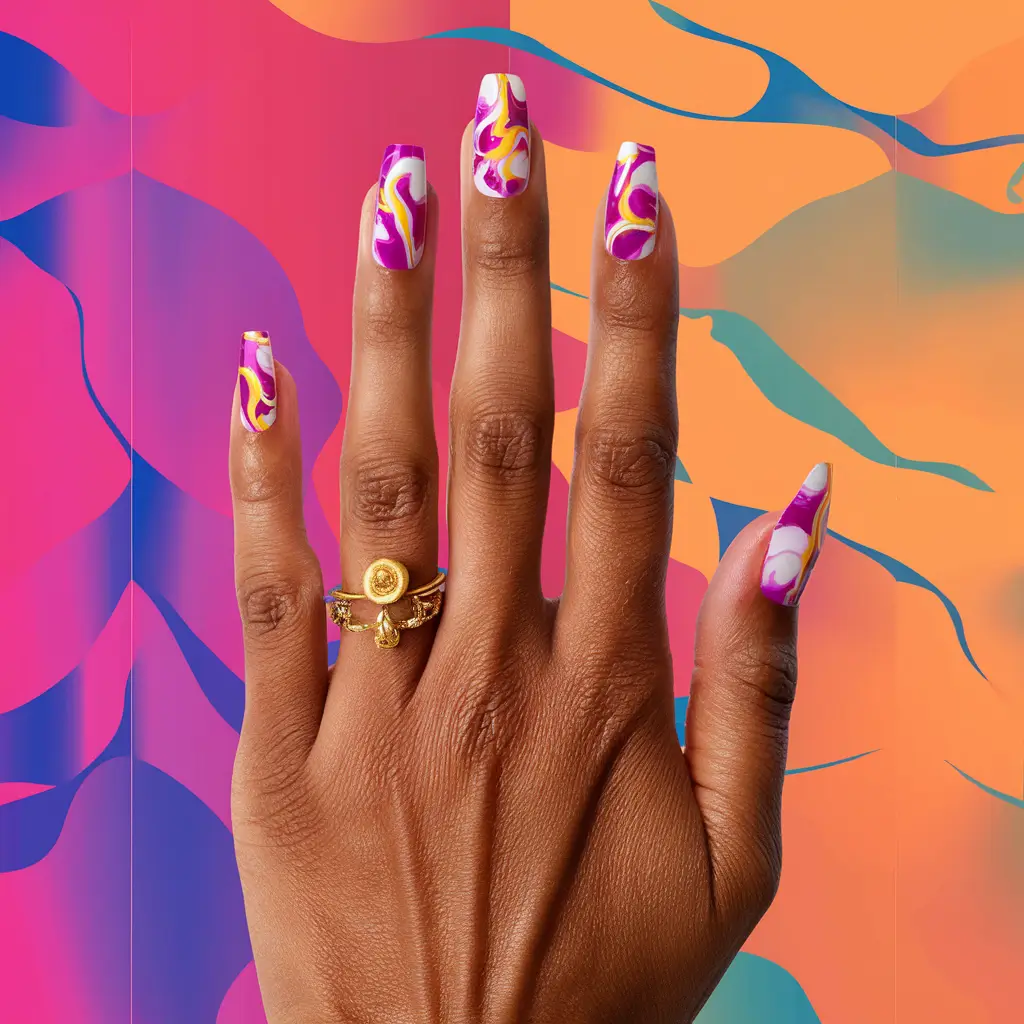
I love combining orchid and marble designs for a unique and stylish look. The beautiful hues of orchid flowers blend perfectly with the swirling patterns of marble.
To create this design, I start by painting vibrantly colored orchid-like petals. Then, I add touches of marbled swirls to give the nails a fascinating texture.
8: Orchid Print on Clear Base

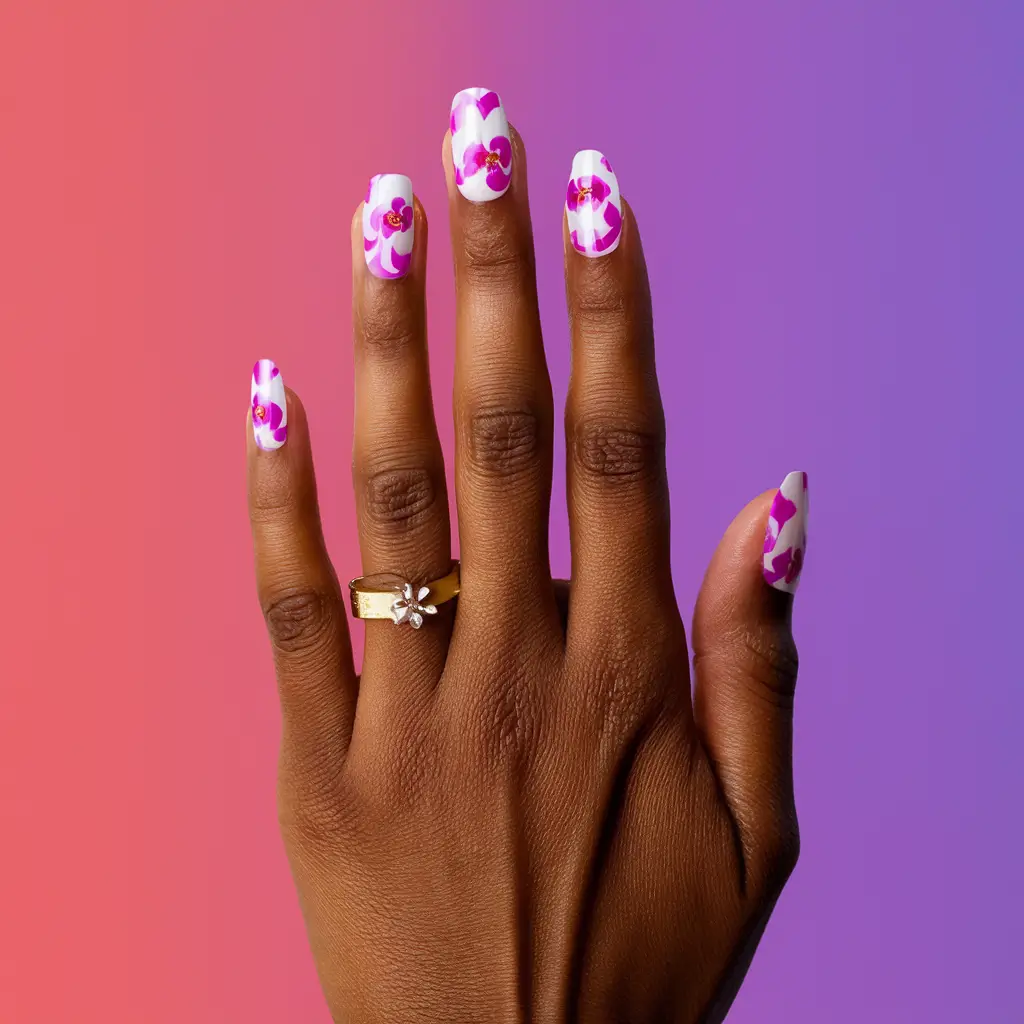
I love the sophisticated look of an orchid print on a clear base. This design shows off the beauty of the orchid flower while keeping the nails elegant.
I start by applying a clear polish. This creates a shiny base that contrasts beautifully with the orchid design.
I used vibrant shades like pink, purple, and white for the orchid print. This makes the flowers pop against the clear background.
I often use fine brushes or nail stickers to create precise flower details, which ensures the orchids look delicate and realistic.
9: Glossy Orchid Coffin Nails
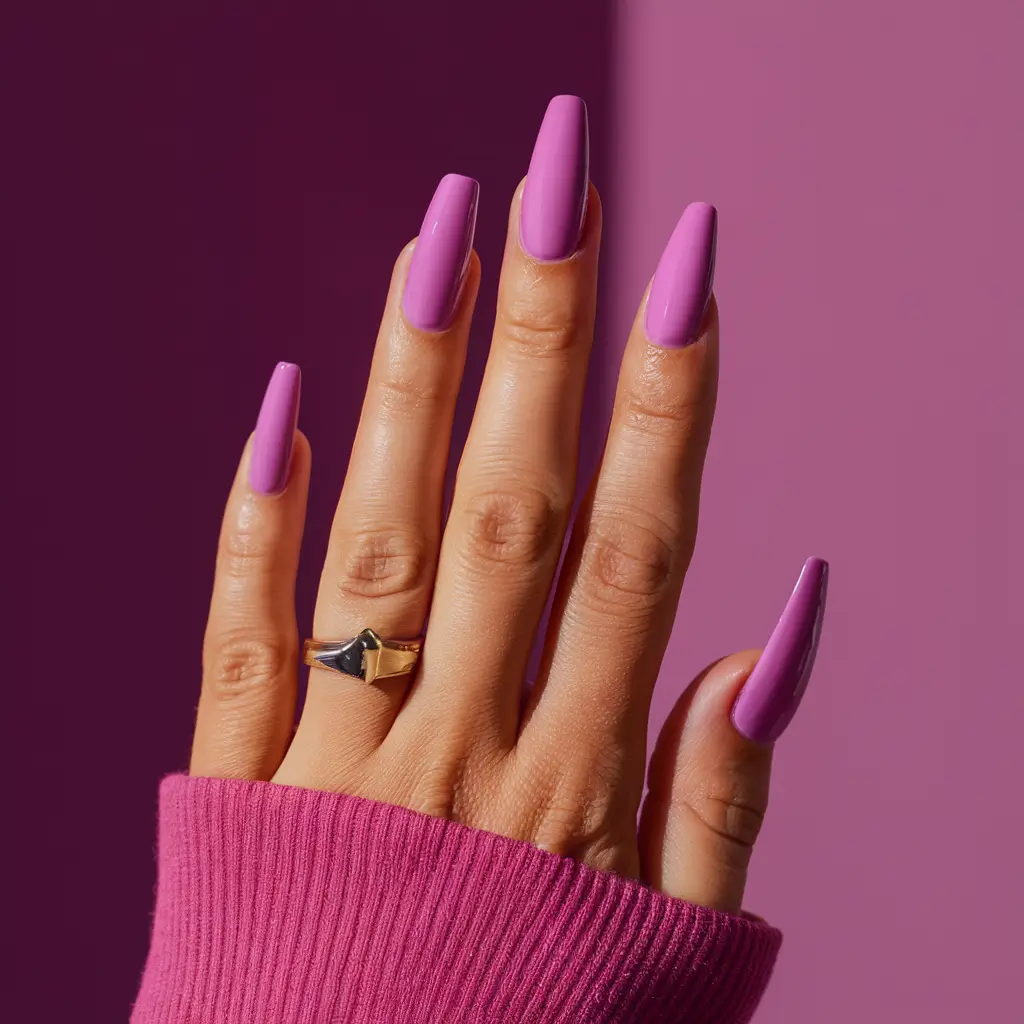
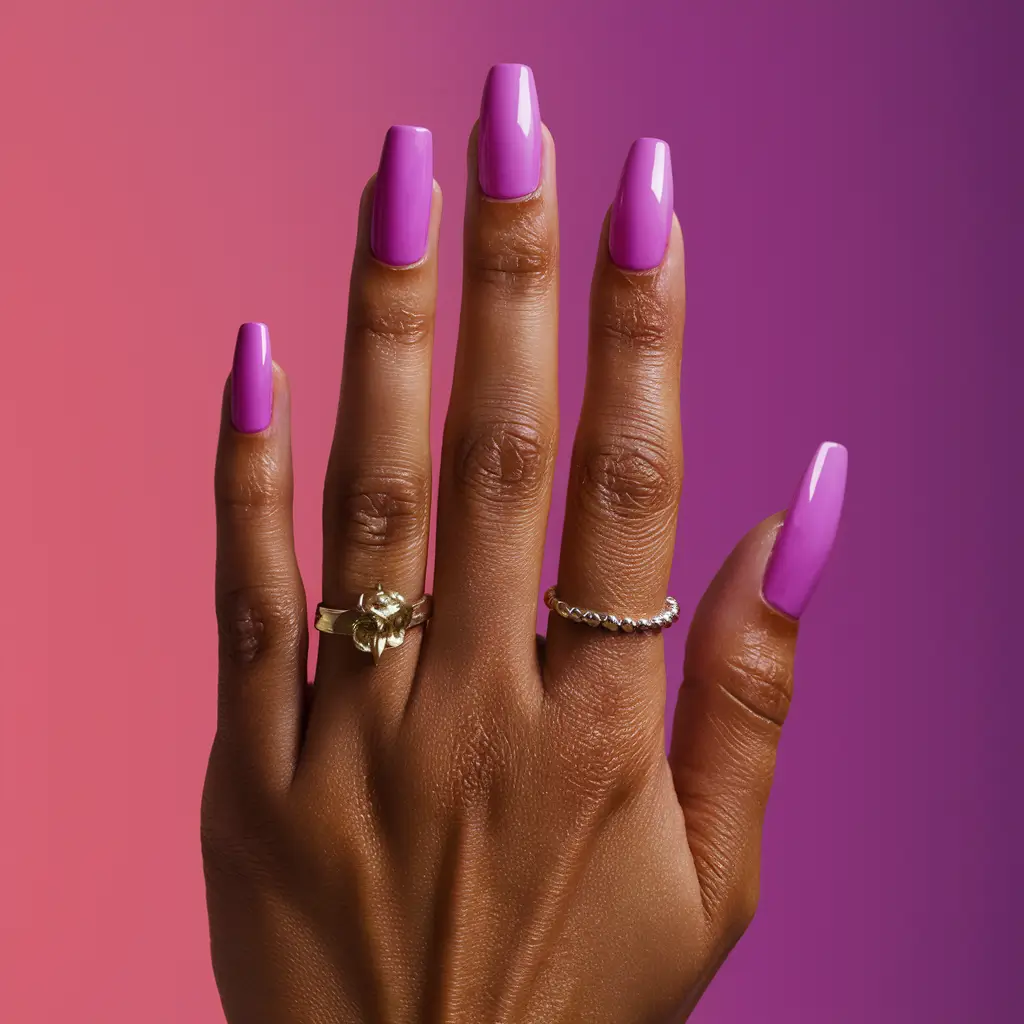
Glossy orchid coffin nails are a stunning choice for those looking to make a bold statement. The sleek, glossy finish elevates the vibrant orchid color, making the nails look polished and sophisticated.
The flat tip of coffin nails complements the length, adding an edgy touch to this stylish nail design.
10: Orchid with Glitter Ombre
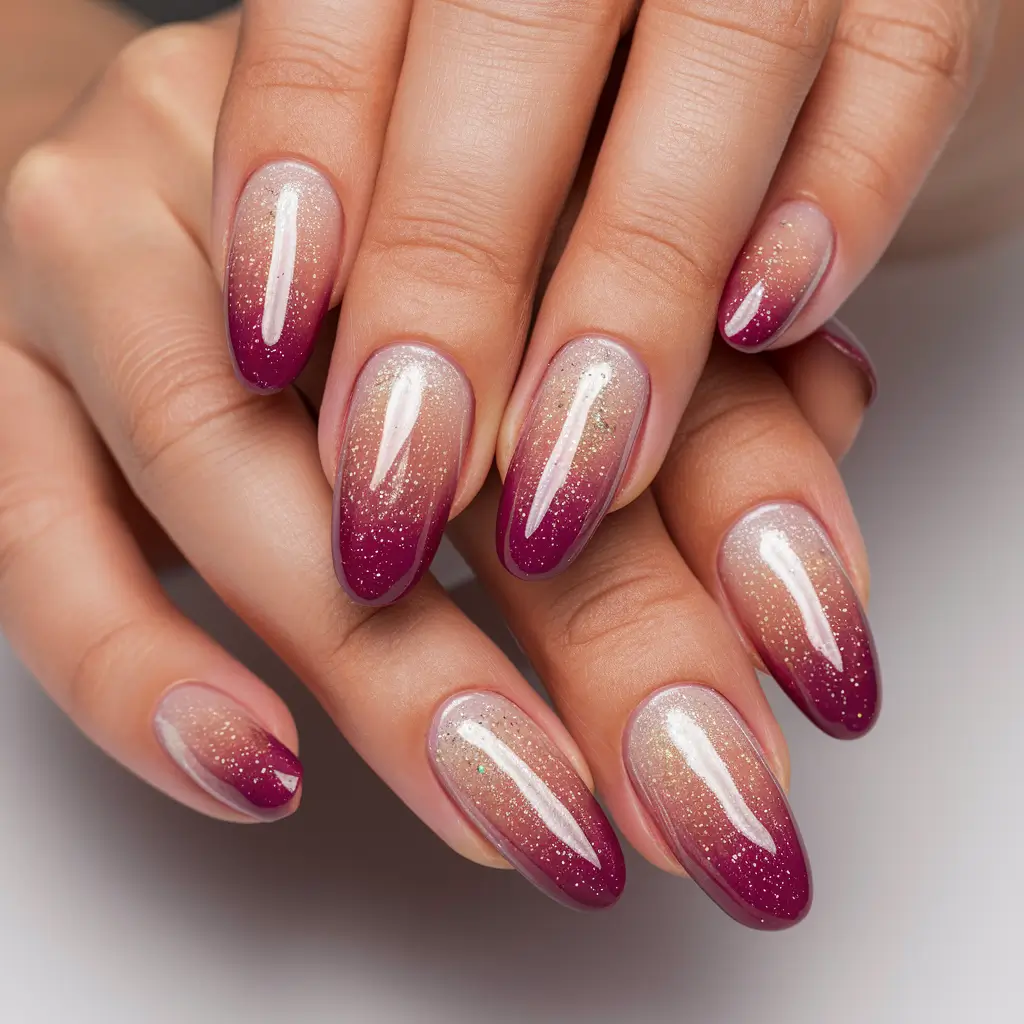
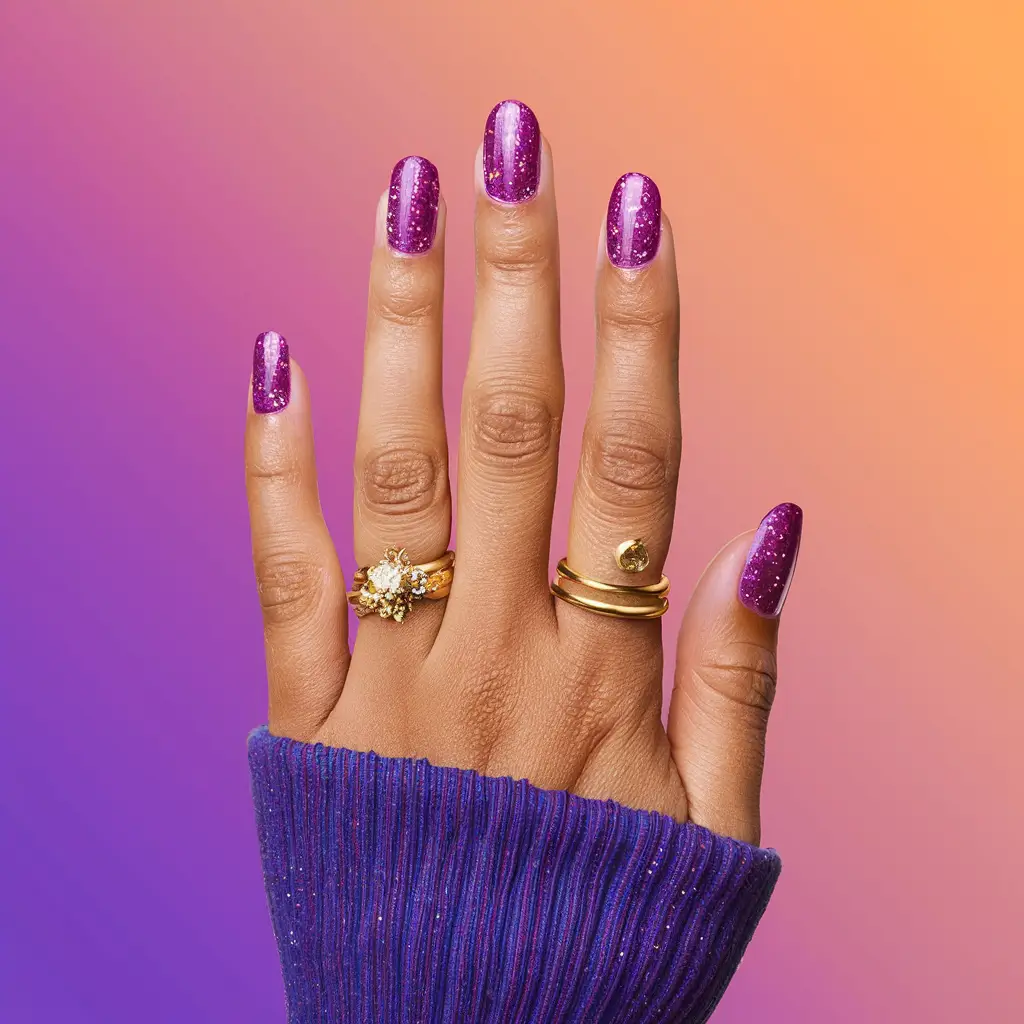
Orchid with Glitter Ombre nails combine the beauty of orchid flowers and the sparkle of glitter. This design starts with a base color inspired by orchid hues.
Next, sprinkle glitter from the tips toward the base, creating a shimmering gradient. This looks like a sparkly, eye-catching sparkle.
I love experimenting with different colors and glitters to find the perfect blend. It’s fun and adds a touch of glamour to any outfit. Try it for your next special event.
11: Intricate Orchid Vines
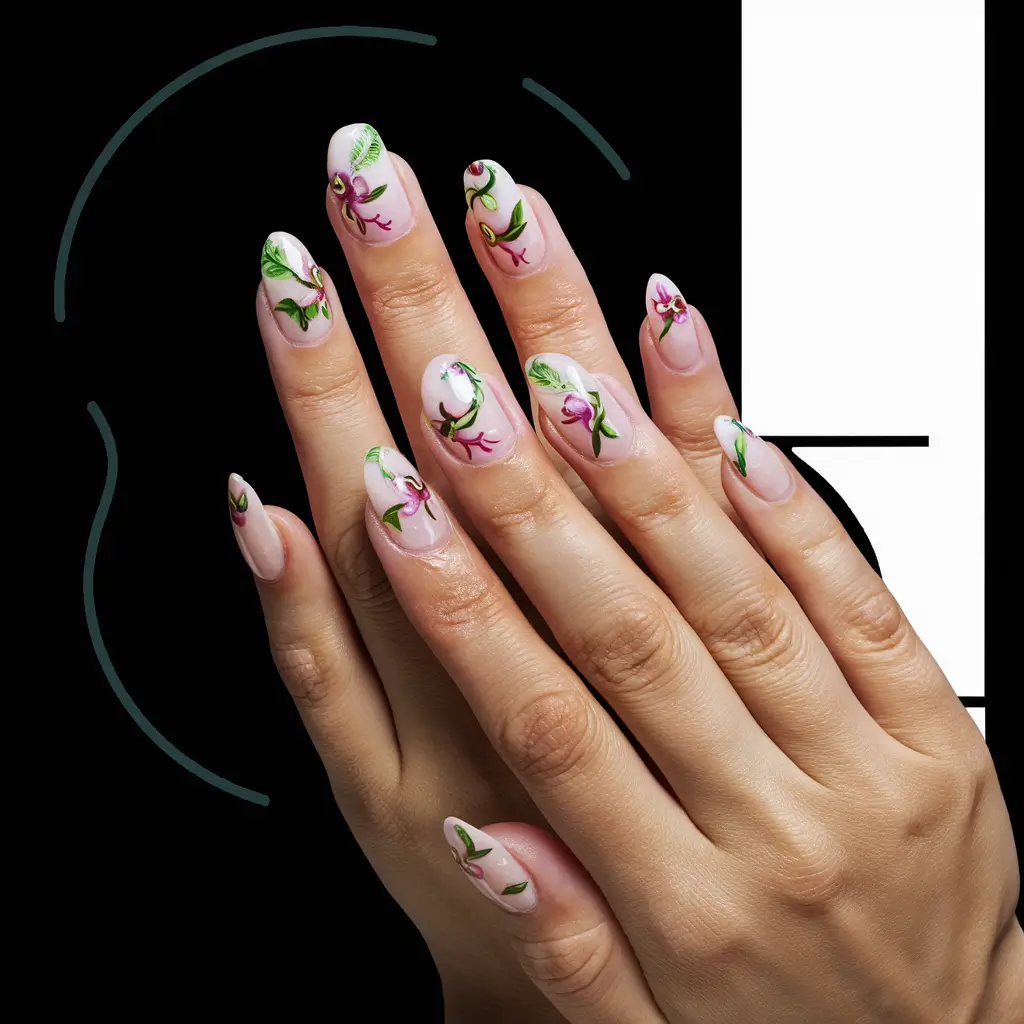

Intricate orchid vine designs bring a touch of nature to your nails. These designs mimic the twisting and curling vines of orchid plants.
I love how the vines can flow across multiple nails, creating a cohesive look. Even short nails can carry this style beautifully.
Using a fine brush helps achieve the delicate lines needed for this design.
12: Neon Orchid Highlights
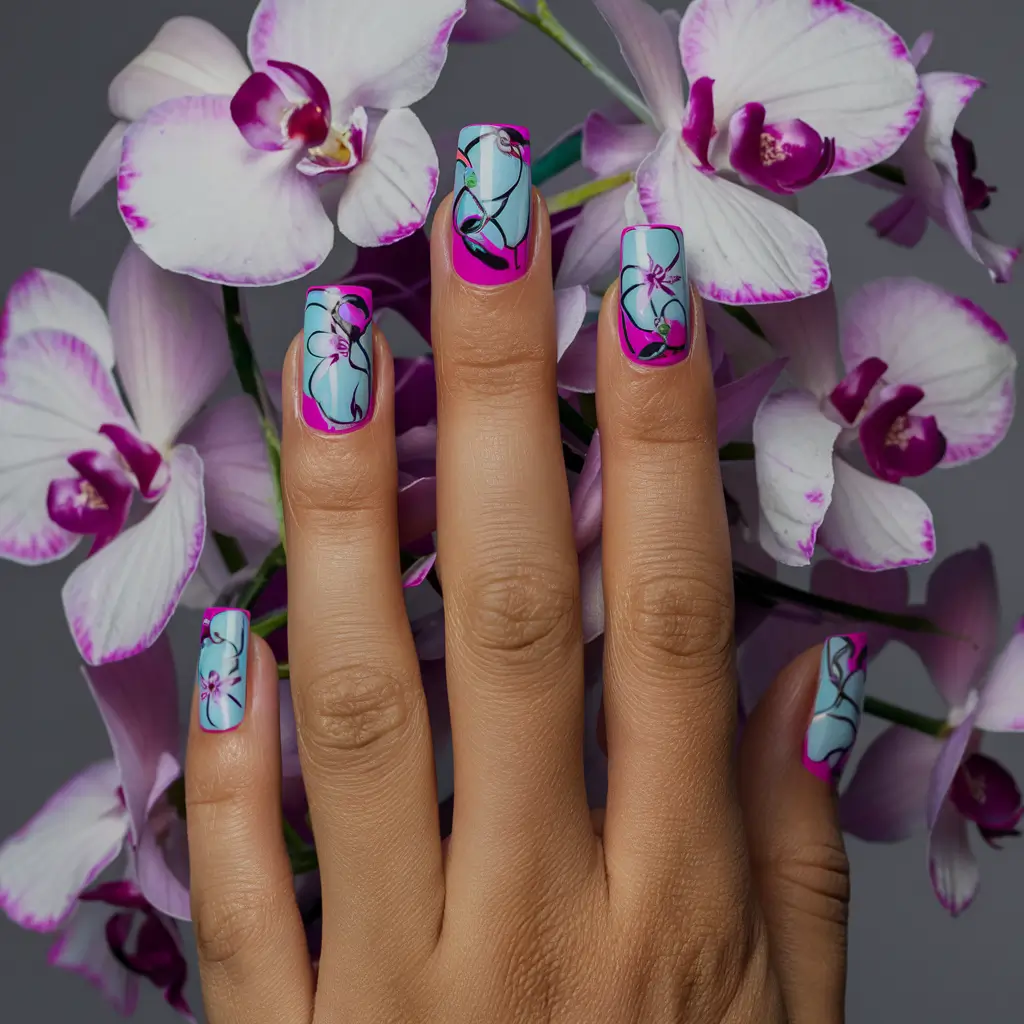
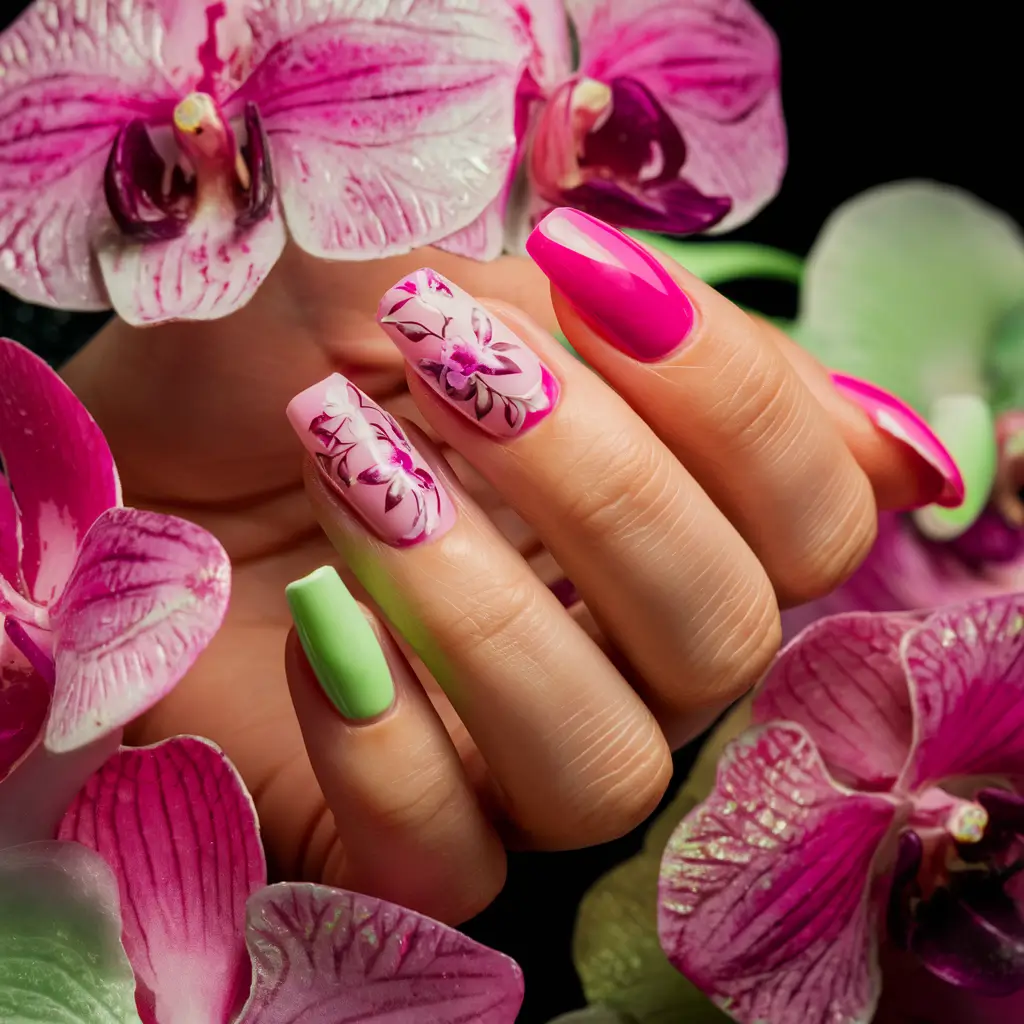
Neon orchid highlights add a vibrant twist to traditional orchid nail designs. I like how the neon colors pop, making a bold statement.
By combining neon shades with the soft elegance of orchid designs, I can create a standout look.
This mix of neon and orchid elements can be both playful and chic.
13: Orchid and Crystal Embellishments
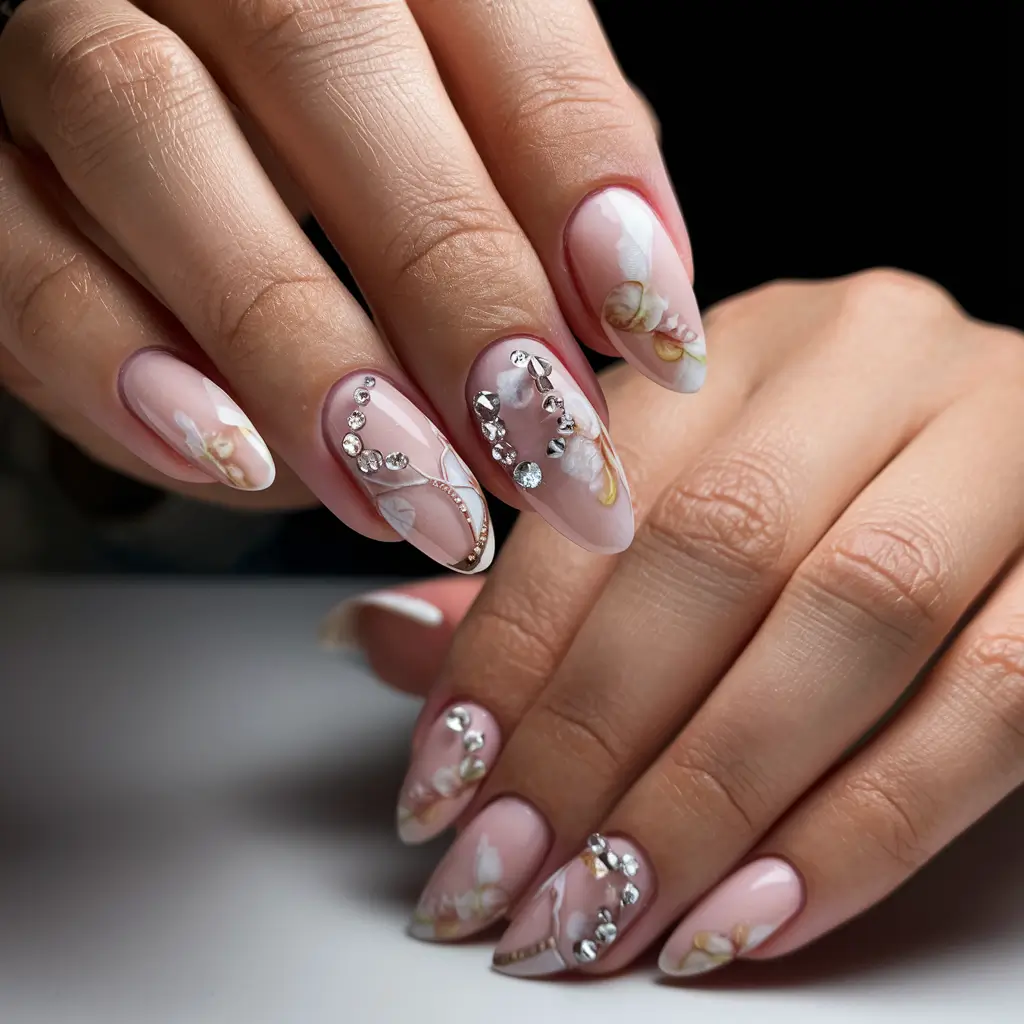
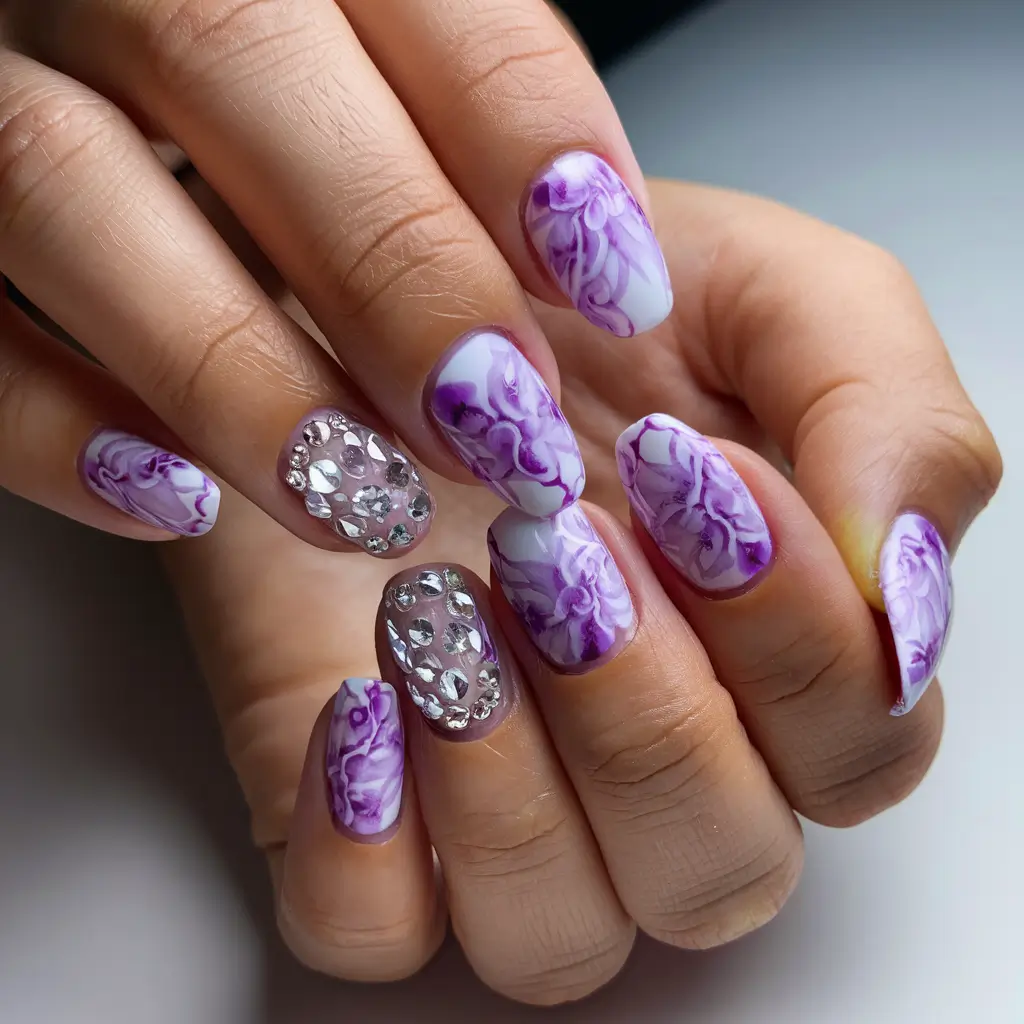
I love combining orchid designs with crystal embellishments. The contrast between the delicate floral patterns and the sparkle of crystals can make any manicure stand out. It’s a perfect way to add some glam.
My favorite approach is using small crystals on an accent nail alongside orchid designs. This combination looks chic and elegant.
14: Orchid and Pastel Swirls
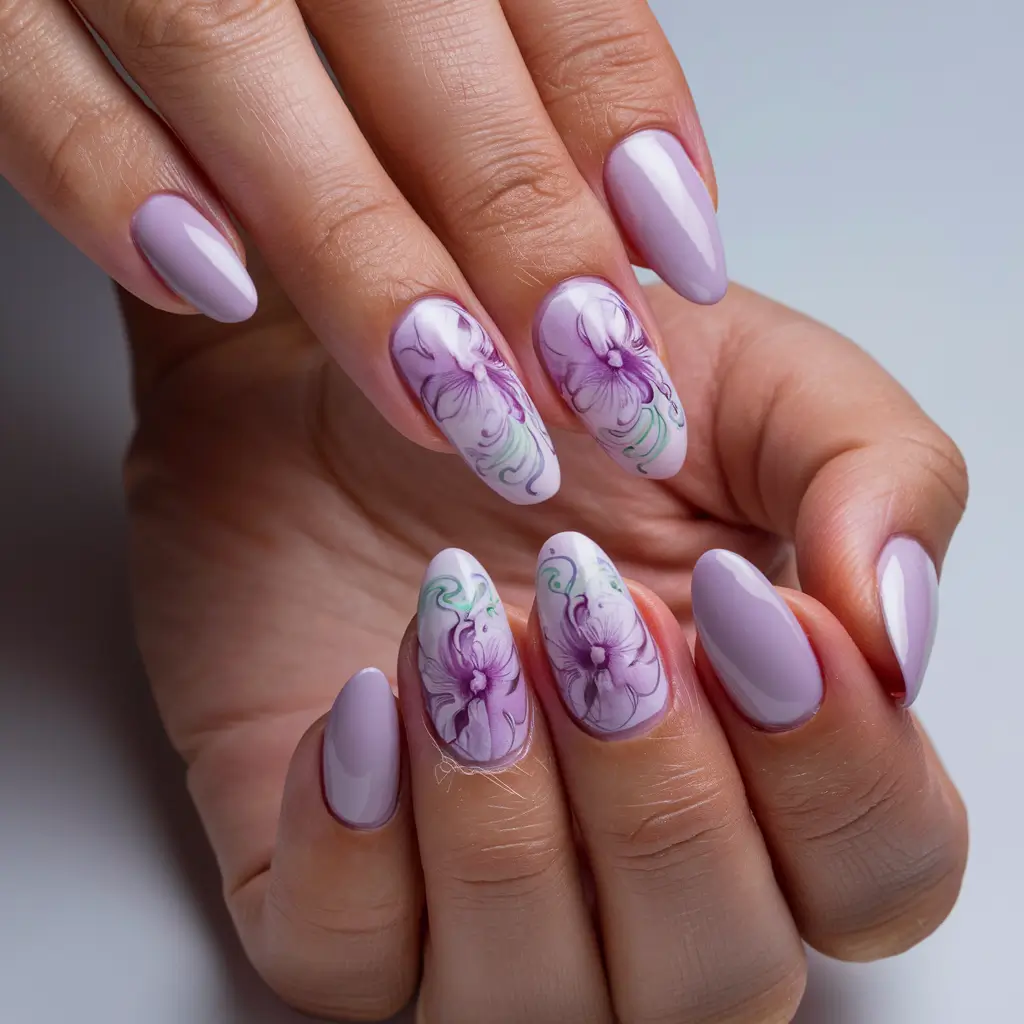
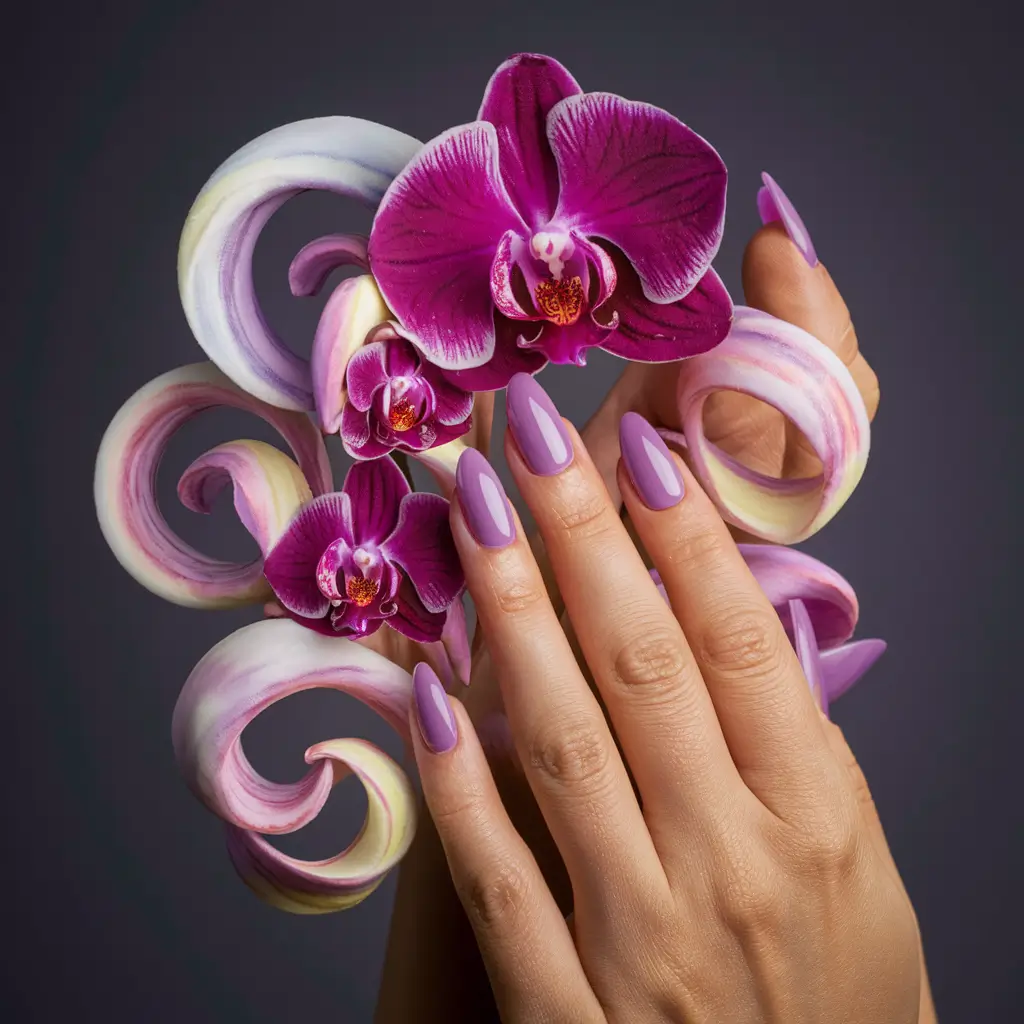
I love combining orchid designs with pastel swirls. The blend of soft, muted colors with the vibrant orchid purple is stunning.
These designs are perfect for anyone who wants a touch of elegance and whimsy. They bring together the beauty of orchids and the gentle tones of pastels.
15: Abstract Orchid Patterns
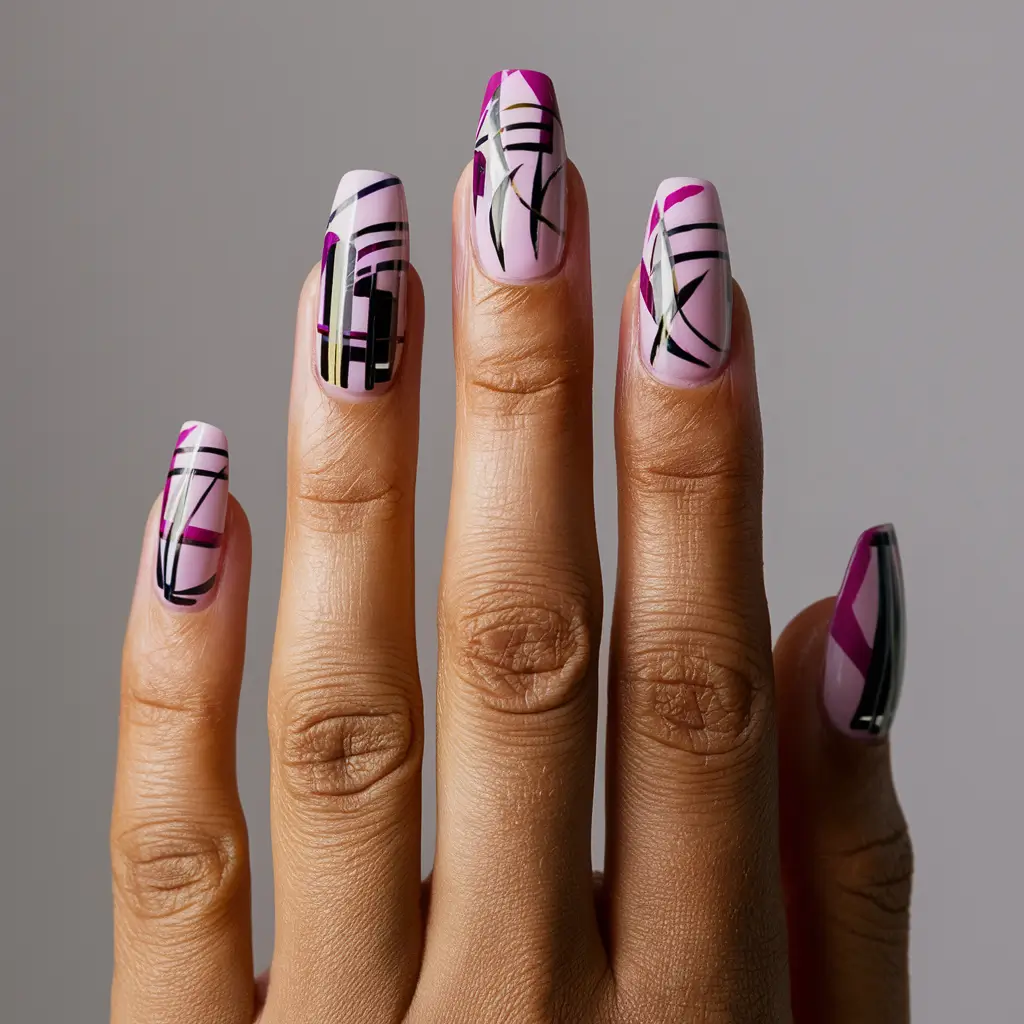
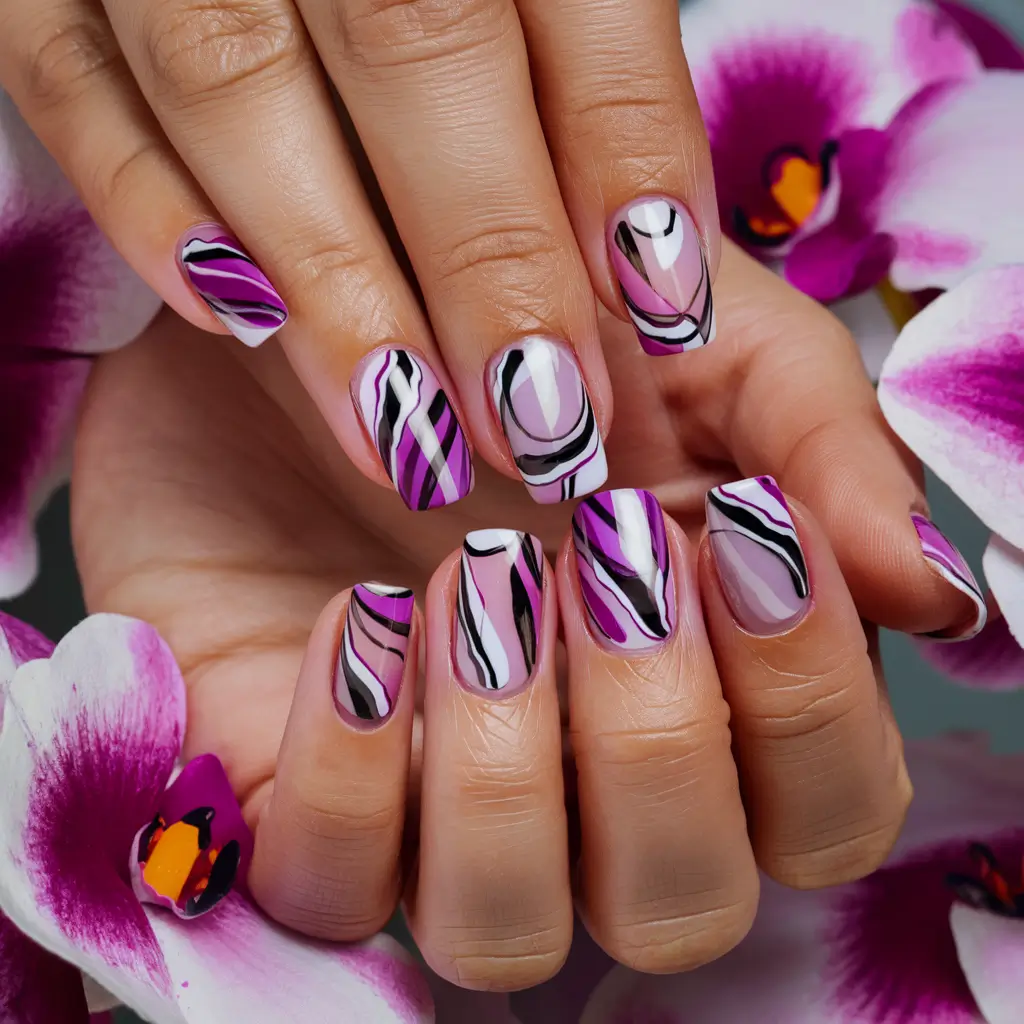
I love how abstract orchid patterns can transform nail art into something truly unique. These designs often break away from realistic floral depictions and instead imaginatively use the colors and shapes of orchids.
Using bold lines, unexpected color blocks, and geometric shapes, abstract patterns can make each nail stand out. They can be both striking and subtle with the right balance.
These patterns are perfect for those who want a modern twist on floral designs. Mixing traditional orchid hues like purples and pinks with abstract elements creates a stunning effect.
16: Orchid and Leopard Print
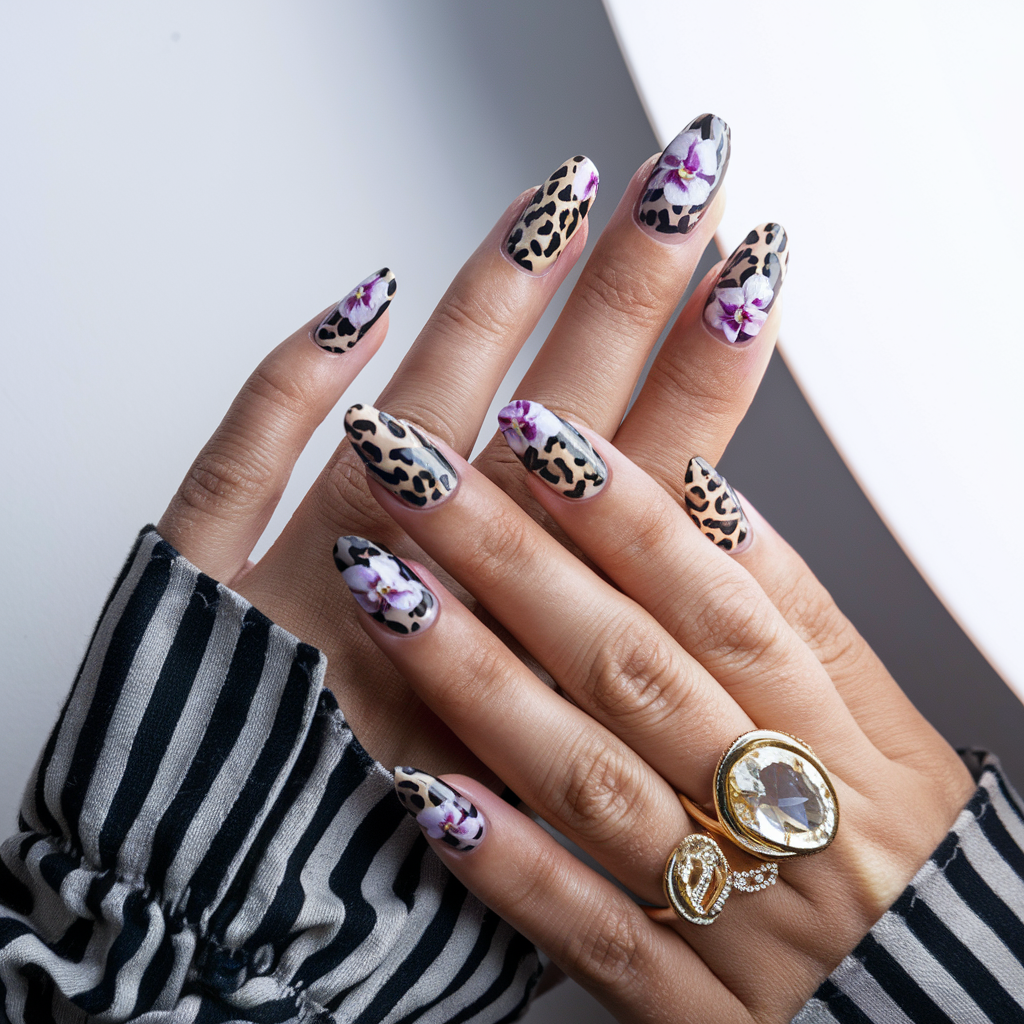
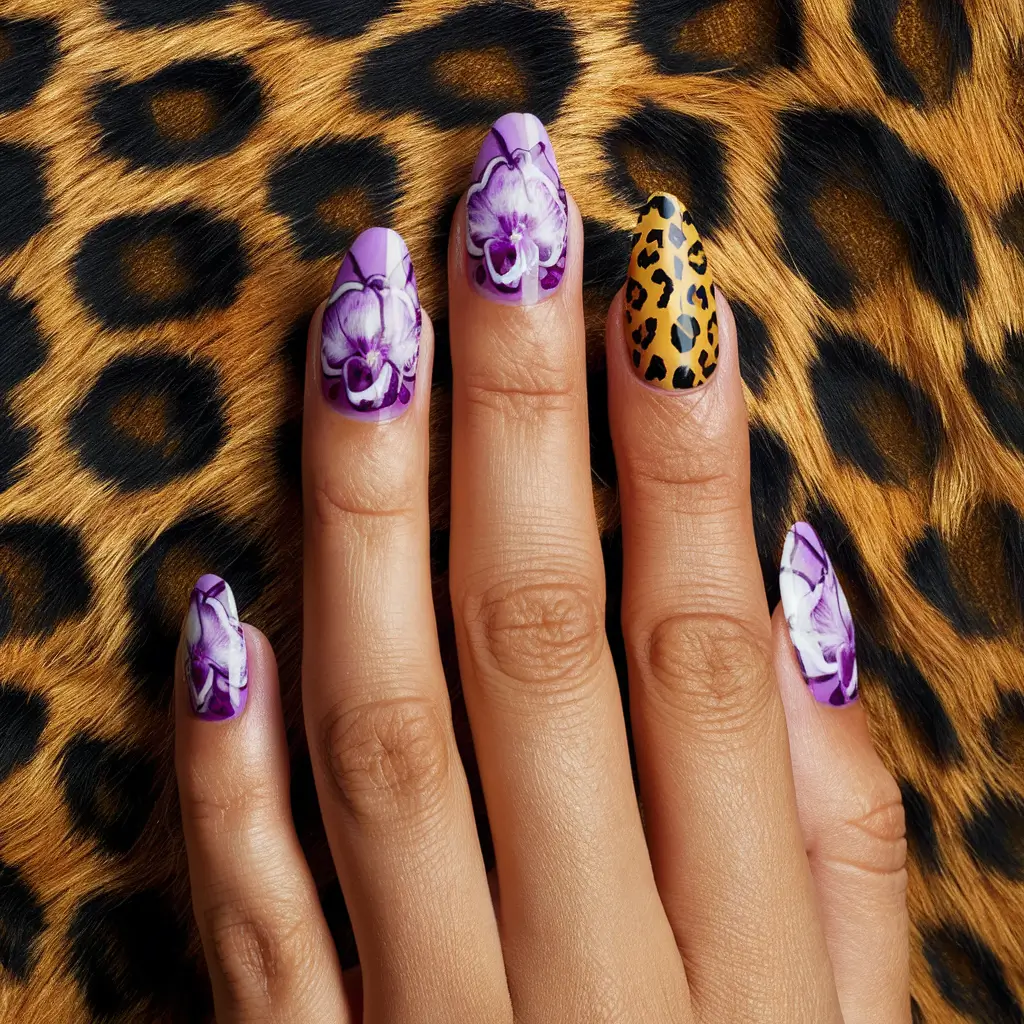
I love how orchid and leopard print can create a unique nail design. Combining the delicate beauty of orchid patterns with the boldness of leopard print makes for an exciting nail look.
This combo works well for different occasions, adding a touch of elegance and a bit of wild flair. The contrast is just perfect.
17: Orchid and Zebra Stripes
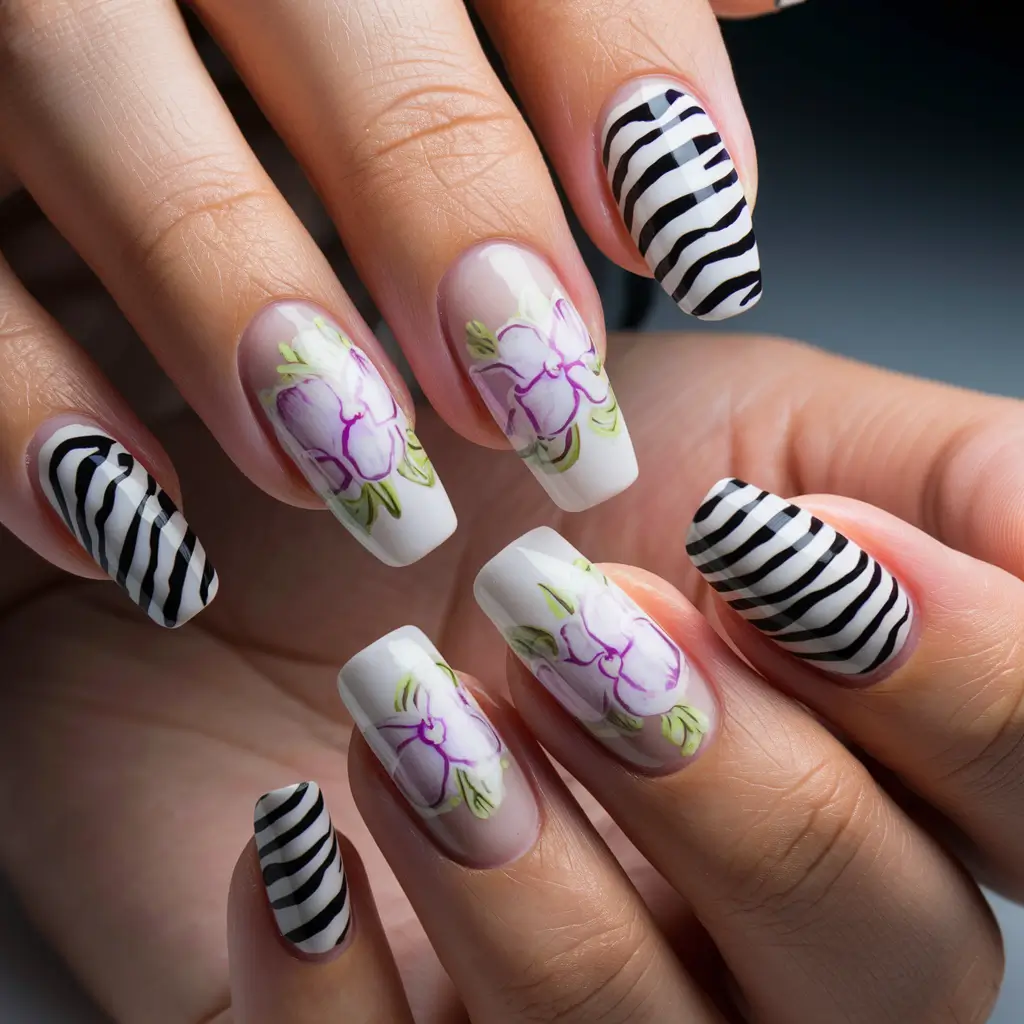
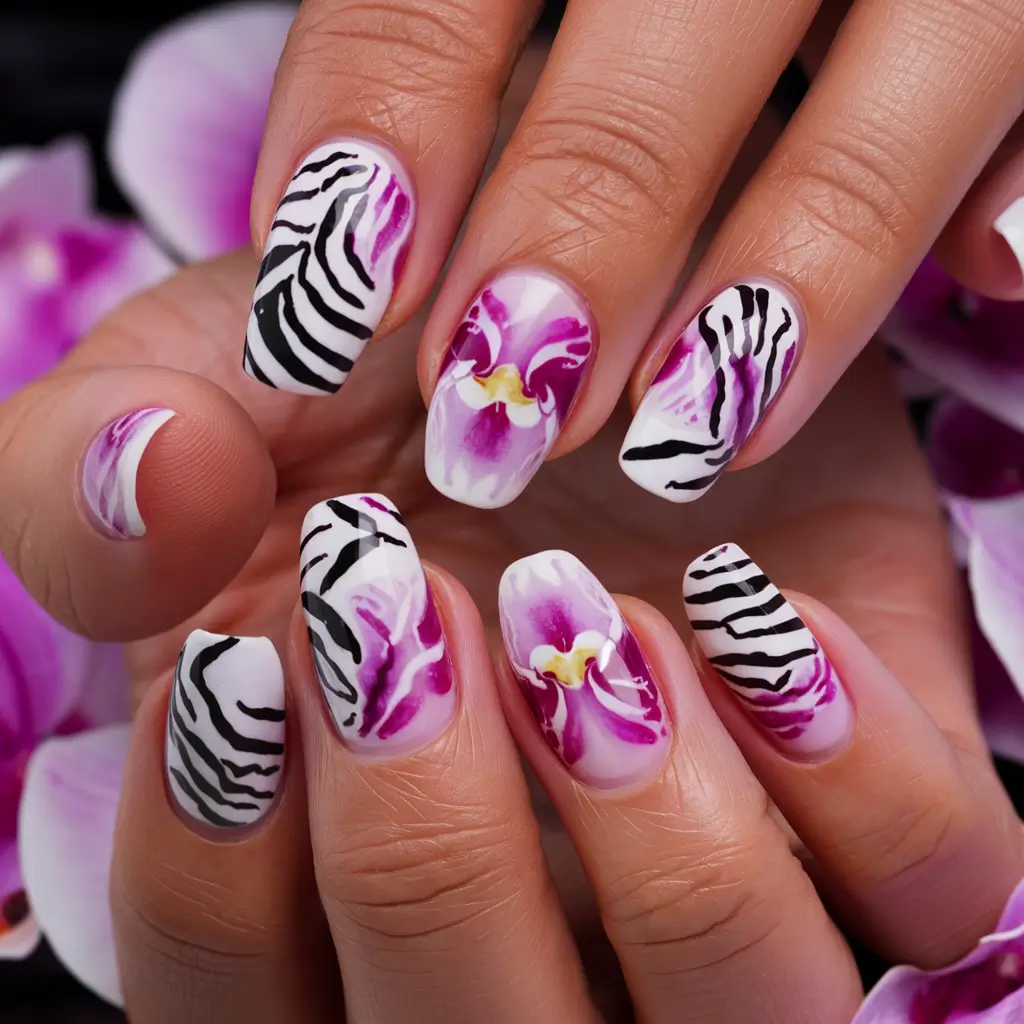
I love the combination of orchids and zebra stripes on nails. It blends the natural beauty of orchid petals with the wild patterns of zebra stripes.
This design is both bold and elegant. I start with a base of soft orchid colors, then add black and white zebra stripes for contrast.
Tools And Materials Required
Creating stunning Orchid Nail Designs requires the right tools and materials. Without them, achieving those intricate and beautiful designs can be difficult.
Below, we explore the essential tools and materials for perfect Orchid Nail Designs.
Nail Polish
High-quality nail polish is the foundation for any nail design. For Orchid Nail Designs, you will need a variety of colors. Choose polishes that are vibrant and durable. Here are some tips:
- Base Color: Select a base color that complements the orchid design.
- Accent Colors: Use shades of purple, pink, and white for the orchid petals.
- Quality: Opt for long-lasting, chip-resistant nail polish.
Here’s a quick checklist of must-have nail polish colors for Orchid Nail Designs:
| Color | Purpose |
|---|---|
| White | For petal highlights |
| Purple | Main orchid color |
| Green | For leaves and stems |

Nail Art Brush
The nail art brush is essential for detailed designs. Different brushes serve different purposes. Here are the key types:
- Detail Brush: For fine lines and intricate details.
- Striping Brush: For long, straight lines.
- Flat Brush: For larger areas and gradients.
Quality brushes ensure precise and clean designs. Invest in a set of brushes with various sizes and shapes. Clean your brushes regularly to maintain their quality. Here’s a quick guide on brush maintenance:
- Wipe off excess polish with a paper towel.
- Dip the brush in nail polish remover.
- Gently wipe again until clean.
Acrylic Paint
Acrylic paint provides more control and a wider range of colors for your designs. It is often used for intricate details in Orchid Nail Designs.
Here’s why acrylic paint is beneficial:
- Versatility: Mix colors to create custom shades.
- Control: Easier to handle for fine details.
- Durability: Long-lasting and less prone to chipping.
Mix your colors using a palette before applying them to your nails. Seal the design with a top coat to ensure longevity.
Here’s a simple list of essential acrylic paint colors for Orchid Nail Designs:
| Color | Purpose |
|---|---|
| White | Petal highlights |
| Purple | Main orchid color |
| Pink | Accent and shading |
Dotting Tool
The dotting tool is crucial for creating dots and small details. It comes in various sizes to suit different design needs. Here’s how to use it:
- Dip the tool in nail polish or acrylic paint.
- Dot gently on the nail to create small circles.
- Vary the pressure to create different dot sizes.
A set of dotting tools usually includes multiple sizes. Experiment with different sizes to create unique designs. Clean the tool after each use to prevent color mixing. Here’s a quick guide on dotting tool maintenance:
- Wipe off excess paint with a paper towel.
- Dip the tool in nail polish remover.
- Wipe again until clean.
Top Coat
The top coat is the final step in your Orchid Nail Designs. It seals the design and adds a glossy finish. Choose a high-quality top coat for the best results. Here’s why a top coat is essential:
- Protection: Prevents chipping and peeling.
- Gloss: Adds a shiny finish to your design.
- Longevity: Extends the life of your manicure.
Apply the top coat in thin, even layers. Allow it to dry completely to avoid smudging. Here’s a quick checklist for applying a top coat:
- Ensure your design is dry.
- Apply a thin layer of top coat.
- Let it dry completely.
Step-by-step Guide To Creating Orchid Nail Designs
Orchid Nail Designs are the perfect way to add a touch of elegance and nature to your nails. This step-by-step guide will help you create stunning orchid nail designs that will turn heads. From preparation to the final touches, follow these simple steps to achieve salon-quality nails at home.
Preparation
Proper preparation is crucial for long-lasting and beautiful orchid nail designs. Here’s what you need to do:
- Gather Your Supplies: You’ll need nail polish, nail art brushes, dotting tools, a base coat, a top coat, and a nail file.
- Clean Your Nails: Use a nail polish remover to remove any old polish. Make sure your nails are clean and dry.
- File and Shape: Shape your nails with a nail file. A rounded or almond shape works best for orchid designs.
- Buff Your Nails: Gently buff the surface of your nails to remove ridges and create a smooth base.
- Push-Back Cuticles: Use a cuticle pusher to push back your cuticles, which will help create more space for your design.
Once your nails are prepped, you can move on to the next step.
Base Coat
Applying a base coat is essential for protecting your nails and ensuring your design lasts longer:
- Choose a Base Coat: Select a clear or colored base coat. A light pink or nude base works well for orchid designs.
- Apply Evenly: Apply the base coat in thin, even layers. Avoid thick layers to prevent bubbles.
- Let It Dry: Allow the base coat to dry completely before moving on to the next step. This usually takes about 2-3 minutes.
The base coat creates a smooth canvas for your orchid design and helps in preventing nail staining.
Drawing The Orchid Design
Now it’s time to draw the beautiful orchid design:
- Choose Your Colors: Select colors for the orchid petals and center. Common choices include purple, pink, and white.
- Start with Petals: Use a fine nail art brush to draw the orchid petals. Begin with the outer petals and work your way in.
- Layer the Colors: Add different shades to create depth. Start with a lighter color and add darker shades for shadows.
- Draw the Center: Use a dotting tool to create the orchid’s center. A small yellow or white dot works well.
If you’re unsure, practice on a piece of paper. This will help you get the design right before you draw it on your nails.
Adding Details And Highlights
Details and highlights bring your orchid design to life:
| Step | Action |
|---|---|
| 1 | Add Veins: Use a fine brush to add veins to the petals. This adds realism to your design. |
| 2 | Highlight Petals: Use a lighter shade to highlight the edges of the petals. This creates a 3D effect. |
| 3 | Outline the Design: A thin black or dark purple line around the petals can make your design pop. |
Take your time with this step. Details and highlights make a big difference in the final look.
Finishing Touches
Finishing touches ensure your orchid nail design looks polished and lasts longer:
- Apply a Top Coat: Seal your design with a clear top coat. This adds shine and protects your artwork.
- Clean the Edges: Use a small brush dipped in nail polish remover to clean any polish around your nails.
- Let It Dry: Allow your nails to dry completely. This usually takes about 5-10 minutes.
Once dry, your stunning orchid nail design is complete. Enjoy your beautiful nails!
Tips For Creating The Perfect Orchid Nail Design
Orchid nail designs are a stunning way to add elegance and beauty to your nails. These designs can range from simple to intricate, making them suitable for any occasion. Here are some essential tips for creating the perfect orchid nail design, ensuring your nails look fabulous every time.
Practice Makes Perfect
Creating the perfect orchid nail design requires practice. Here are some tips to help improve your skills:
- Start Simple: Begin with basic designs and gradually try more complex patterns.
- Use Tutorials: Follow online tutorials to learn new techniques and get inspired.
- Practice on Tips: Use practice tips or old nails to try out designs before applying them to your nails.
Dedicate time each week to practice. Consistency helps improve your technique and confidence.
| Tip | Description |
|---|---|
| Start Simple | Begin with basic designs to build your skills. |
| Use Tutorials | Follow step-by-step guides to learn new methods. |
| Practice on Tips | Use practice nails to perfect your design. |
Use High-quality Materials
High-quality materials are essential for stunning orchid nail designs. Here’s why:
- Better Finish: High-quality polishes provide a smoother and shinier finish.
- Long-Lasting: Quality products last longer, reducing the need for frequent touch-ups.
- Healthier Nails: Good products are less likely to damage your nails.
Investing in high-quality materials pays off. Choose reputable brands known for their consistency and quality.
- Nail Polish: Opt for brands like OPI, Essie, and Sally Hansen.
- Nail Brushes: Use fine-tipped brushes for detailed designs.
- Top Coat: Always finish with a good top coat to seal and protect your design.
Experiment With Colors
Experimenting with colors can make your orchid nail designs unique and eye-catching. Here are some tips:
- Color Combinations: Try combining different shades of purple with other colors.
- Accent Nails: Use a contrasting color on one or two nails for an accent.
- Ombre Effect: Blend different shades for a beautiful ombre look.
Don’t be afraid to try new color combinations. Use a color wheel to find complementary colors that work well together.
| Technique | Description |
|---|---|
| Color Combinations | Mix different shades of purple with other colors. |
| Accent Nails | Use a different color on one or two nails. |
| Ombre Effect | Blend shades for a gradient look. |
Don’t Rush The Process
Patience is key to a perfect orchid nail design. Here’s why you shouldn’t rush:
- Dry Time: Allow each layer of polish to dry completely before adding the next.
- Detail Work: Take your time with detailed designs to avoid mistakes.
- Application: Apply polish in thin, even layers for a smooth finish.
Rushing can lead to smudges and imperfections. Set aside enough time for your nail art to ensure the best results.
- Dry Time: Wait at least 5 minutes between coats.
- Detail Work: Use a steady hand and take breaks if needed.
- Application: Thin layers dry faster and look better.
Maintenance And Removal Of Orchid Nail Designs
Orchid Nail Designs are stunning and popular. The right maintenance and removal techniques ensure they stay beautiful and your nails remain healthy. Follow these tips to keep your Orchid Nail Designs looking fresh and safely remove them when needed.
Avoid Harsh Chemicals
Using harsh chemicals can damage your Orchid Nail Designs and natural nails. Avoiding these substances is important to maintaining the beauty and health of your nails.
- Avoid Acetone: Acetone is a strong solvent that can weaken your nails and strip away the design. Look for acetone-free nail polish removers.
- Stay Away from Household Cleaners: Many household cleaners contain chemicals that can erode your nail design. Wear gloves while cleaning to protect your nails.
- Choose Gentle Products: Use nail care products free from sulfates, parabens, and other harsh ingredients.
Consider using a table to compare harsh chemicals with gentle alternatives:
| Harsh Chemicals | Gentle Alternatives |
|---|---|
| Acetone | Acetone-free remover |
| Bleach | Vinegar |
| Ammonia | Baking soda |
Moisturize Your Nails
Keeping your nails moisturized is essential for maintaining the integrity of your Orchid Nail Designs and the health of your natural nails. Dry nails are more prone to breaking and chipping.
Here are some ways to keep your nails moisturized:
- Use Cuticle Oil: Apply cuticle oil daily to nourish your nails and cuticles. This helps prevent dryness and keeps your nails flexible.
- Hand Cream: Choose a hand cream that is rich in moisture. Apply it after washing your hands to lock in hydration.
- Hydrating Nail Treatments: Look for nail treatments that specifically target hydration. Products containing ingredients like hyaluronic acid are effective.
For an easy-to-follow routine:
- Apply cuticle oil before bed.
- Use hand cream after washing hands.
- Incorporate hydrating nail treatments weekly.
Use Proper Removal Techniques
Removing your Orchid Nail Designs safely is crucial to avoid damaging your natural nails. Improper removal can lead to nail thinning and breakage.
Follow these steps for safe removal:
- Soak Nails: Soak your nails in warm, soapy water for 10-15 minutes to soften the nail polish.
- Use a Gentle Remover: Use an acetone-free nail polish remover to lift the design from your nails gently.
- Avoid Scraping: Do not scrape or peel off the nail design. This can damage the top layers of your natural nails.
It’s also beneficial to give your nails a break between designs. This allows your nails to breathe and recover from any potential damage.
Proper maintenance and removal of your Orchid Nail Designs ensure your nails remain healthy and beautiful. Following these tips will help preserve the longevity of your designs and protect your natural nails.
Frequently Asked Questions
What Nail Design Is Trending?
Minimalist nail designs, pastel colors, and abstract patterns are trending. Negative space and geometric shapes are also popular.
How To Do A Simple Flower Design On Nails?
Start with a base coat. Apply a light nail polish color. Use a dotting tool to create flower petals. Add a dot in the center. Finish with a top coat.
What Type Of Nail Designing Tool Is Used For Picking Up And Placing Decals On Nails?
A dotting tool or wax pencil is commonly used for picking up and placing decals on nails.
What Do You Need For Nail Art?
For nail art, you need nail polish, a base coat, a top coat, nail brushes, dotting tools, and nail stickers.
Conclusion
Orchid nail designs are a stunning choice for any occasion. They offer elegance and a touch of nature. Experiment with different shades and patterns to find your perfect look. Share your unique orchid nail creations with friends and inspire others.


