15+ Fruit Nail Design Ideas for a Fresh and Fun Look
Fruit nail designs are a fun and vibrant way to add a touch of summer to your manicure.
These colorful and creative designs can range from simple patterns to detailed art, allowing for endless customization and personal expression.
Why should you consider fruit nail designs for your next manicure?
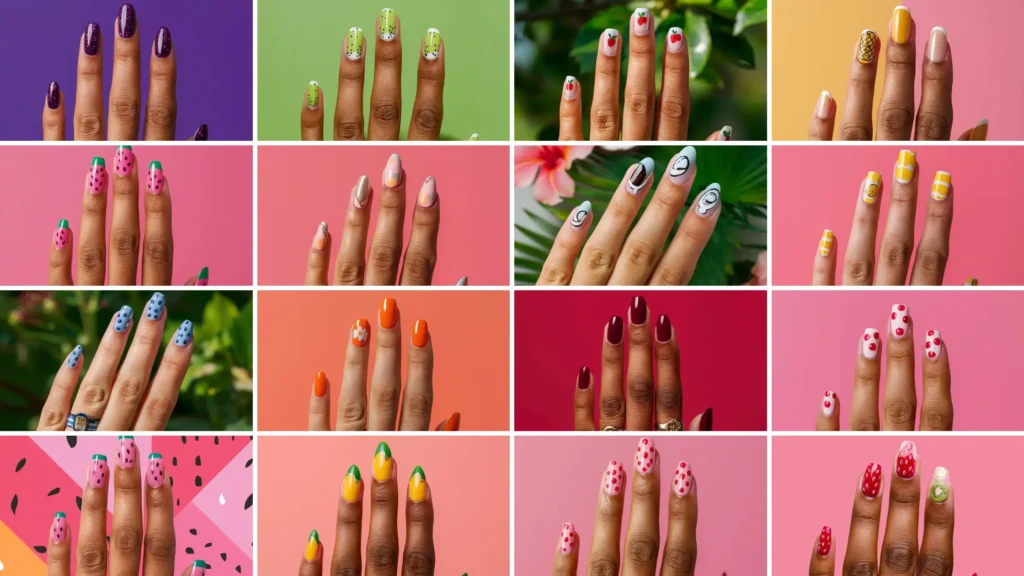
They bring a playful and eye-catching element to your look, making your nails stand out in a unique way. Various designs match your style with fruits like watermelons, cherries, and strawberries.
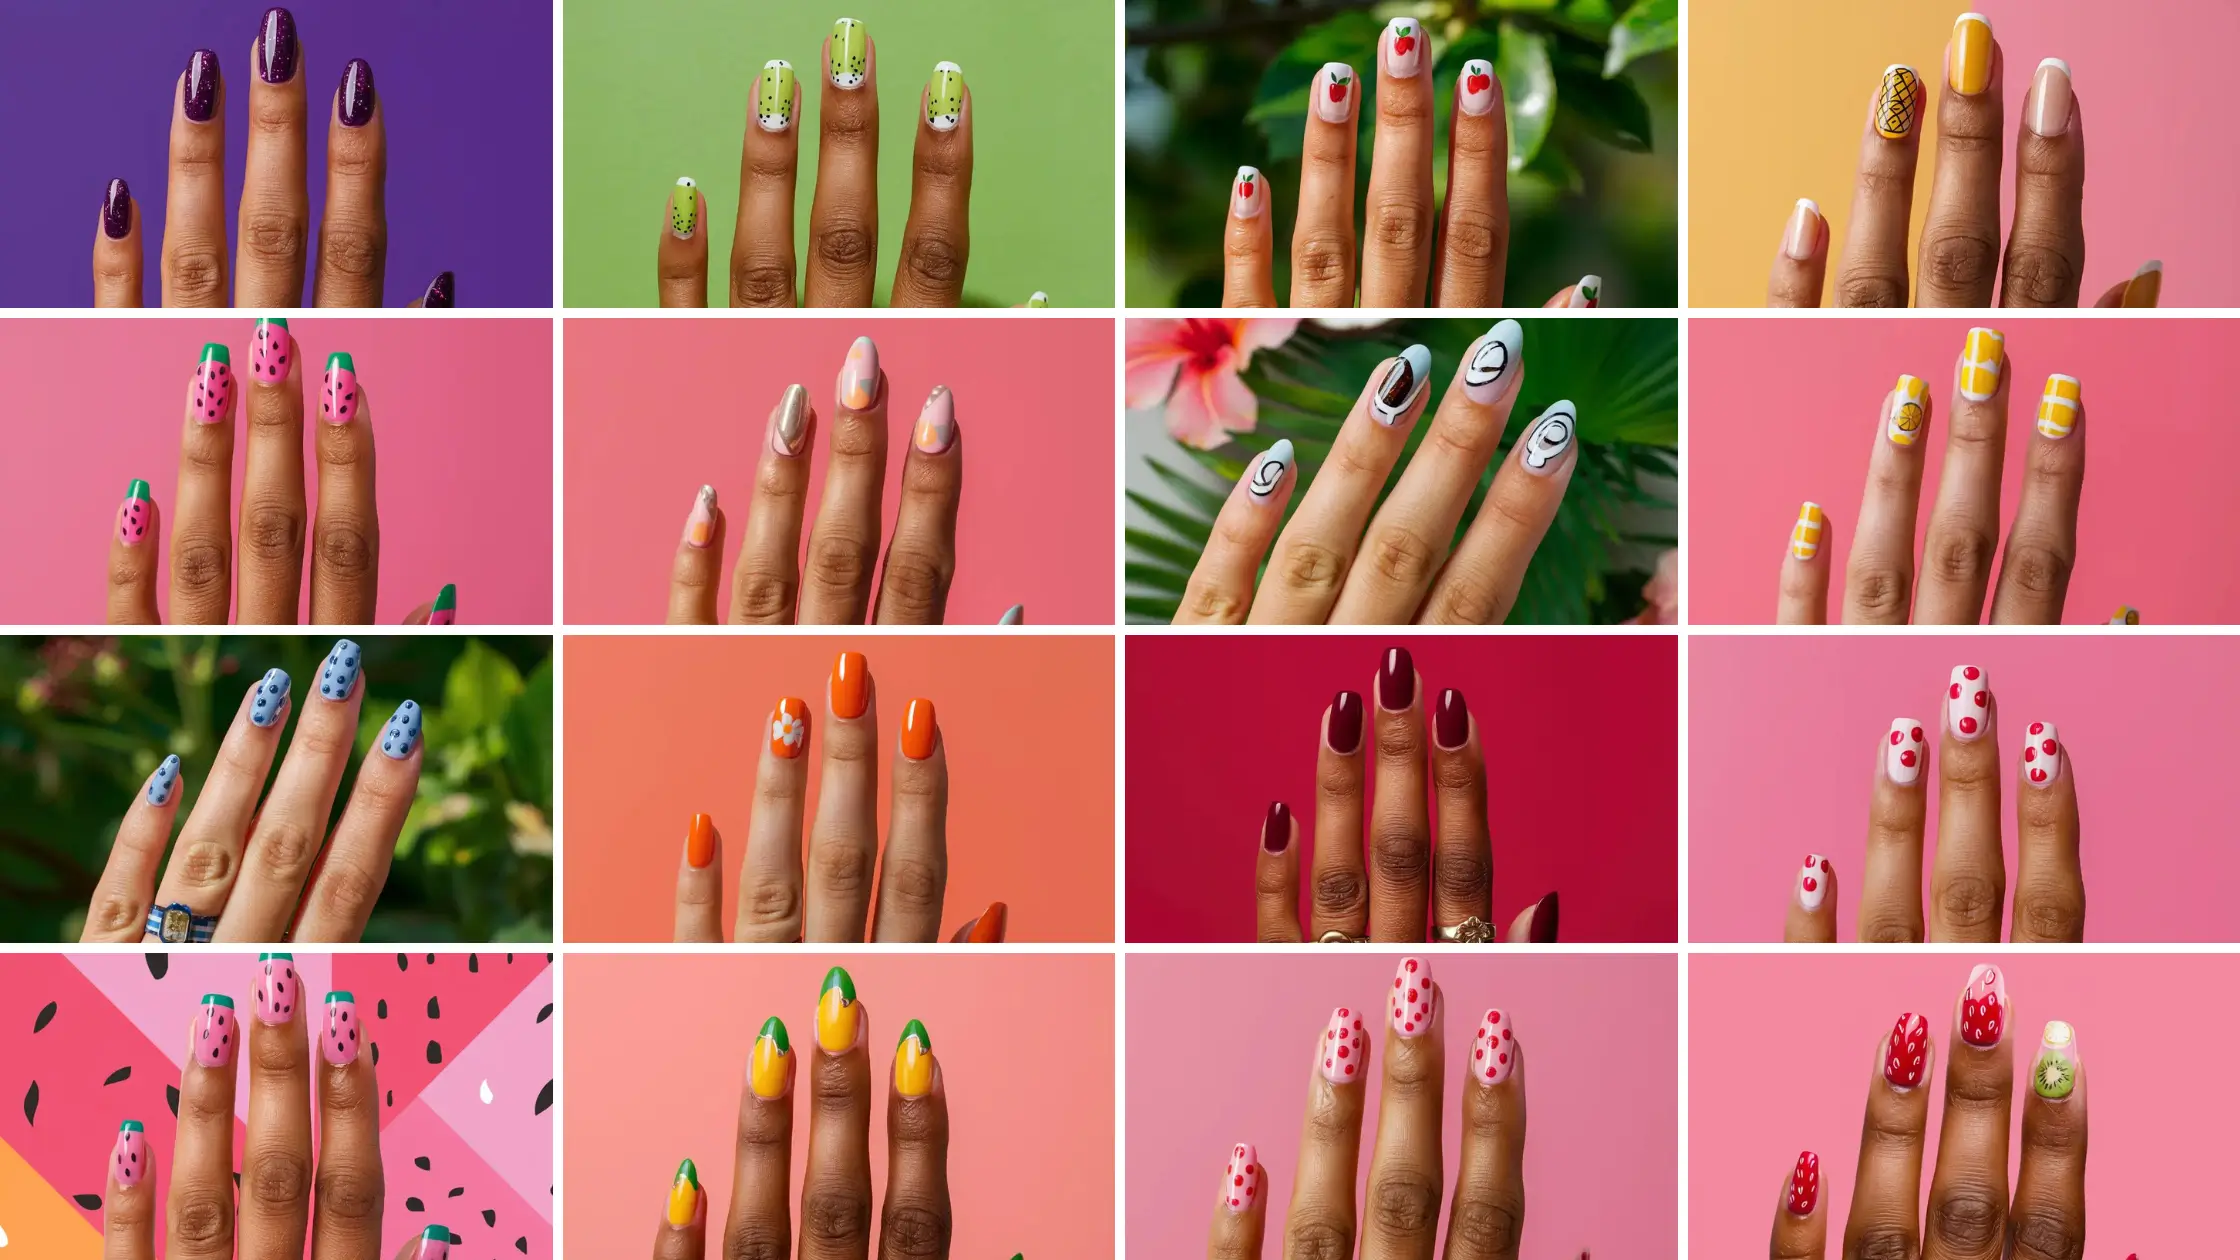
1: Cherry Delight

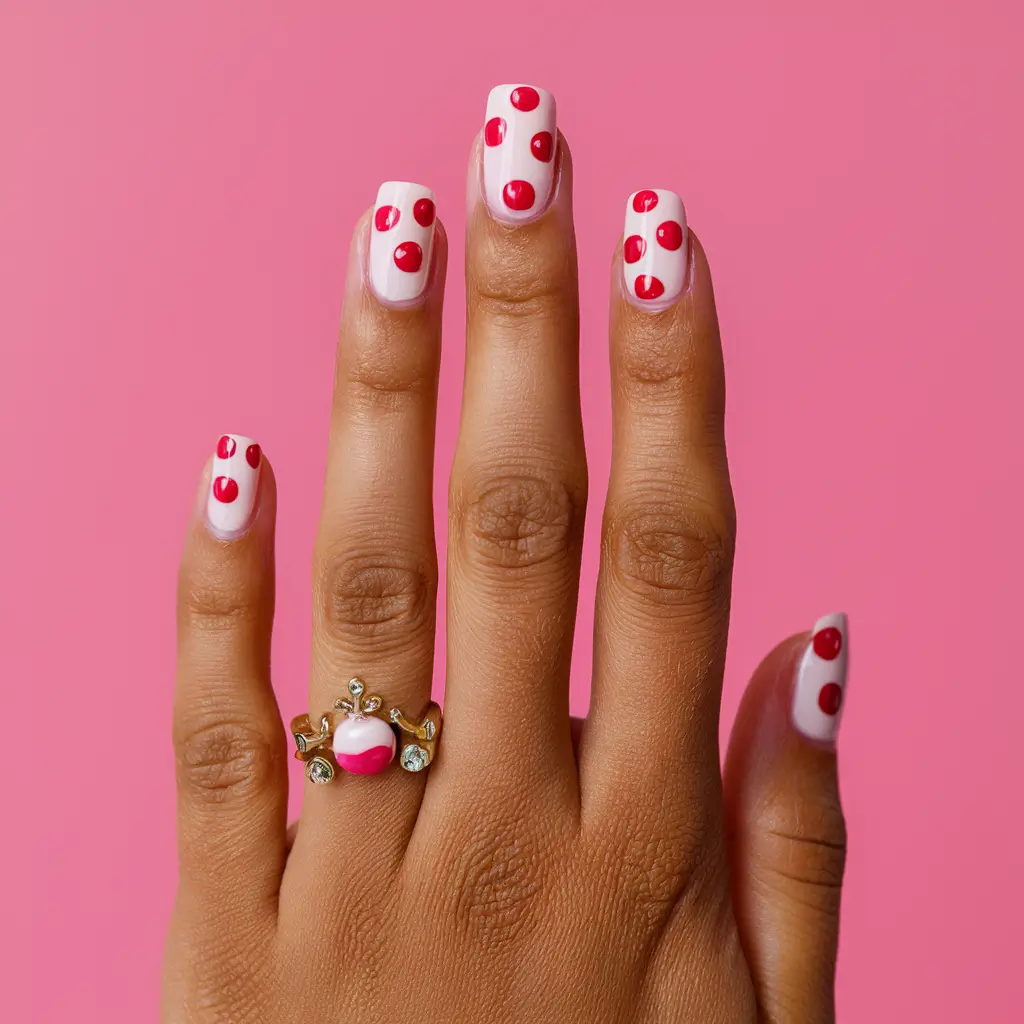
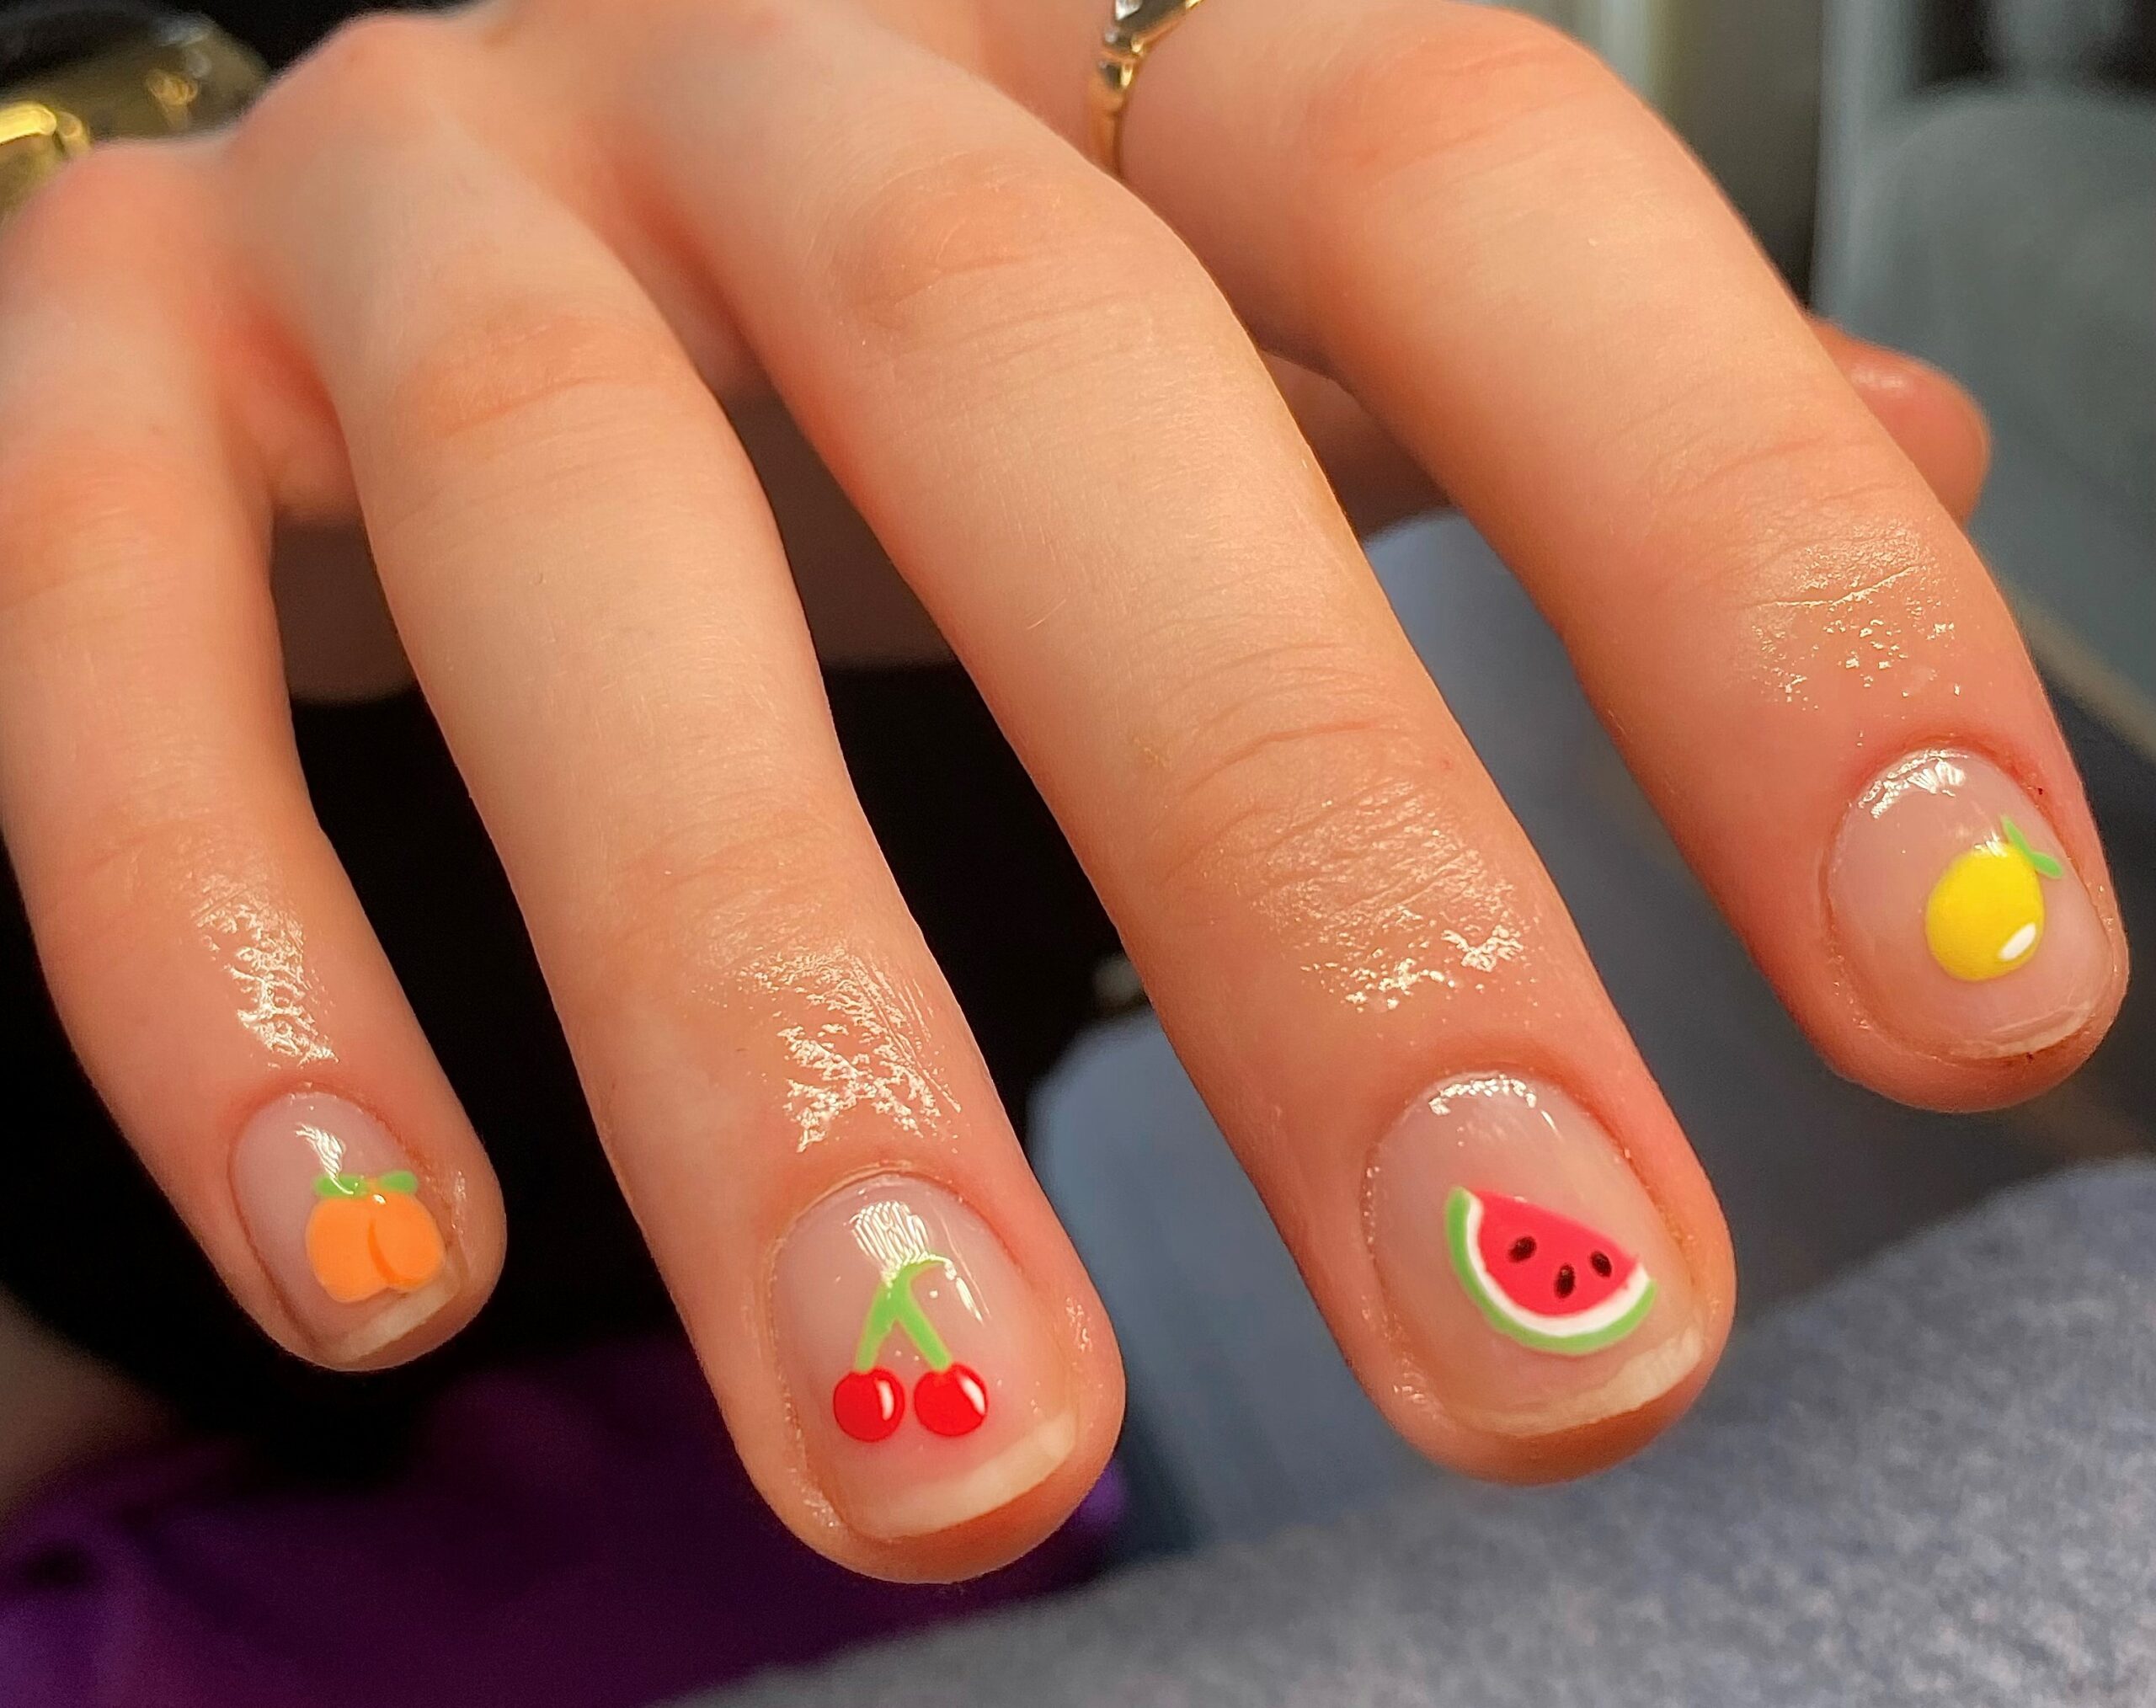
Cherry nail designs are bright and fun, perfect for summer. Each nail can feature delicate cherry patterns, making it stand out.
For a twist, add 3D cherry embellishments to mimic real cherries. These cute and creative designs offer a fresh look for any occasion.
2: Lemon Zest

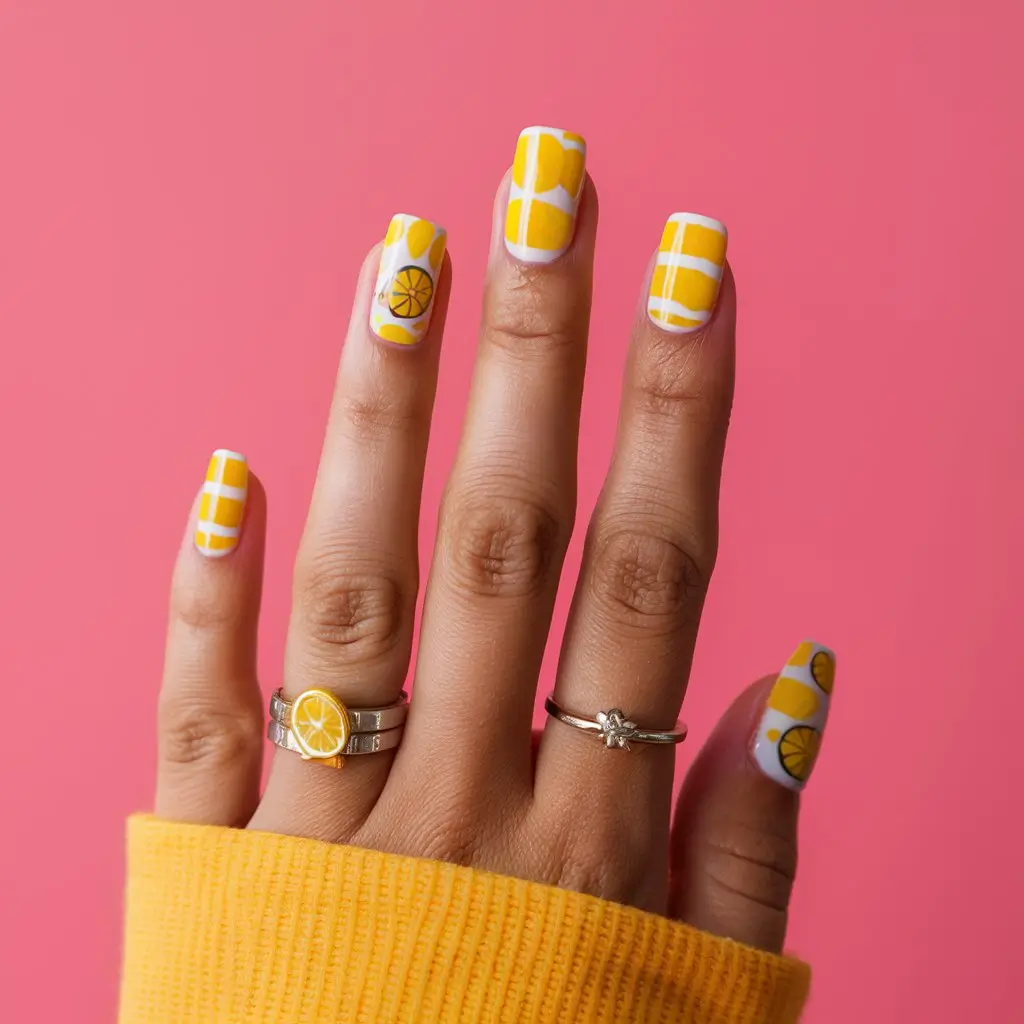
I love lemon zest nail designs because they add a fresh, vibrant touch to any look. These designs often feature bright yellow colors and playful lemon fruit patterns.
Short nails can be painted with vivid lemon fruits. Accent nails with two-toned yellow strips separated by thin white lines create a chic finish.
Lemon zest nails are perfect for summer with their sunny, cheerful vibe. They bring energy to my nails and make them stand out in any crowd.
3: Pineapple Punch
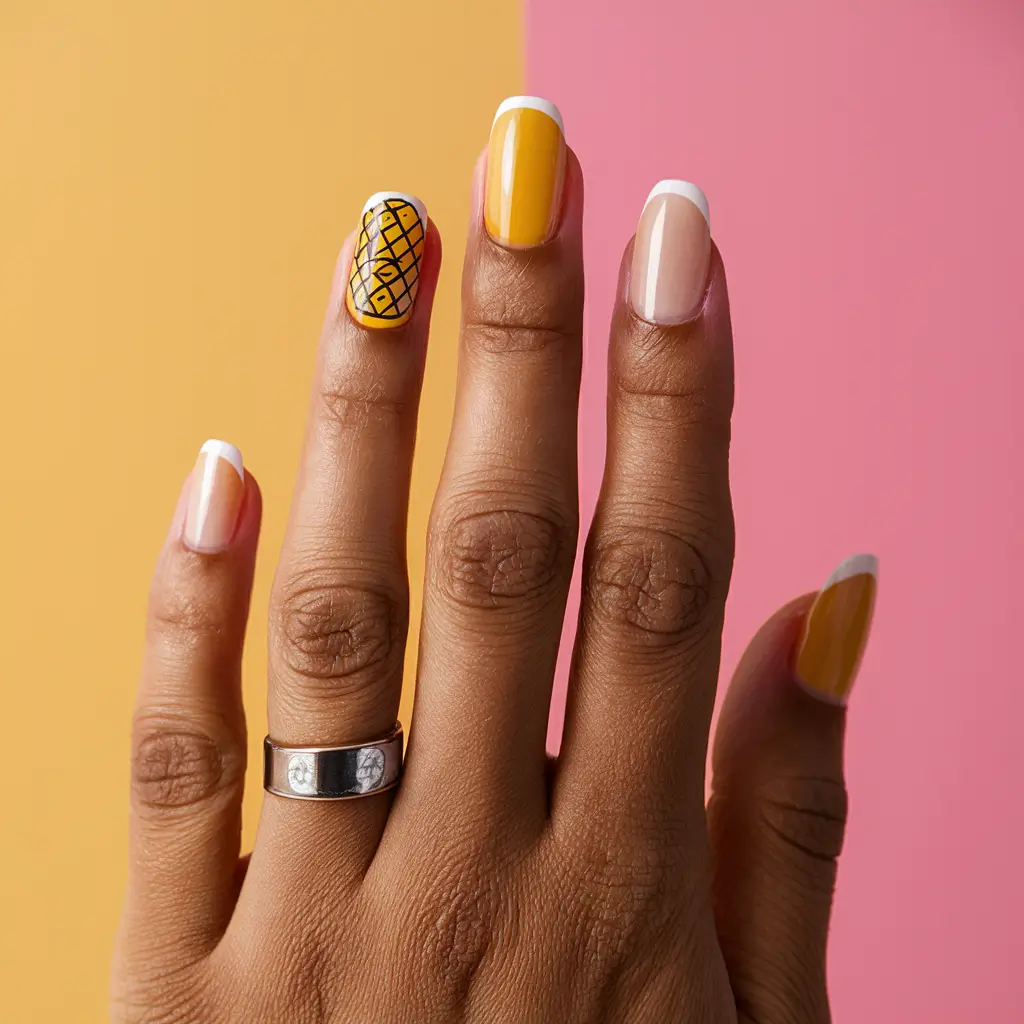
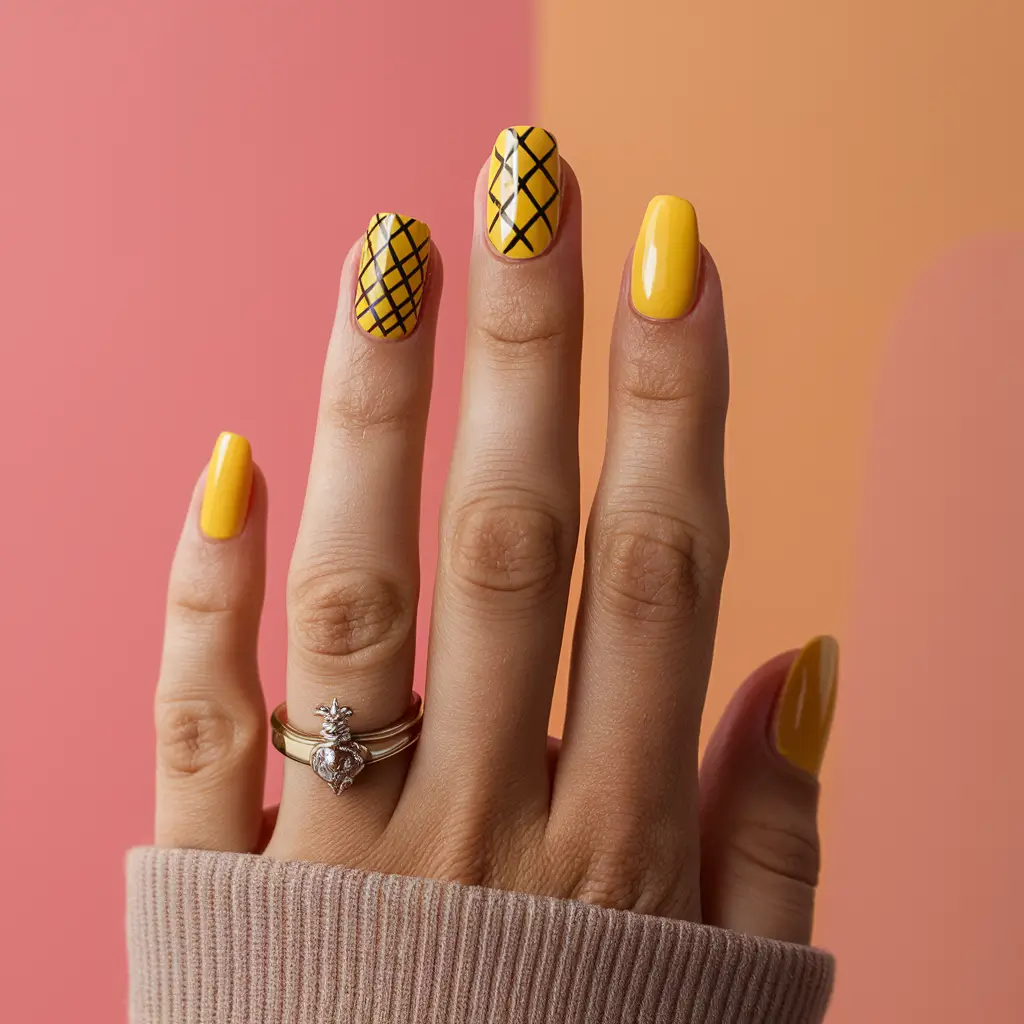
I love the bright and playful look of pineapple nails. Start by painting your nails a bold yellow, similar to the color of a ripe pineapple.
I added a geometric pineapple design for an accent nail. On the other nails, a simple French tip with a thin white line keeps it classic.
4: Strawberry Dream

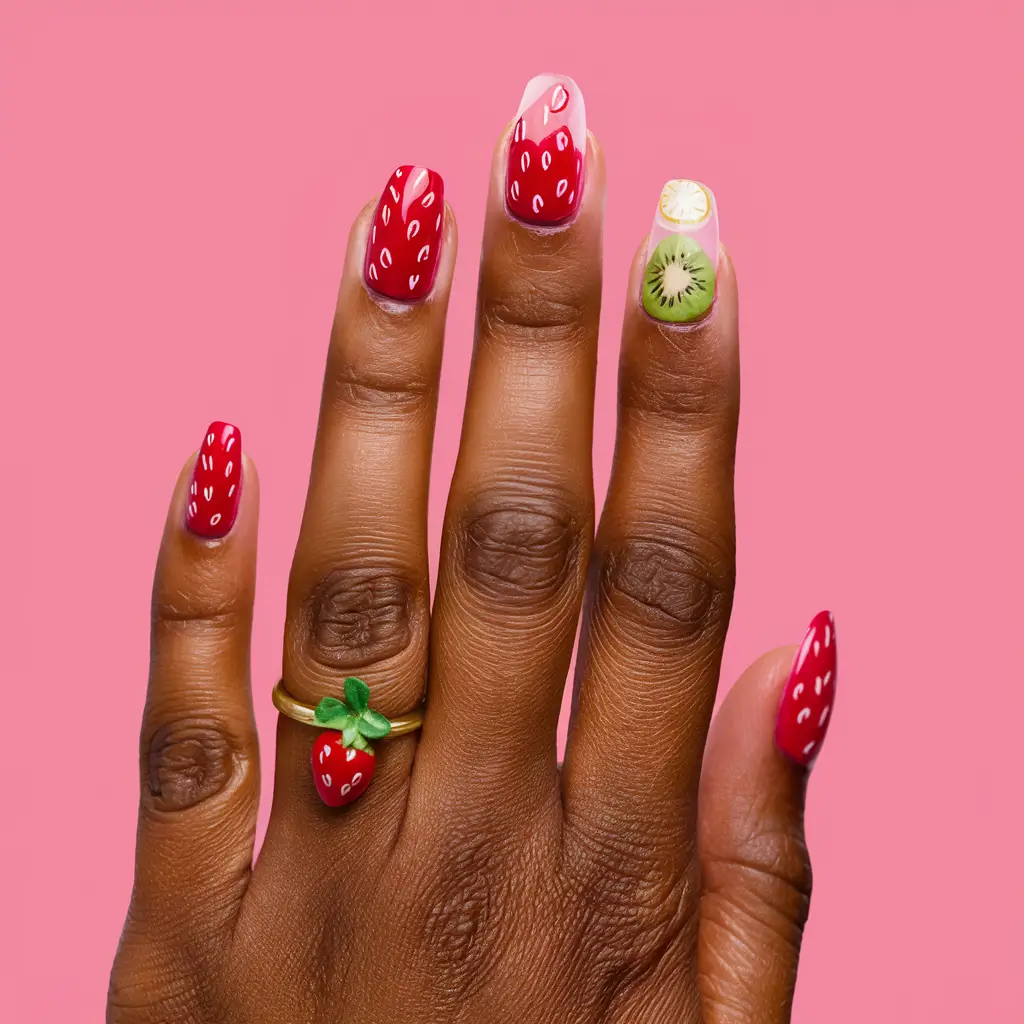
Strawberry Dream nails are perfect for summer. I love how they fun and stylishly capture the sweetness of strawberries. These designs often feature rich red shades with tiny white seeds like real strawberries.
Sometimes, I mix things up by adding other fruits like lemons and kiwi for a fruit salad effect. This gives the nails a unique and playful look. The combination of bright colors always stands out and catches the eye.
One of my favorite styles includes adding tiny strawberry slices on a clear or pink base. It’s simple yet so charming. Strawberry Dream nails are always a hit whether you go minimalist or bold.
5: Watermelon Splash
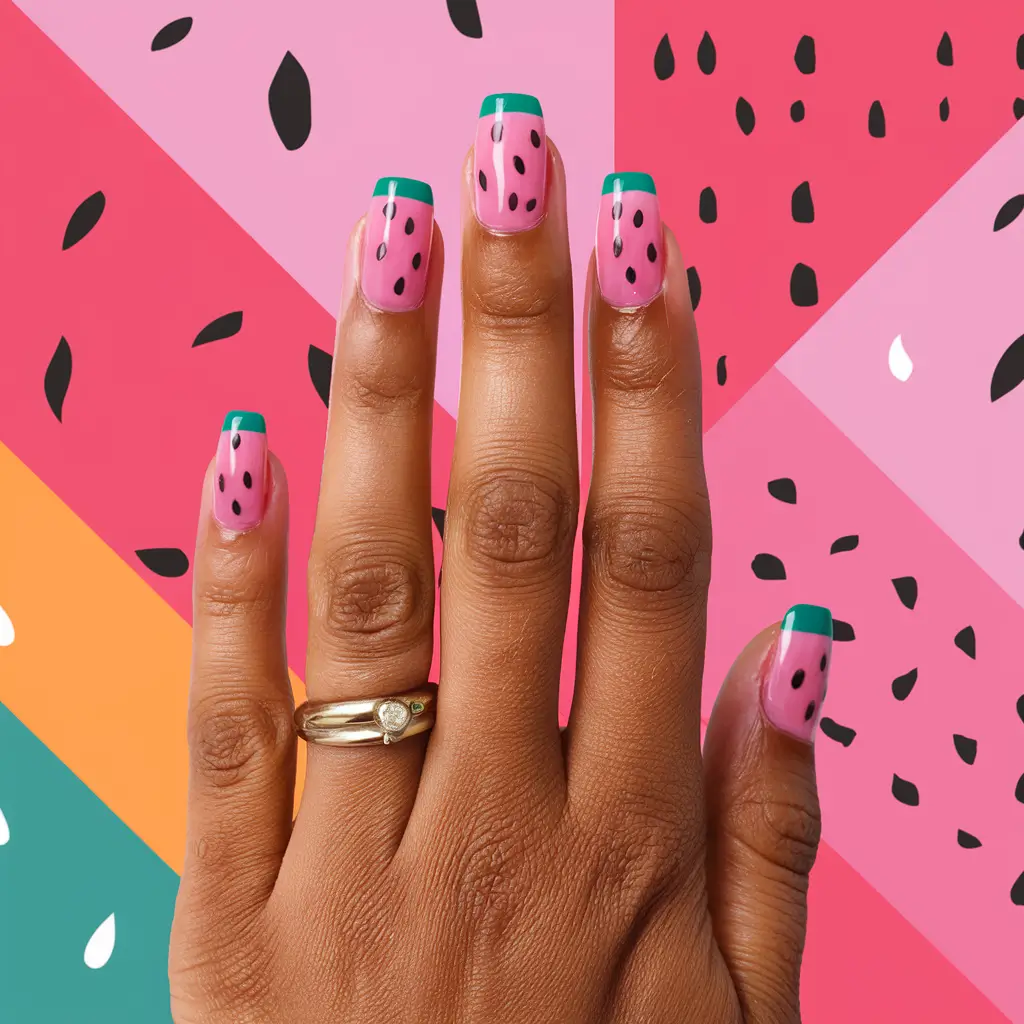
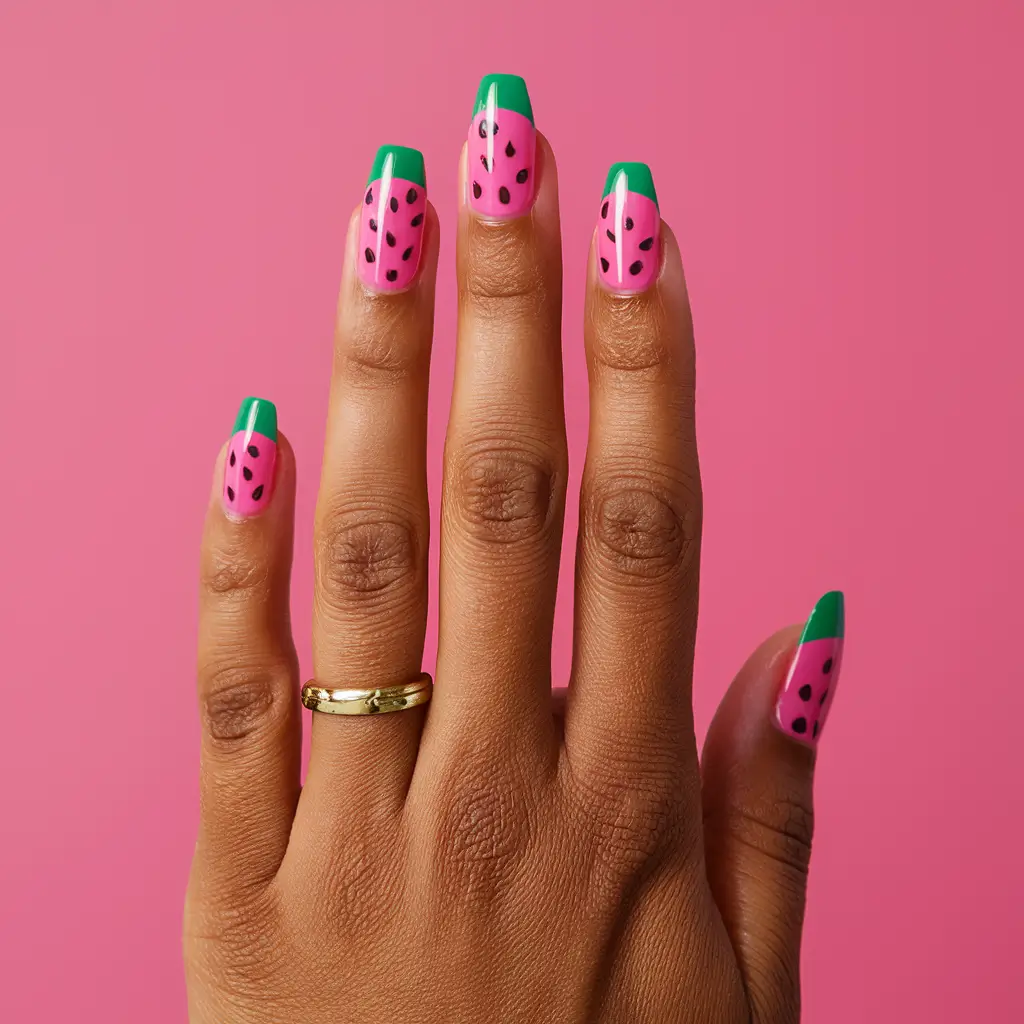
When I think of summer, watermelon is one of the first things that comes to mind. Watermelon nail designs capture the fruit’s juicy, refreshing essence perfectly.
A classic design features pink or red polish for the flesh, with small black dots to represent seeds. Adding a green tip can mimic the rind. It’s such a fun, vibrant look!
6: Blueberry Bliss
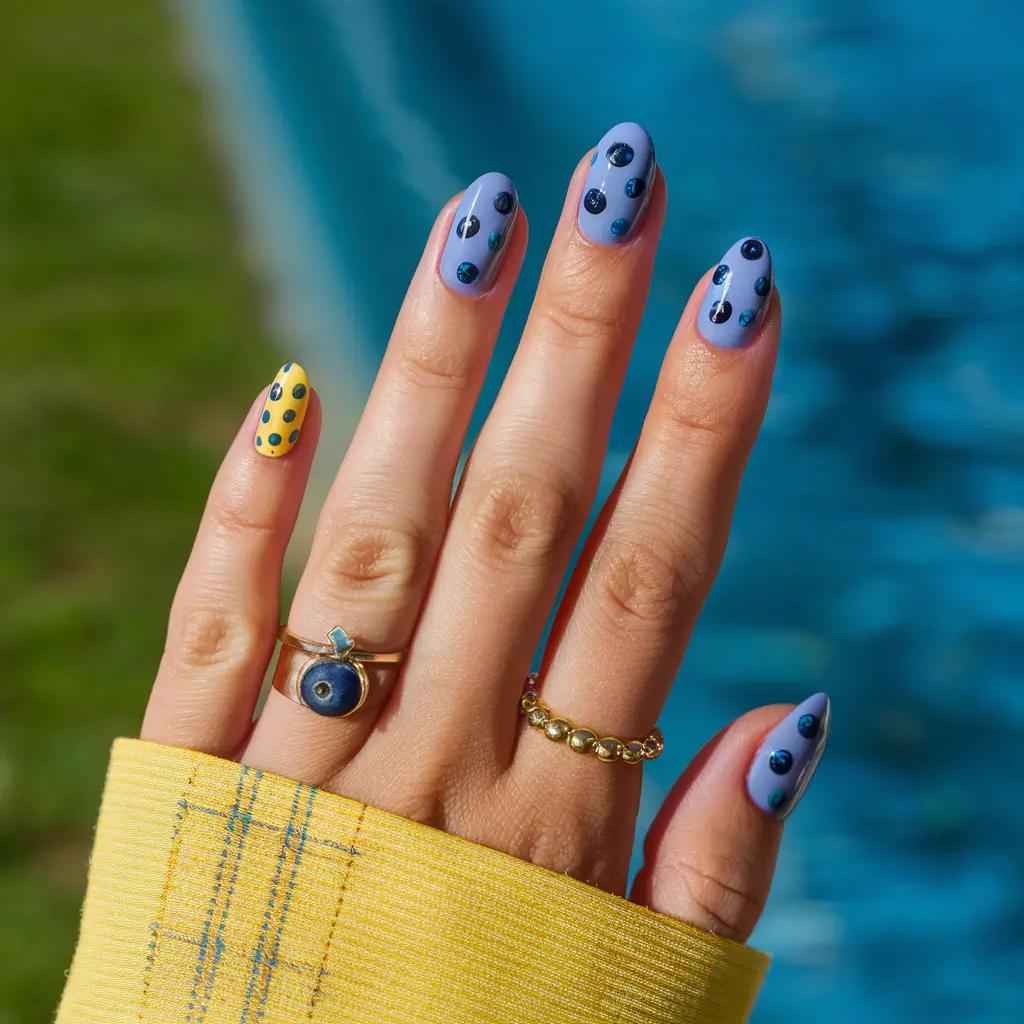
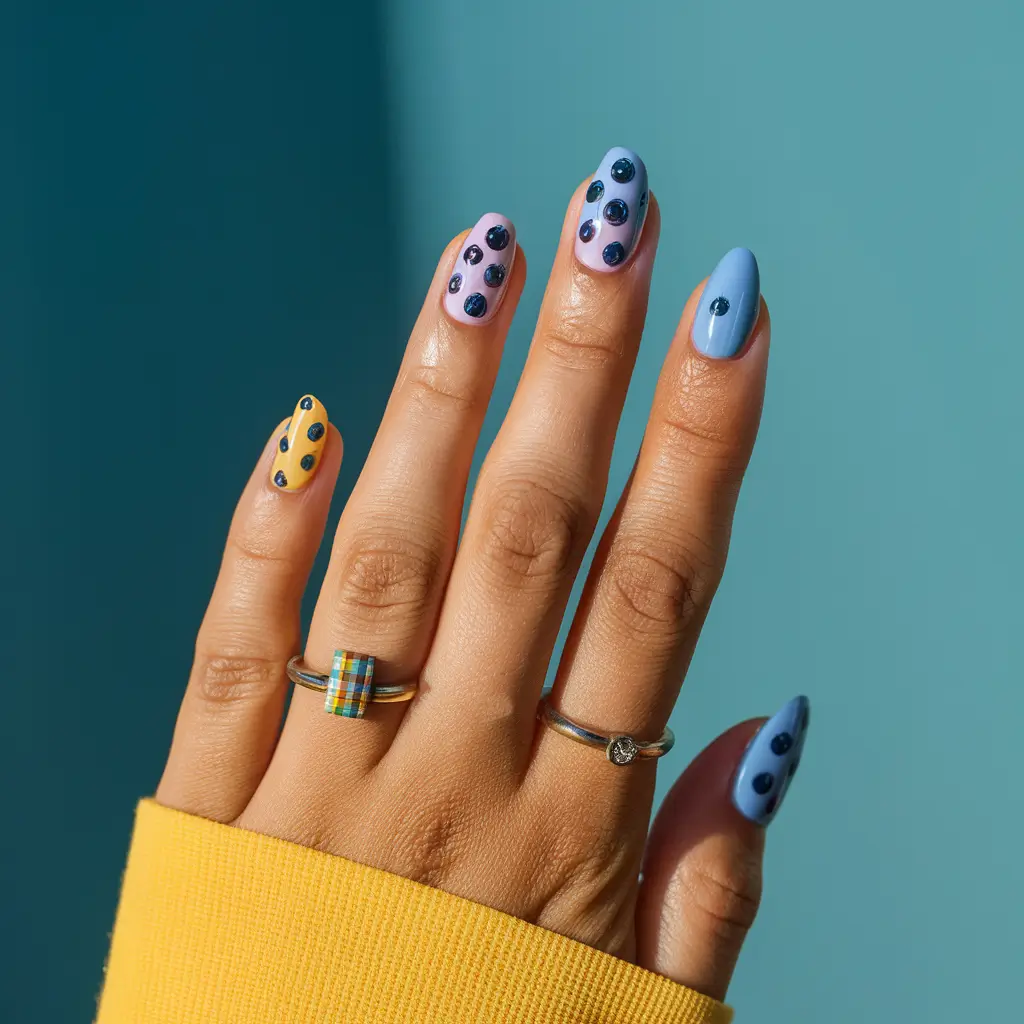
I love the look of blueberry nails for summer. They remind me of fresh blueberries on a hot day.
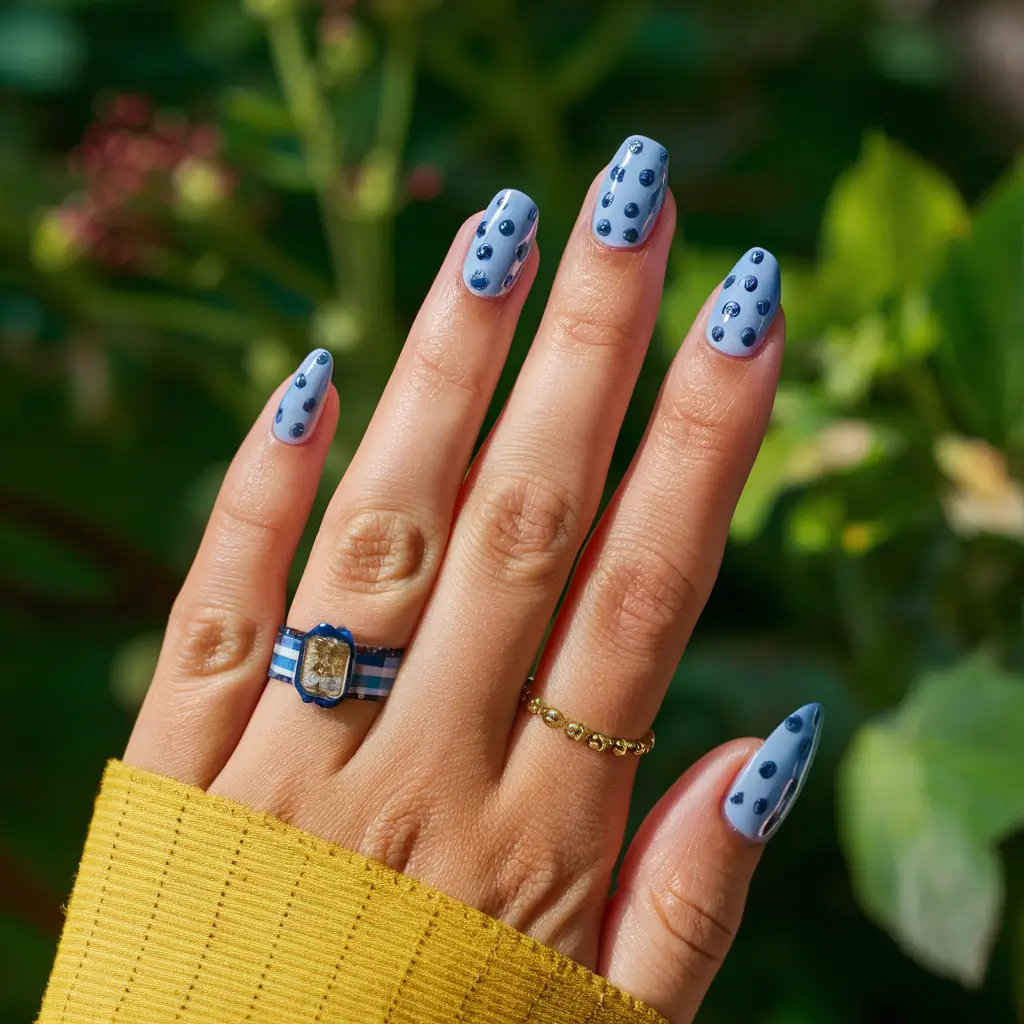
One fun idea is blueberry chrome nails. This style combines a cool blue chrome with small blueberry designs. It’s fresh and modern.
Another option is mismatched blueberry nails. Pair a couple of blueberry nails with solid blue chrome or a plaid pattern. It gives a playful twist to a classic look.
For a bit of contrast, try adding a touch of yellow. Blueberries and yellow tones work well together. Consider a yellow French tip with blueberry accents.
7: Kiwi Kraze
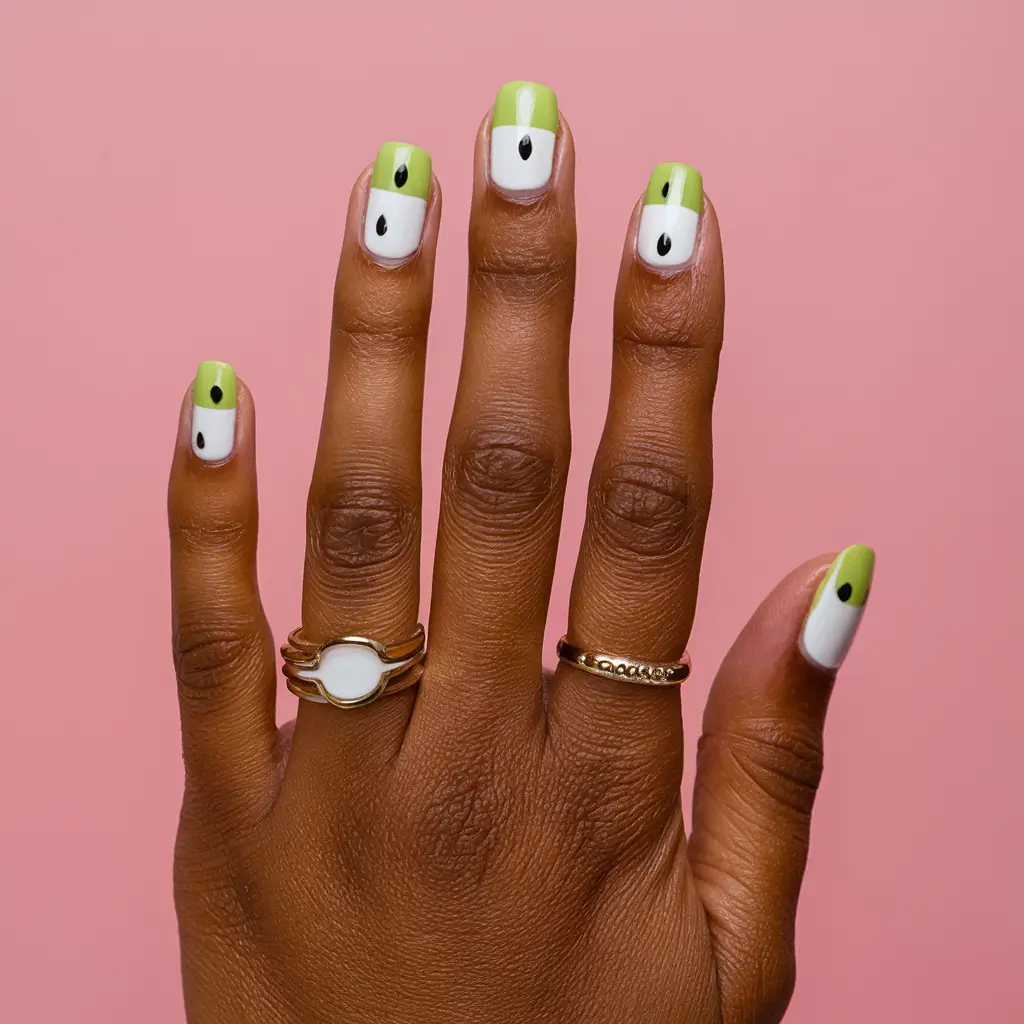
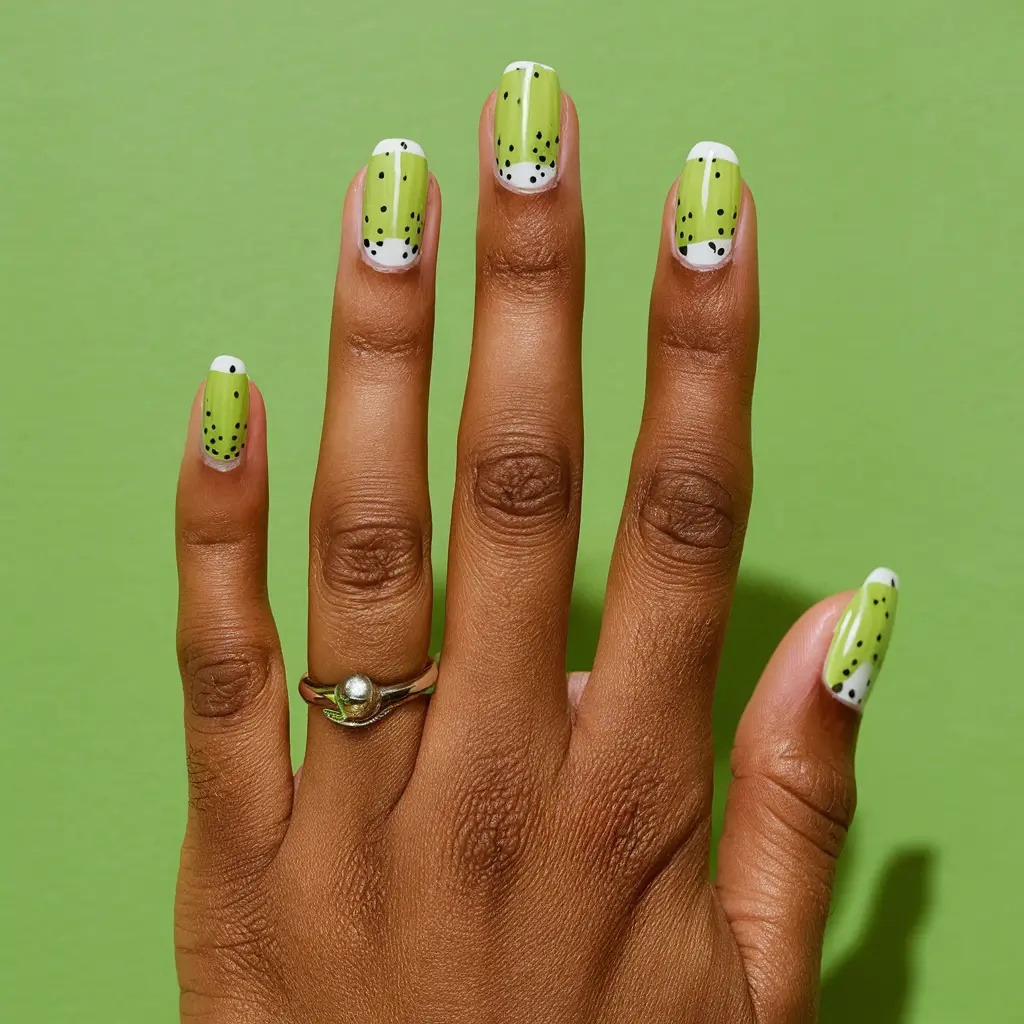
Kiwi nails are a delicious summer choice. I love their mix of green tones and tiny black seeds. They look fresh and vibrant.
To create this design, I start with a lime green base. Then, I used white polish to make the center. Finally, I added small black dots to mimic seeds. Kiwi nails are easy and fun. They add a pop of color and a fruity touch to any look.
8: Grape Glitter
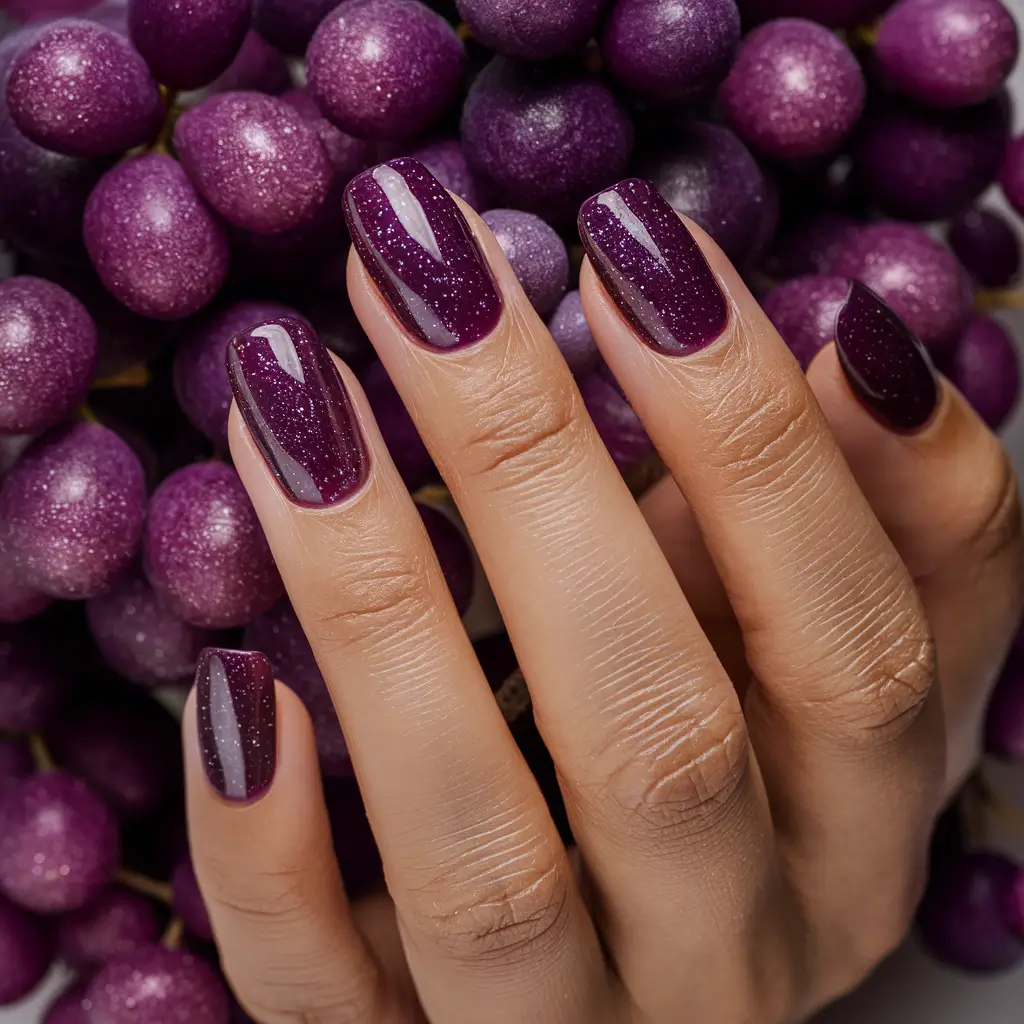

I love how Grape Glitter nails bring a touch of elegance to any manicure. Purple hues with a bit of sparkle can make your nails stand out.
I start with a deep purple base coat and add a layer of fine glitter for a dazzling effect. To finish, a glossy top coat seals the glitter, making the nails shine brilliantly.
9: Apple Orchard
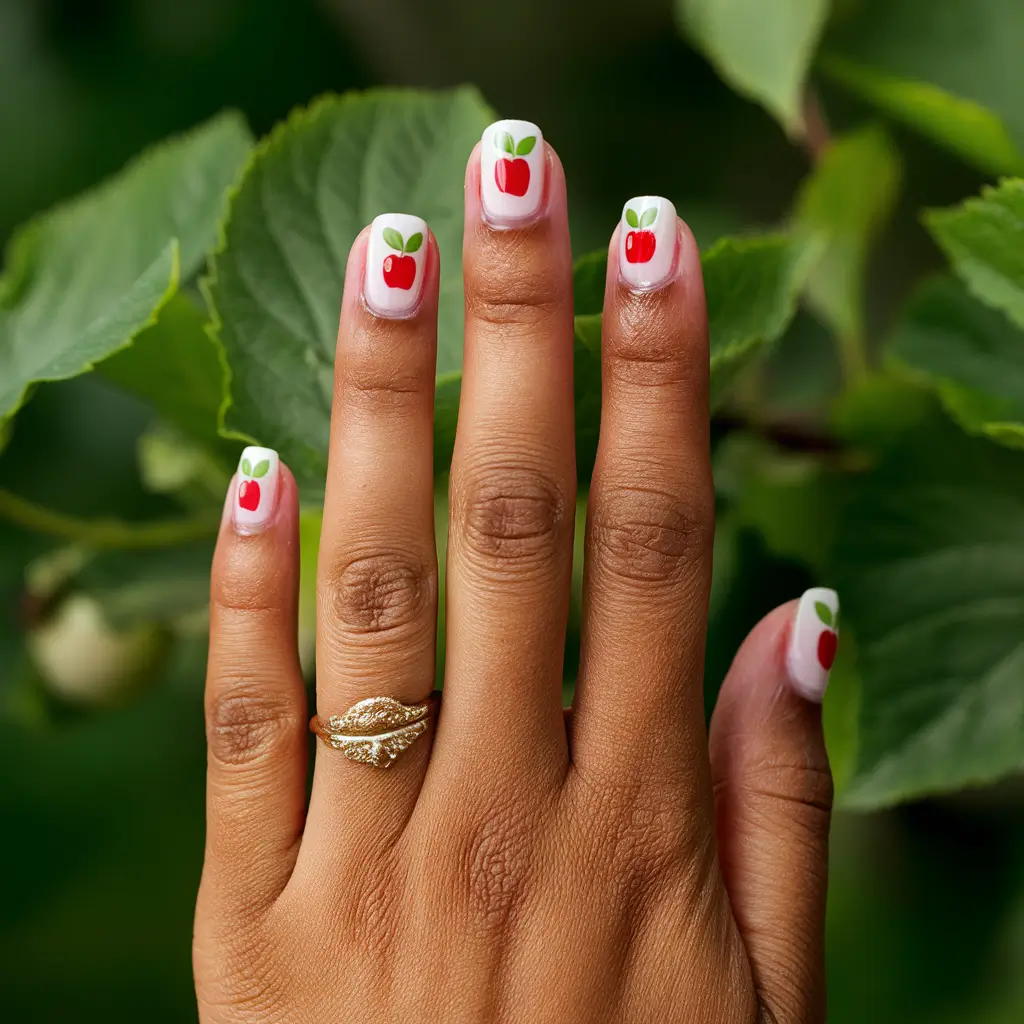
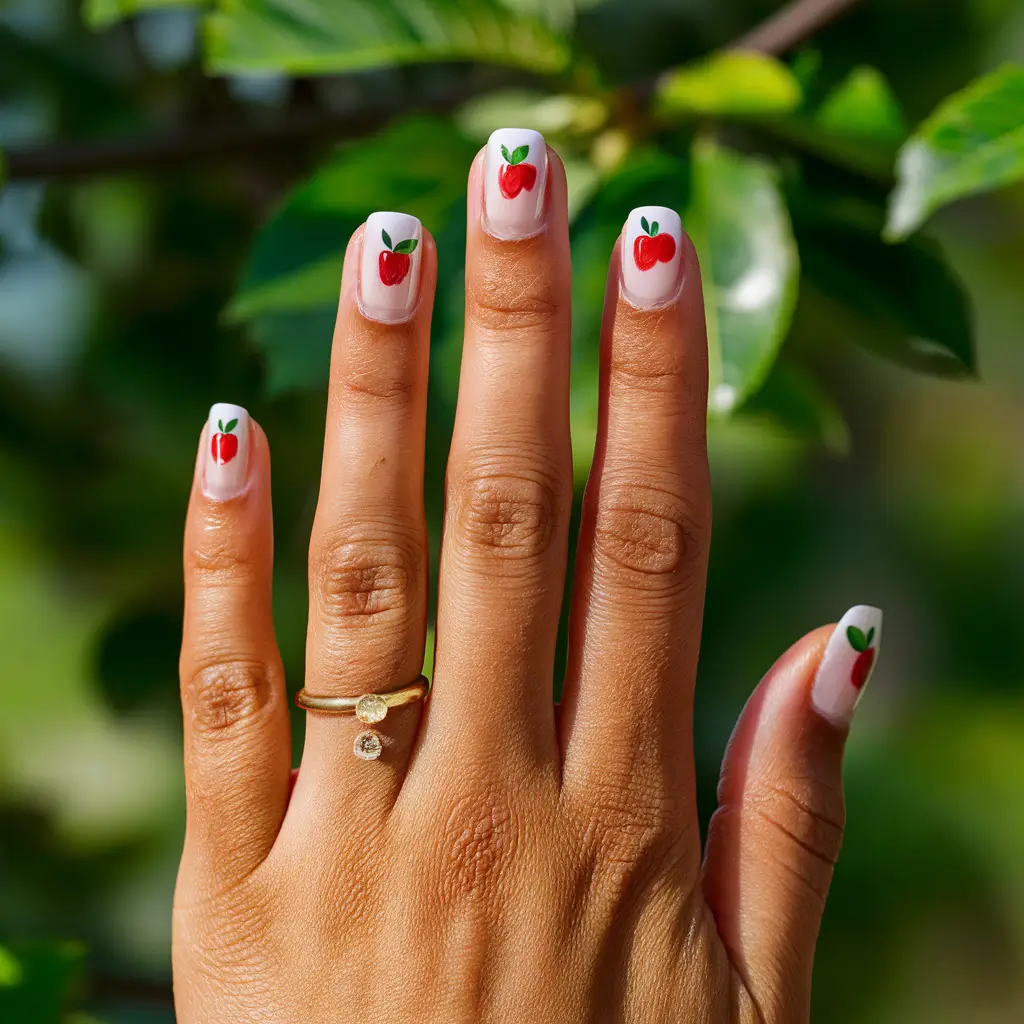
Apple-inspired nail designs are perfect for a fresh and crisp look. I like to start with a soft green or pale yellow polish base to mimic the leafy orchard backdrop.
I paint small red fruits for the apples, adding white highlights to create a glossy effect. Tiny green leaves and brown stems complete the design, making it feel like an apple-picking day.
10: Mango Mingle
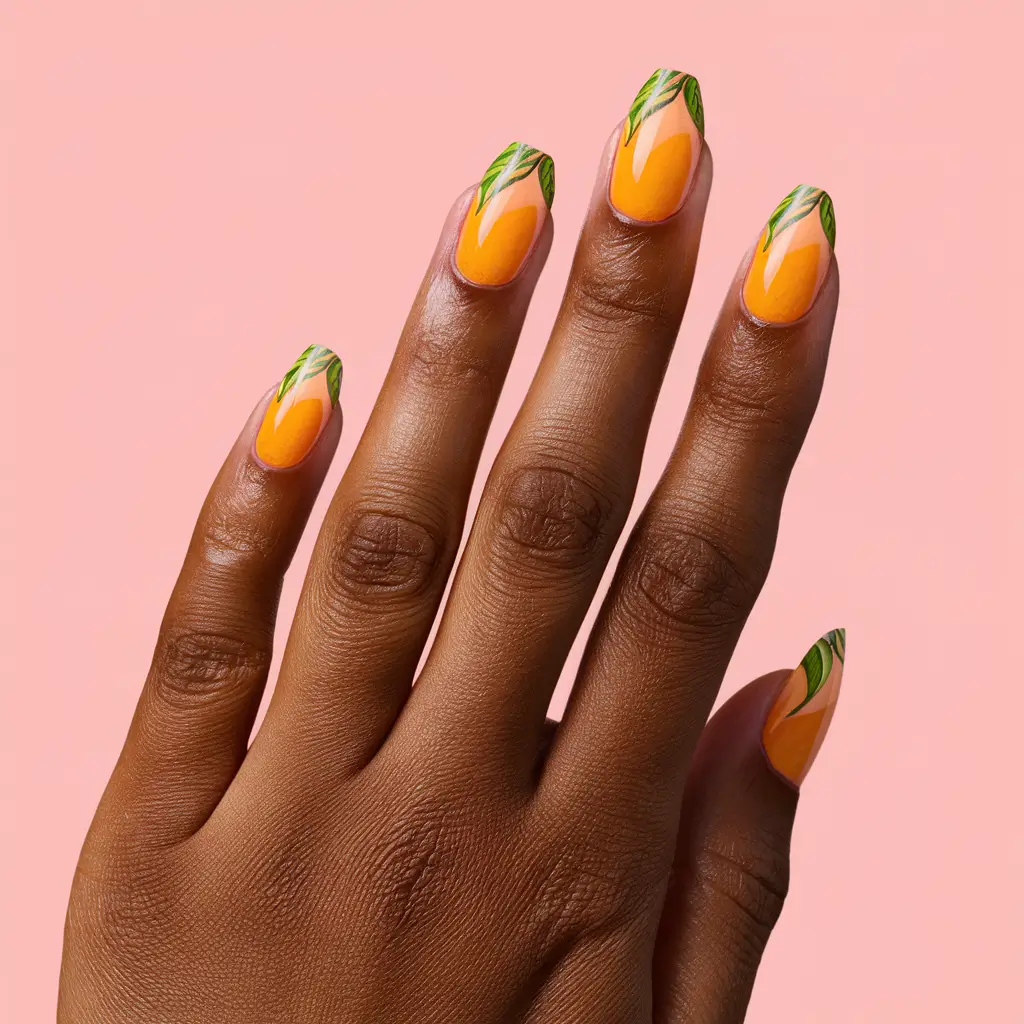
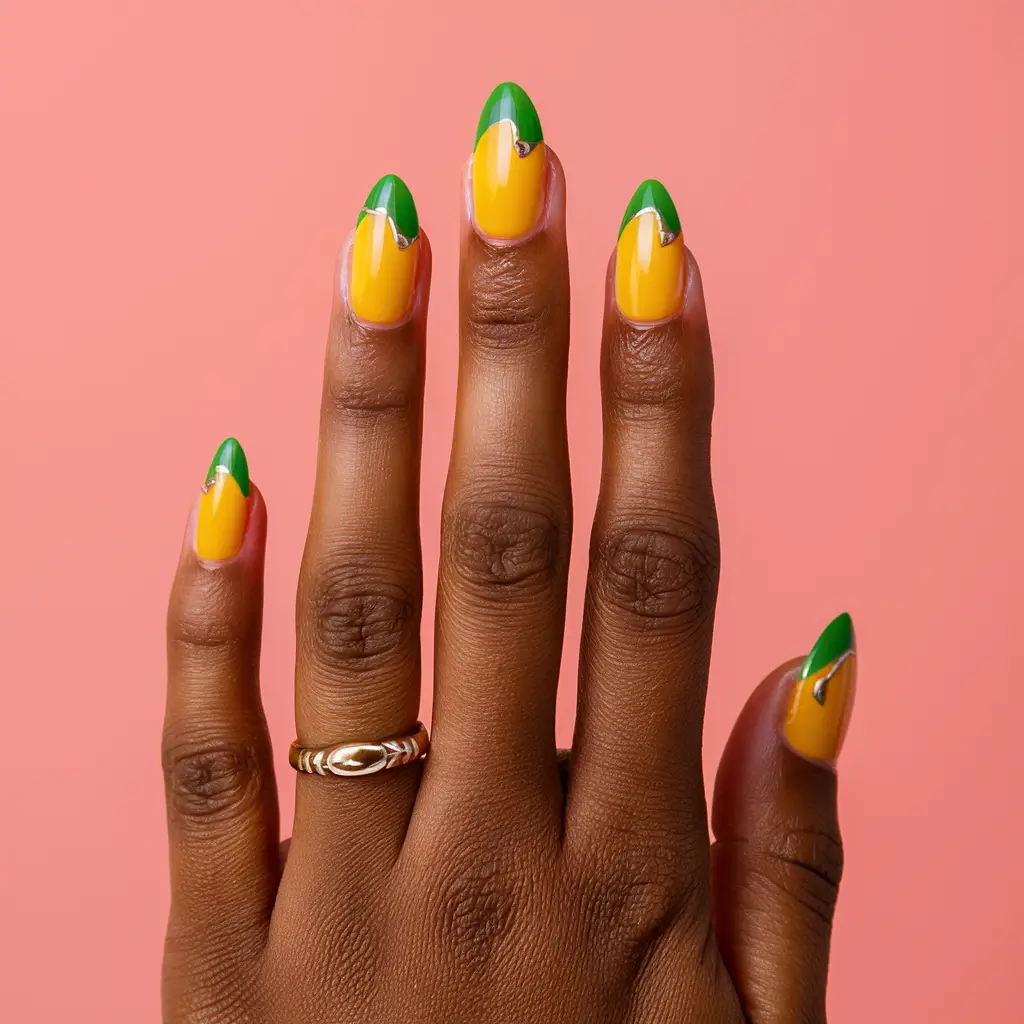
Mango-inspired nail designs are fresh and fun. I love the bright orange and yellow hues that mimic the fruit’s vibrant color.
To achieve this look, start with a mango-colored base. Then, add small green leaves at the edges. A fine brush will help create the detailed leaf designs.
This look works perfectly for summer, adding a tropical vibe that’s both playful and chic.
11: Peach Paradise
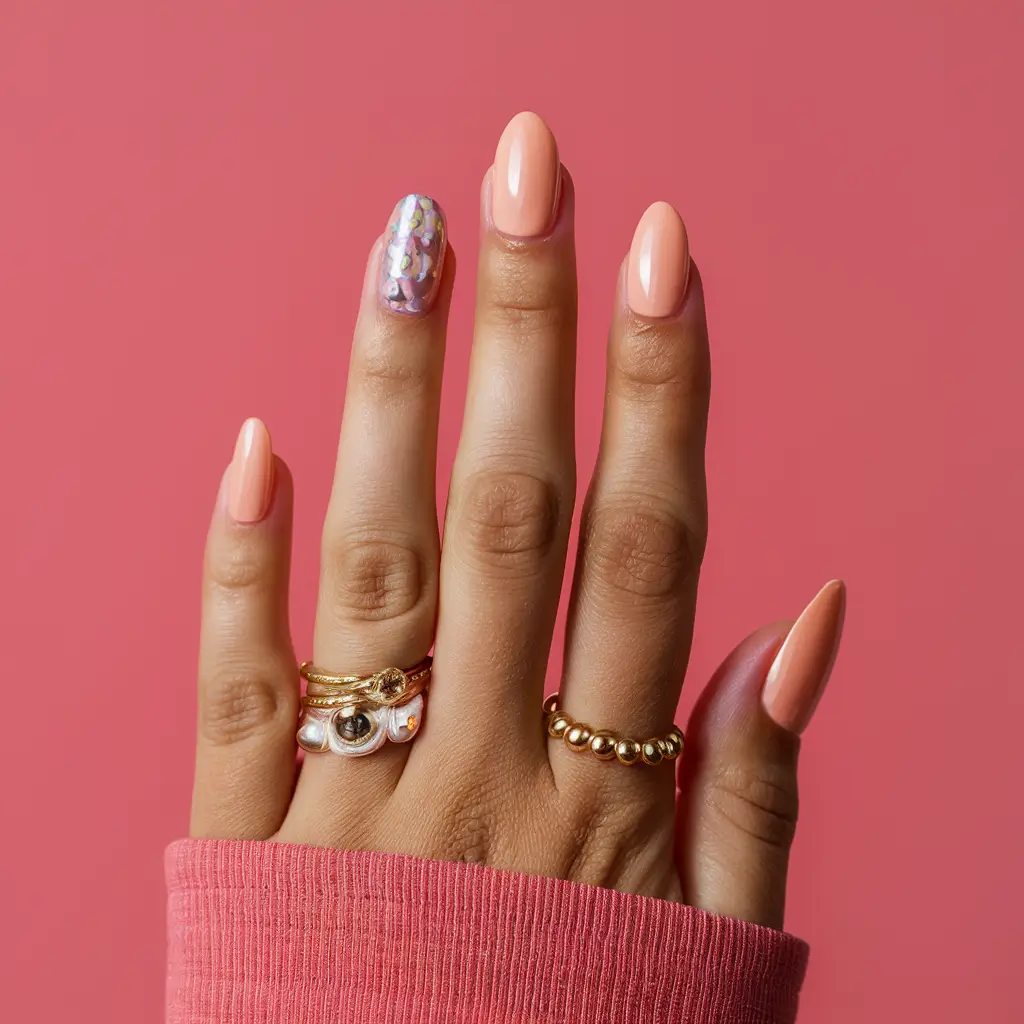

Peach nails are perfect for a cheerful and chic summer look. The light, fruity shade brings a fresh vibe to any manicure.
I enjoy mixing peach tones with other soft colors like pink and taupe. Adding 3D effects and fun patterns makes this design even more playful.
To create Peach Paradise, sometimes I use pearly or chrome powders for an elegant touch. This design lets me experiment with different looks each time.
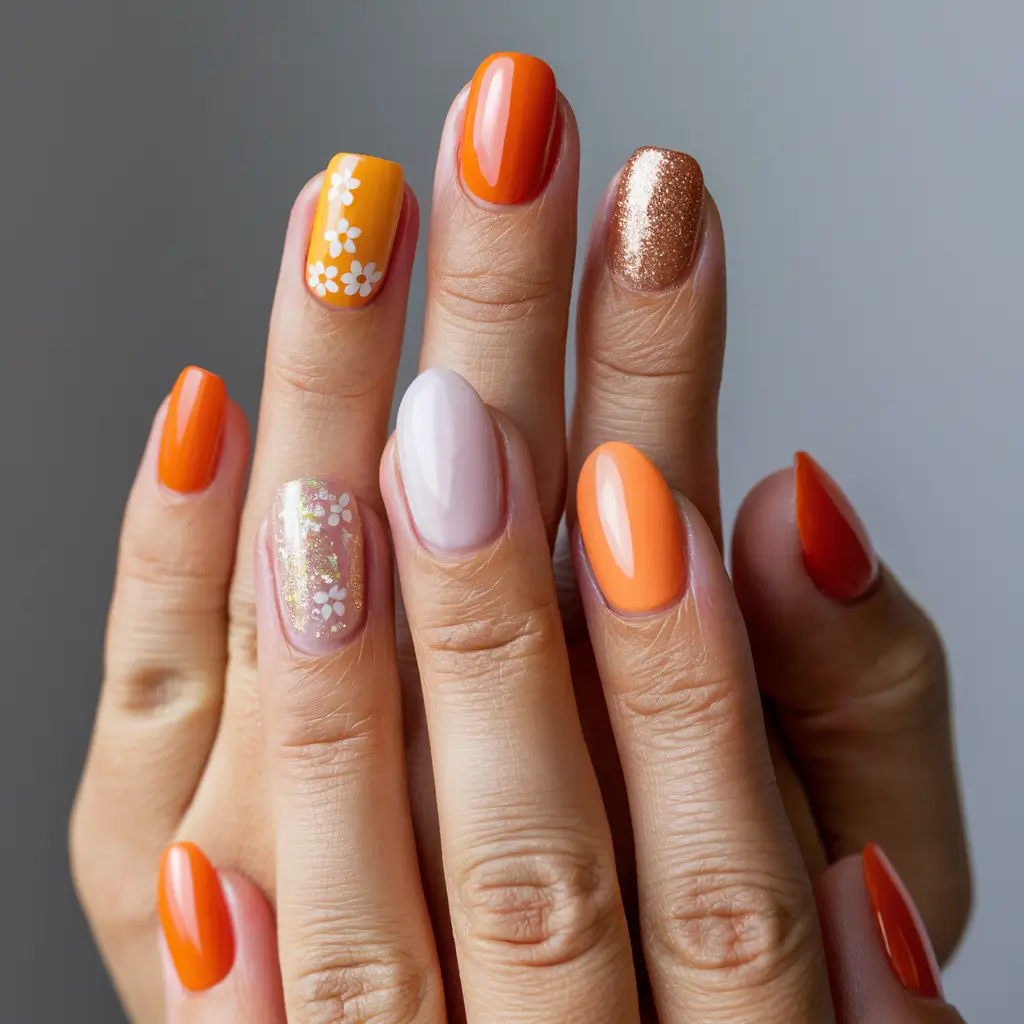
12: Tangerine Twist

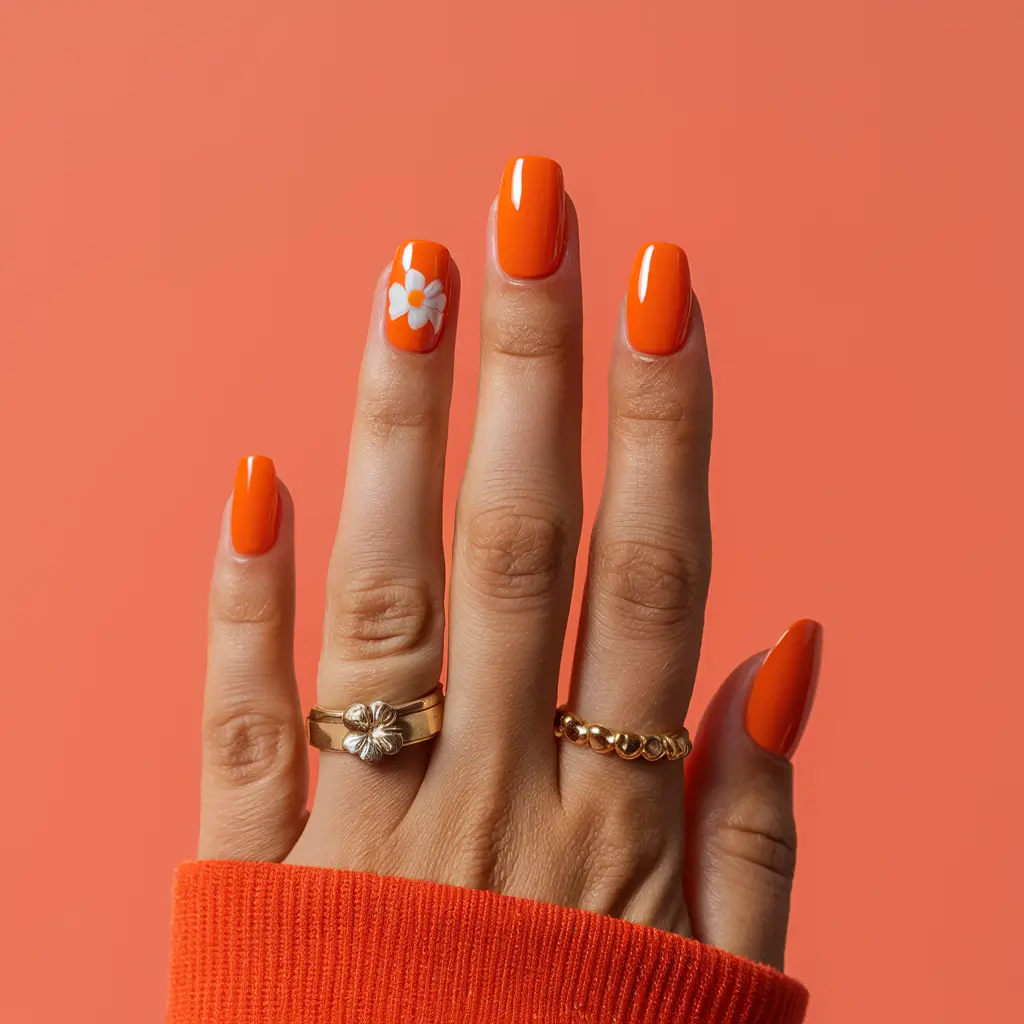
I love how tangerine nails can brighten up any look. This vibrant shade of orange brings a fresh and youthful vibe to your nails.
I sometimes add small white flower accents or glitter for a fun twist. It’s an easy way to make the tangerine color pop even more.
When I’m feeling adventurous, I might create tangerine ombre nails. This design shades from lighter orange at the top to a deeper tangerine at the tips.
13: Raspberry Ripple

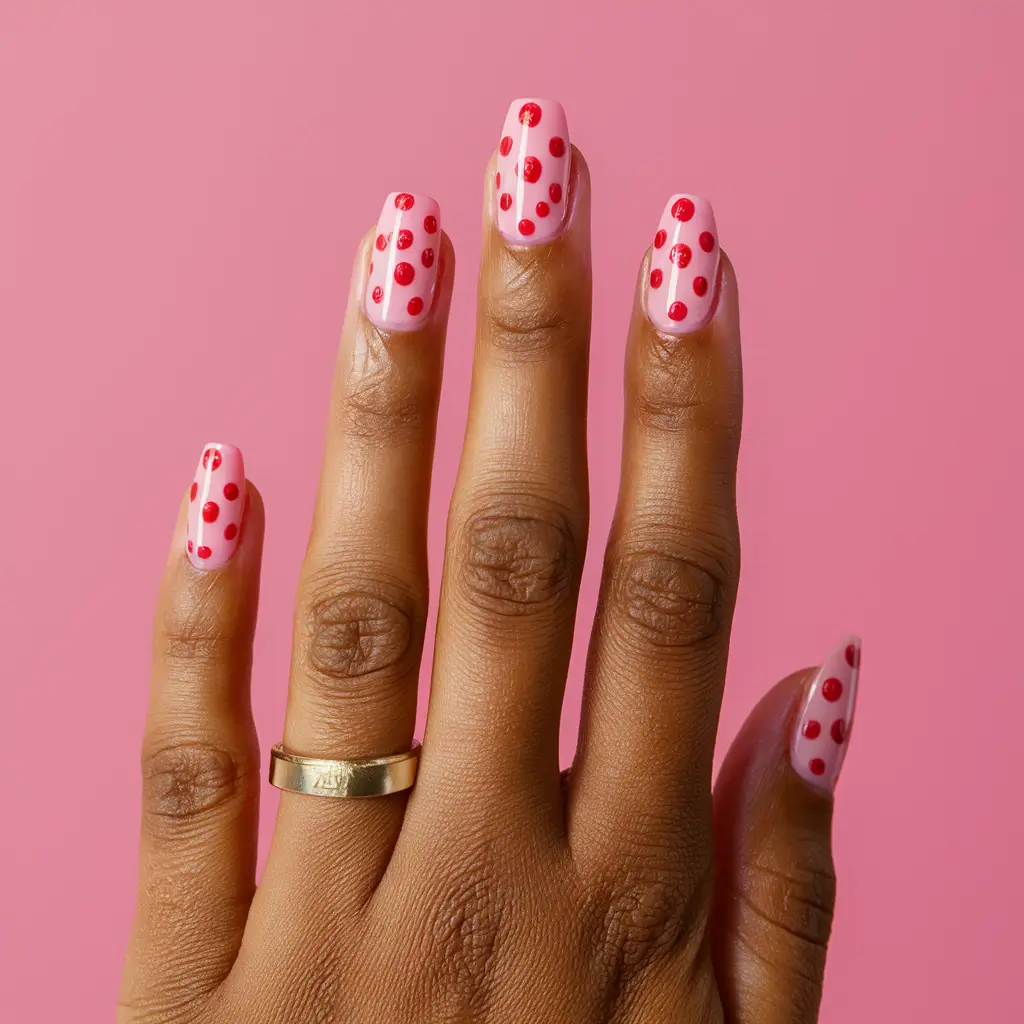
Raspberry nails are a juicy and fun design for summer. I paint my nails with a light pink base to create the look. Then, I use a dotting tool to add small, red dots resembling raspberries.
Adding green leaves with a fine brush gives a natural touch. This design is perfect for a sweet and stylish manicure.
14: Cranberry Crush

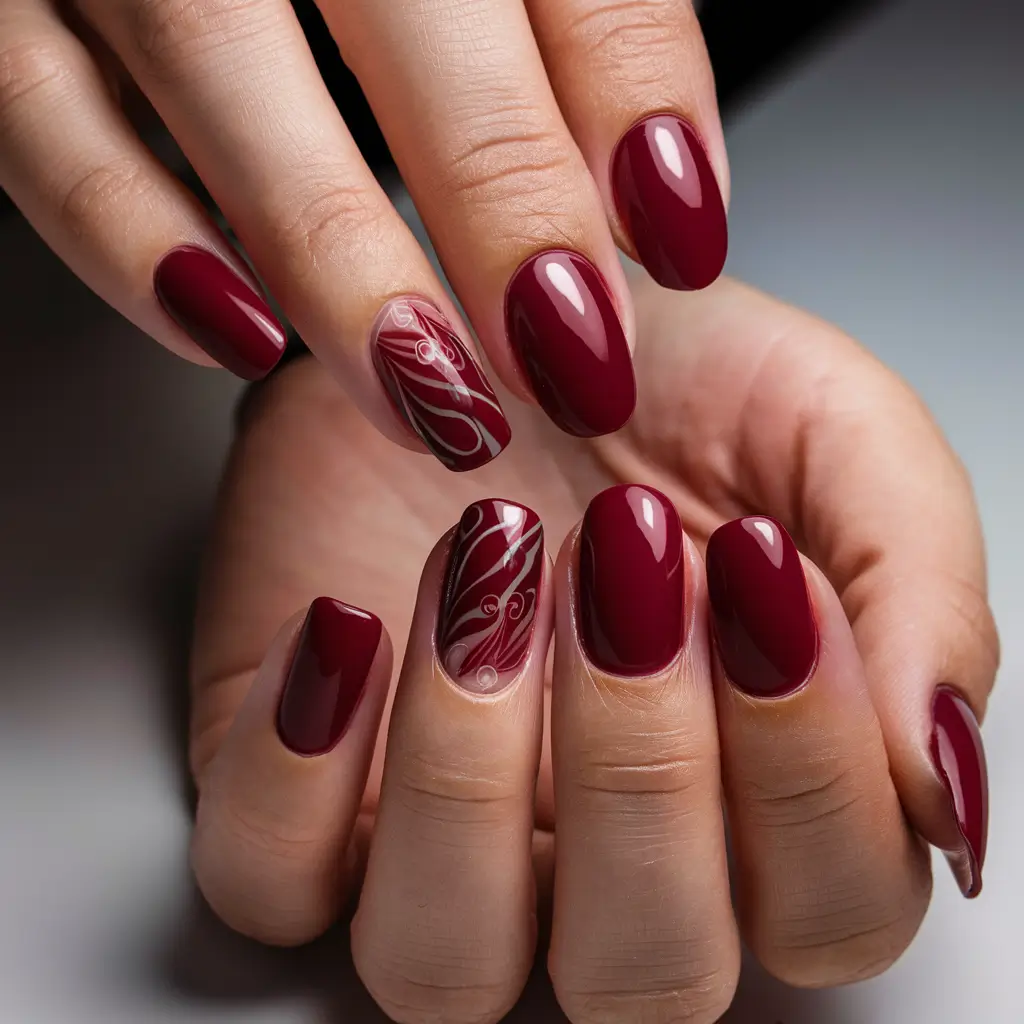
Cranberry nails are a bold choice, capturing the rich red tones of the small fruit. This color stands out due to its deep, bright hue, which is perfect for making a statement.
I love how versatile this shade is. Whether matte or glossy, cranberry nails can complement various outfits and occasions. The dark red adds a sophisticated touch to any look.
15: Coconut Charm
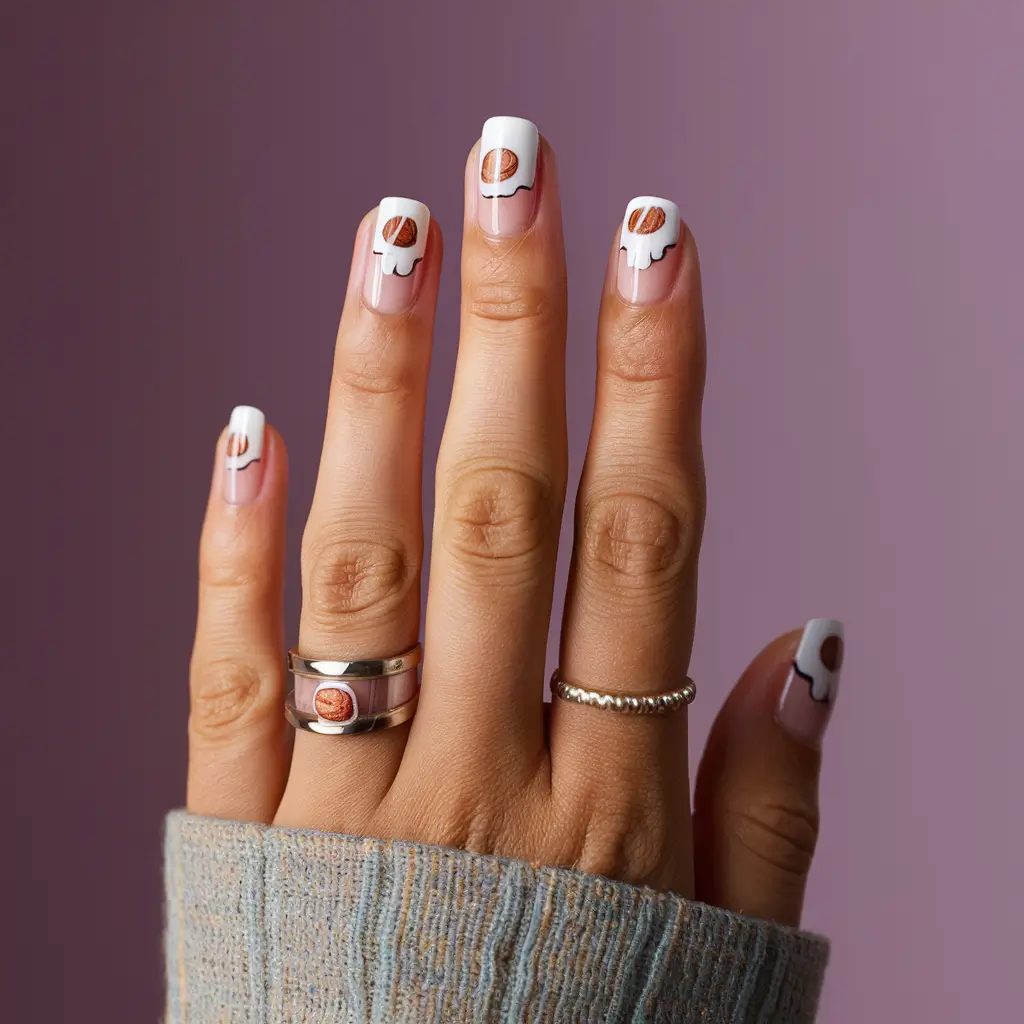

For a unique twist, I suggest trying “Coconut Charm” nails. This design features the tropical allure of coconuts.
Start with a base coat in a sandy beige or pale blue to mimic the beach. Then, paint small coconuts using a dark brown polish, adding white for the milk-dripping effect.
If you prefer a minimalist look, try painting just one accent nail with a coconut design. It blends well with other tropical themes like palm trees or hibiscus flowers.
The mix of colors and simple lines makes this design easy to complete.
Gathering Supplies For Fruit Nail Design
Fruit nail designs are a fun and vibrant way to express your creativity. However, you need the right supplies to achieve the perfect fruit-inspired nails.
This step-by-step guide will help you gather everything you need for a flawless fruit nail design. Let’s start by gathering the supplies.

Choosing The Right Nail Polish
Picking the right nail polish is crucial for a stunning fruit nail design. Choose bright and vivid colors that mimic the look of fruits. Here are some tips to help you select the best shades:
- Red and Green: Perfect for watermelon or strawberry designs.
- Yellow and Green: Great for lemon or pineapple nails.
- Orange: Ideal for orange or peach-inspired nails.
- Purple: Use for grape or plum designs.
It’s also important to consider the quality of the polish. High-quality nail polish lasts longer and provides a smooth finish. Here are a few tips for selecting quality polish:
| Brand | Benefits |
|---|---|
| OPI | Long-lasting and chip-resistant. |
| Essie | Vibrant colors and smooth application. |
| Sally Hansen | Wide range of colors and affordable. |
Other Necessary Tools And Materials
Aside from nail polish, you’ll need several other tools and materials to complete your fruit nail design. These tools will help you achieve precision and a professional look:
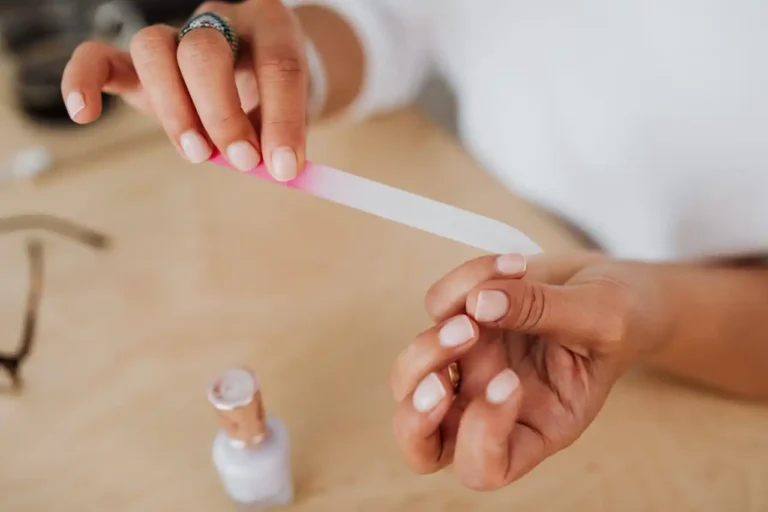
- Nail File: To shape your nails before painting.
- Base Coat: Protects your nails and provides a smooth surface.
- Top Coat: Seals the design and adds shine.
- Nail Art Brushes: For detailed designs and fine lines.
- Dotting Tools: Perfect for creating dots and small details.
- Nail Stickers or Decals: Easy way to add fruit shapes without freehand painting.
- Nail Polish Remover: This is used to correct mistakes and clean up edges.
It’s important to have all these tools ready before starting. Having everything within reach will make the process smooth and enjoyable. These tools can be found at beauty supply stores or online retailers.
With the right supplies, you are well on your way to creating beautiful fruit nail designs. Preparation is key to achieving a flawless look. Happy nail designing!
Preparing Your Nails
Fruit nail designs are a fun and vibrant way to express your creativity. Properly preparing your nails is essential before diving into the colorful world of fruit nail art.
Proper preparation ensures that your nail design lasts longer and looks more professional. Let’s break down the preparation process step by step.
Remove Old Nail Polish
Start by removing any old nail polish from your nails. This step is crucial for a clean canvas. Follow these steps to remove old nail polish effectively:
- Use a gentle nail polish remover: Choose a non-acetone remover to avoid drying out your nails.
- Soak a cotton ball: Douse a cotton ball with nail polish remover.
- Press and hold: Place the cotton ball on your nail and press down for a few seconds.
- Wipe away: Gently wipe off the old polish with the cotton ball.
Repeat the process for each nail until all polish is gone. Ensure no remnants are left; even small bits can affect the final look.
Trim And Shape Your Nails
Once your nails are polish-free, it’s time to trim and shape them. Well-shaped nails create the perfect base for your fruit designs. Follow these steps:
- Trim your nails: Use a nail clipper to trim your nails to your desired length. Be careful not to cut too short.
- File your nails: Select a nail file with fine grit. File in one direction to avoid splitting. Shape your nails into your preferred style, such as square, round, or oval.
- Buff the surface: Use a nail buffer to smooth out any ridges. This helps the polish adhere better.
Taking your time with this step ensures your nails look neat and uniform, providing a perfect base for the upcoming nail art.
Apply A Base Coat
The final step in preparing your nails is applying a base coat. A base coat protects your nails and ensures the nail polish adheres better. Here’s how to apply a base coat:
- Choose a quality base coat: Opt for a clear, strengthening base coat.
- Apply a thin layer: Brush a thin layer of base coat onto each nail. Start from the cuticle and move towards the tip.
- Allow it to dry: Let the base coat dry completely before proceeding to the next step. This usually takes a few minutes.
A base coat protects your nails from staining and provides a smooth surface for your fruit nail design.
Creating The Fruit Design
Creating a fruit design on your nails is a fun and creative way to express yourself. This step-by-step guide will help you achieve beautiful fruit nail designs, perfect for any season.
Whether you prefer strawberries, pineapples, or watermelons, this guide will simplify the process. Let’s dive into the colorful world of fruit nail art!
Choose Your Desired Fruit Design
First, decide on the fruit you want to feature on your nails. Popular choices include:
- Strawberries – Bright red with green leaves.
- Watermelons – Green rind, red flesh, and black seeds.
- Pineapples – Yellow with green spiky leaves.
- Oranges – Vibrant orange with white segments.
Once you’ve chosen your fruit, gather the necessary colors:
| Fruit | Colors Needed |
|---|---|
| Strawberries | Red, Green, Yellow |
| Watermelons | Green, Red, Black |
| Pineapples | Yellow, Green, Brown |
| Oranges | Orange, White, Green |
Make sure you have fine nail brushes and dotting tools to add precise details later. With your colors and tools ready, you can bring your fruit design to life!
Apply The First Layer Of Color
Begin by applying a base coat to protect your nails. Then, paint the entire nail with the main color of your chosen fruit:
- Strawberries: Apply a bright red polish.
- Watermelons: Paint the nail light green for the rind.
- Pineapples: Use a yellow polish for the base.
- Oranges: Choose a vibrant orange polish.
Let the first layer dry completely before moving on to the next step. This ensures a smooth and even base for your design. Depending on the opacity of your polish, you may need a second coat. Allow each layer to dry fully to avoid smudging.
After the base color is set, you can add the fun details that make your fruit nail design pop!
Add Details And Accents
Now it’s time to add the intricate details that will bring your fruit design to life. Use fine brushes and dotting tools for precision:
- Strawberries: Use a dotting tool to add tiny yellow seeds. Paint green leaves at the base of the nail.
- Watermelons: Create red triangles for the flesh. Add black dots for seeds. Paint the tip of the nail dark green for the rind.
- Pineapples: Draw diagonal lines in brown to mimic the texture. Add green leaves at the top.
- Oranges: Use white polish to create segments. Add tiny green leaves for a fresh look.
Take your time with each detail to ensure accuracy. If you make a mistake, use a small brush dipped in nail polish remover to fix it. Once all details are added, let them dry completely.
Finish with a top coat to seal your design and add shine. Your fruit nails are now complete and ready to show off!
:max_bytes(150000):strip_icc()/072922-beauty-nail-art-lead-2000-21de3481261e48a995c855269f9846ad.jpg)
Adding Finishing Touches
You’ve followed all the steps to create beautiful fruit nail designs. Now, it’s time to focus on adding those essential finishing touches. These final steps ensure your nails look polished and professional.
Let’s dive into your key actions: applying a top coat, cleaning up any mistakes, and letting your nails dry properly.
Apply A Top Coat
Applying a top coat is crucial to seal your fruit nail design. It adds shine and extends the life of your manicure. Here’s how to do it:
- Ensure your design is completely dry before applying the top coat.
- Use a high-quality top coat for best results.
- Start from the center of your nail and brush outward.
- Apply a thin layer to avoid smudging your design.
Benefits of using a top coat include:
| Benefit | Description |
|---|---|
| Shine | Makes your nails look glossy and professional. |
| Protection | Guards against chips and scratches. |
| Longevity | Extends the life of your nail art. |
Clean Up Any Mistakes
Cleaning up mistakes is essential for a neat and tidy look. Here are some steps to help you:
- Use a small brush dipped in nail polish remover.
- Gently clean the edges around your nails.
- Wipe off any excess polish on your skin.
- Check each nail for any missed spots.
For more stubborn mistakes, try these tips:
- Use a toothpick for precise correction.
- Employ a cotton swab for larger areas.
- Work slowly to avoid ruining your design.
Remember: A clean finish makes your fruit nails look professional and eye-catching.
Let Your Nails Dry
Letting your nails dry is the final step. It ensures your design stays intact. Follow these tips:
- Allow at least 15 minutes for drying.
- Avoid any activities that might smudge your nails.
- Use a nail dryer or fan for faster results.
- Apply a quick-dry top coat for added speed.
To check if your nails are dry, gently touch them with the pad of your finger. If they feel tacky, give them more time. Proper drying time prevents smudges and ensures a long-lasting manicure.
Maintenance
Fruit nail designs are vibrant and fun, but maintaining that fresh look requires some effort. Proper maintenance ensures your fruit nail art remains stunning for weeks.
Here’s how you can keep your nails looking fabulous and how to safely remove your nail design when it’s time for a change.
Tips For Making Your Nail Design Last Longer
Keeping your fruit nail design intact involves a few essential steps. Follow these tips to extend the life of your nail art:
- Apply a top coat: Seal your design with a clear top coat. Reapply every few days for added protection.
- Avoid harsh chemicals: Wear gloves when cleaning or using chemicals to prevent nail damage.
- Moisturize regularly: Keep your cuticles and hands moisturized. Dry skin can cause your nail polish to chip.
Here’s a quick table summarizing the key maintenance tips:
| Tip | Description |
|---|---|
| Top Coat | Apply every few days to protect your design. |
| Avoid Chemicals | Wear gloves during cleaning tasks. |
| Moisturize | Use hand cream to keep skin and cuticles healthy. |
By following these simple steps, you can enjoy your beautiful fruit nail design for longer.
How To Safely Remove Your Nail Design
Removing your fruit nail design safely is crucial to prevent damage to your natural nails. Here’s how to do it:
- Gather your supplies: You’ll need acetone, cotton balls, aluminum foil, and a nail file.
- File the top layer: Gently file the top coat to break the seal. This helps the acetone penetrate better.
- Soak cotton balls: Soak them in acetone and place them on your nails.
- Wrap with foil: Wrap each nail with a small piece of aluminum foil to hold the cotton balls in place.
- Wait for 10-15 minutes. Let the acetone work to dissolve the nail polish.
- Remove the foil and cotton: Gently pull off the foil and cotton. The polish should come off easily.
- Buff and moisturize: Buff your nails gently and apply cuticle oil or hand cream to keep them healthy.
Following these steps ensures your nails stay healthy and ready for your next fun design.
Frequently Asked Questions
How To Design Nails Step By Step?
1. Clean and trim nails.
2. Apply a base coat.
3. Choose and apply nail polish.
4. Create designs with nail art tools.
5. Finish with a top coat.
What Are The 5 Basic Nail Designs?
The 5 basic nail designs are French tips, solid colors, ombre, glitter, and floral patterns. These styles are popular and versatile.
How To Do Nails At Home Step By Step For Beginners?
1. Gather all necessary nail tools.
2. Remove old polish and trim nails.
3. File and shape nails.
4. Soak hands, then push back cuticles.
5. Apply base coat, polish, and top coat.
What Are The Steps In Performing Basic Nail Design?
Start by cleaning and trimming nails. Apply a base coat. Paint nails with the desired color. Add designs using nail art tools. Finish with a top coat.
Conclusion
Mastering fruit nail designs is fun and rewarding. With practice, your nails will look vibrant and unique. Share your beautiful creations with friends and inspire others.
Keep experimenting with colors and patterns. Enjoy the process, and let your creativity shine through.

