15 Starfish Nail Art Ideas: Stunning Designs for Your Next Mani
Nail art has become a popular way to express personal style and creativity. Starfish nail art stands out for its charming coastal vibe among the myriad of designs.
These designs often feature the iconic five-pointed starfish shape, crafted through hand-painting, decals, or 3D embellishments.
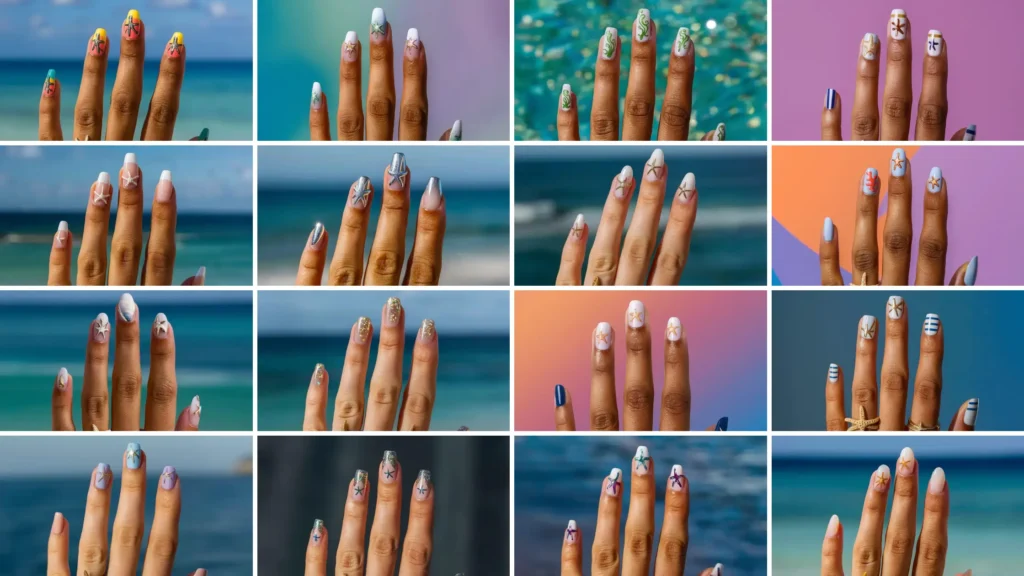
Starfish designs are perfect if you want to add beachy elegance to your nails.
Whether you prefer vibrant colors or intricate details, a starfish nail art idea matches your summer style.
Join me as I explore 15 captivating starfish nail art ideas to elevate your nail game and bring a splash of seaside charm to your fingertips.
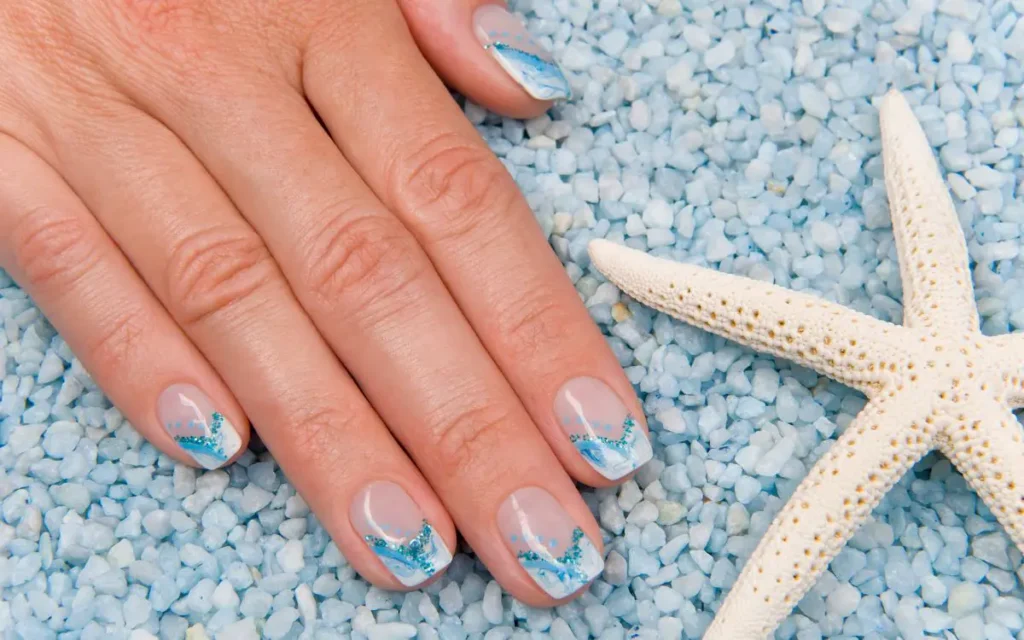
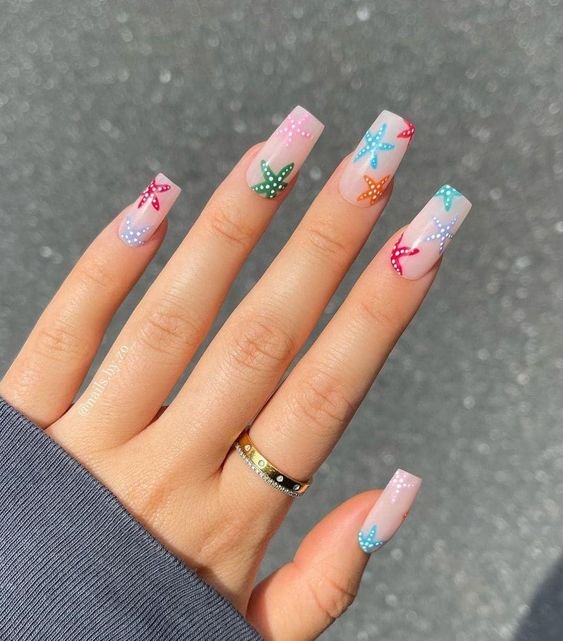
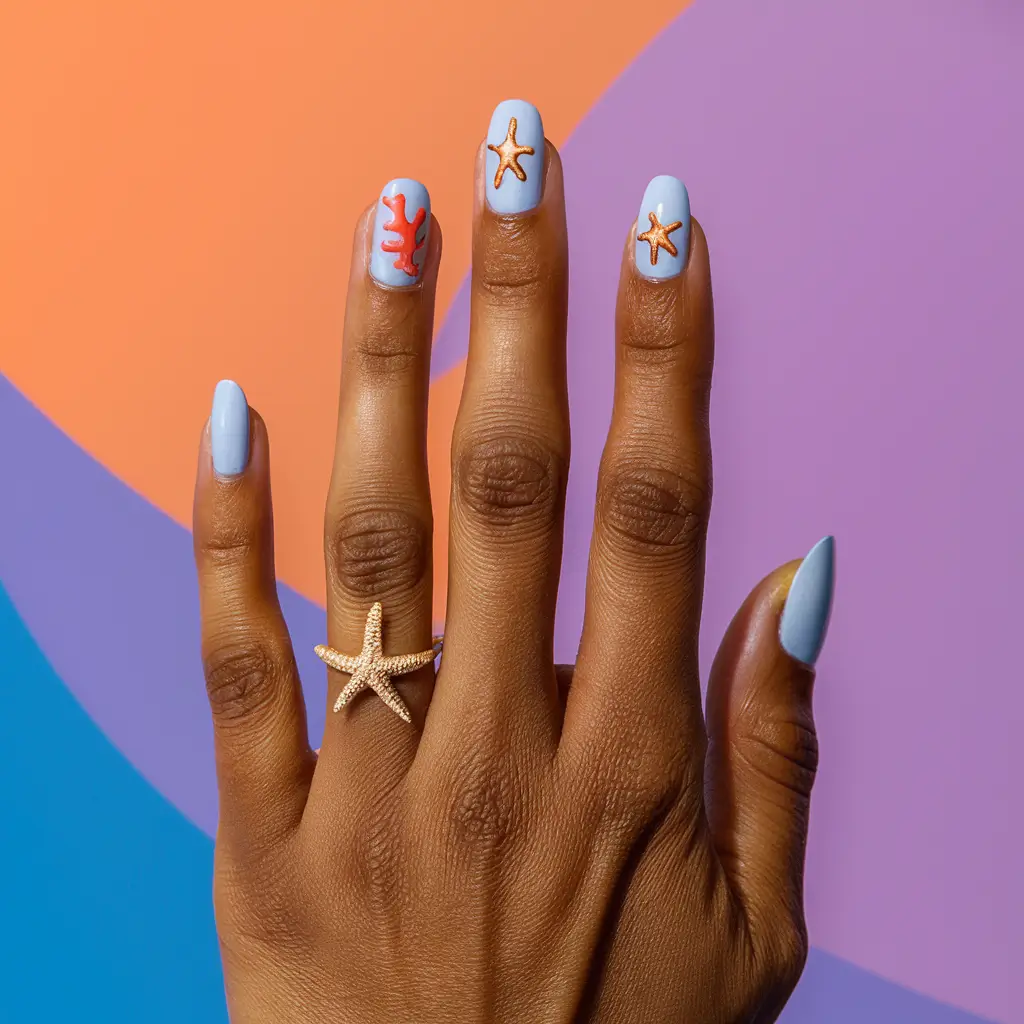
1: Starfish and Coral Combo

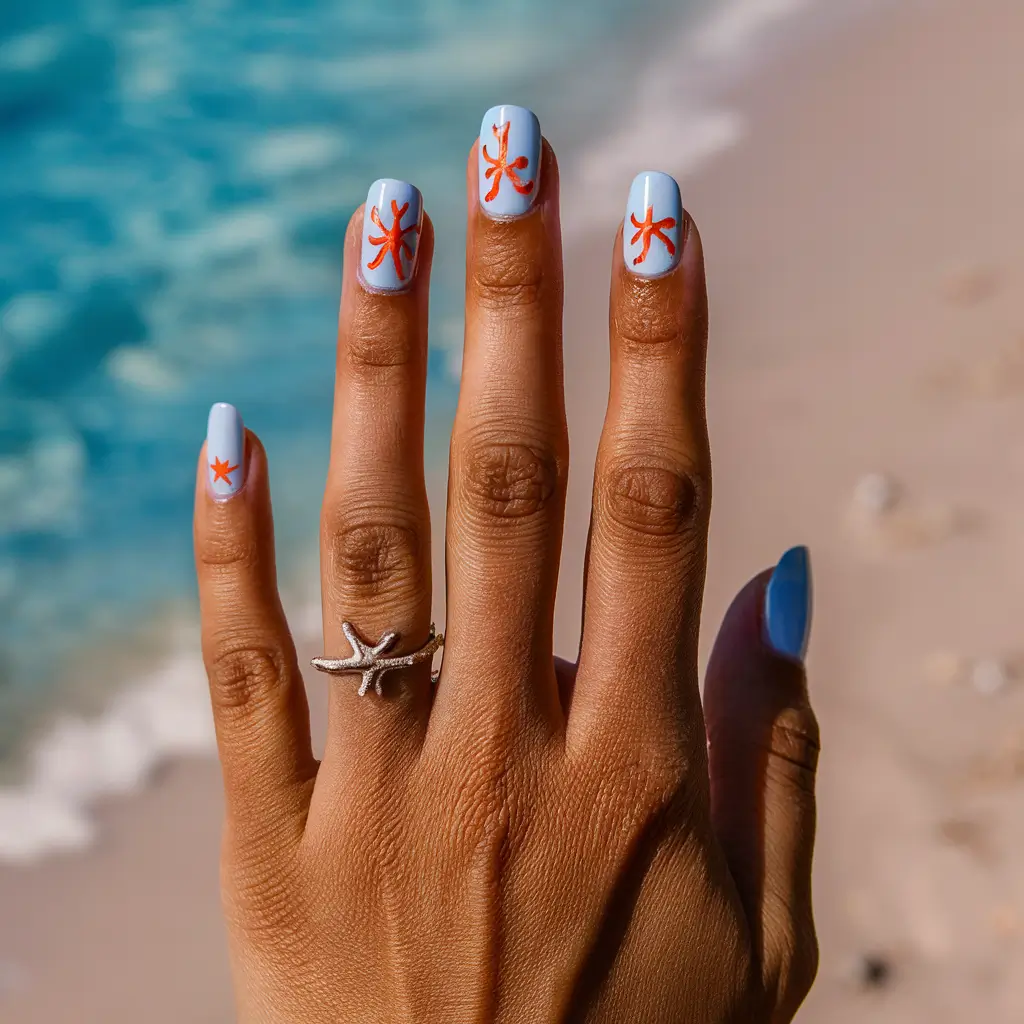
I love combining starfish with coral designs to create a proper ocean-themed look. I start by painting the nails a soft blue or sandy beige.
Next, I add coral shapes using a coral or orange polish. I finish by painting a small starfish on top. It’s a beautiful and unique design.
2: Nautical Stripes with Starfish
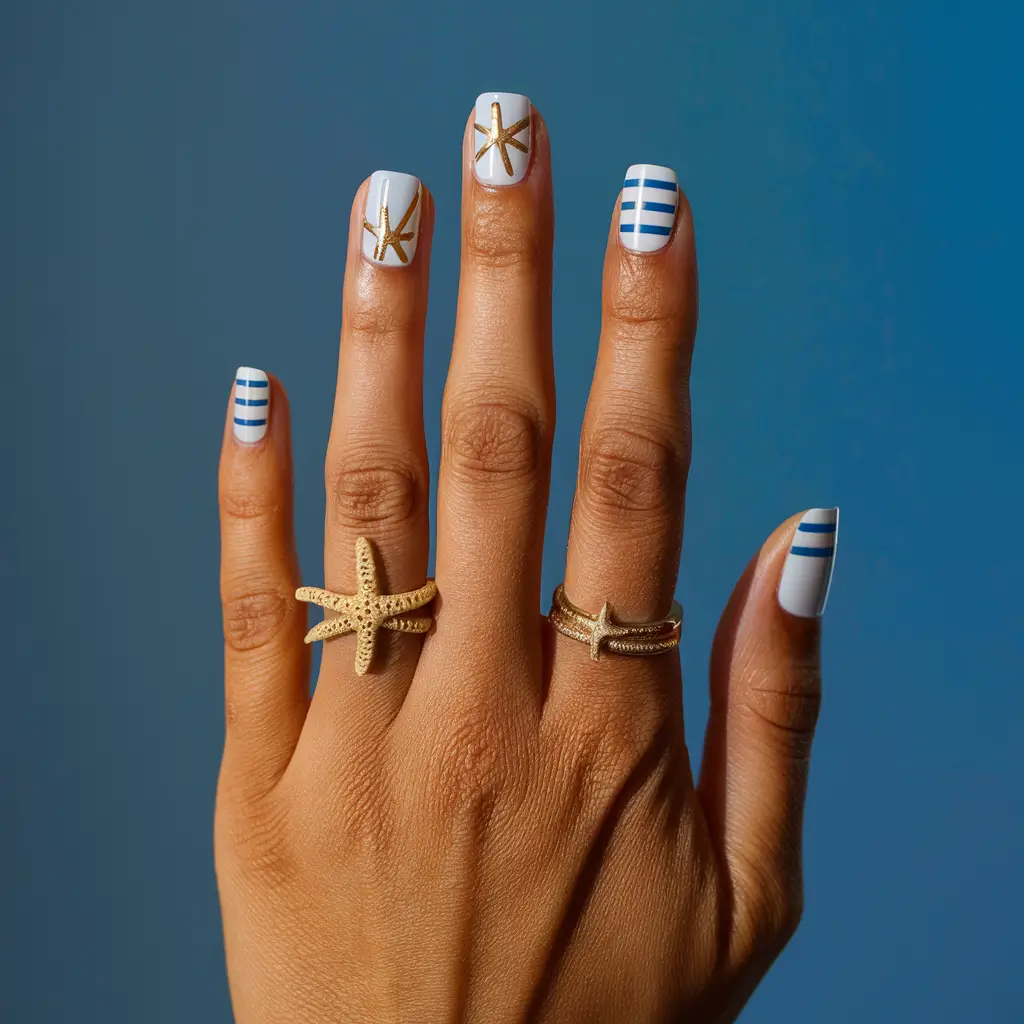

I love combining nautical stripes with starfish designs for an elegant look. I start with a base color, usually a soft blue or white. Then, I add horizontal stripes in contrasting shades, like navy or gold.
Next, I place starfish accents on one or two nails. These can be stickers, stamps, or hand-painted designs. I prefer to make the starfish in neutral shades to stand out without overwhelming the stripes.
The combination of stripes and starfish creates a classic, beach-inspired manicure that always feels fresh and stylish. This look works well for casual beach days and more formal summer events.
3: Beach Sand Base with Starfish Accent
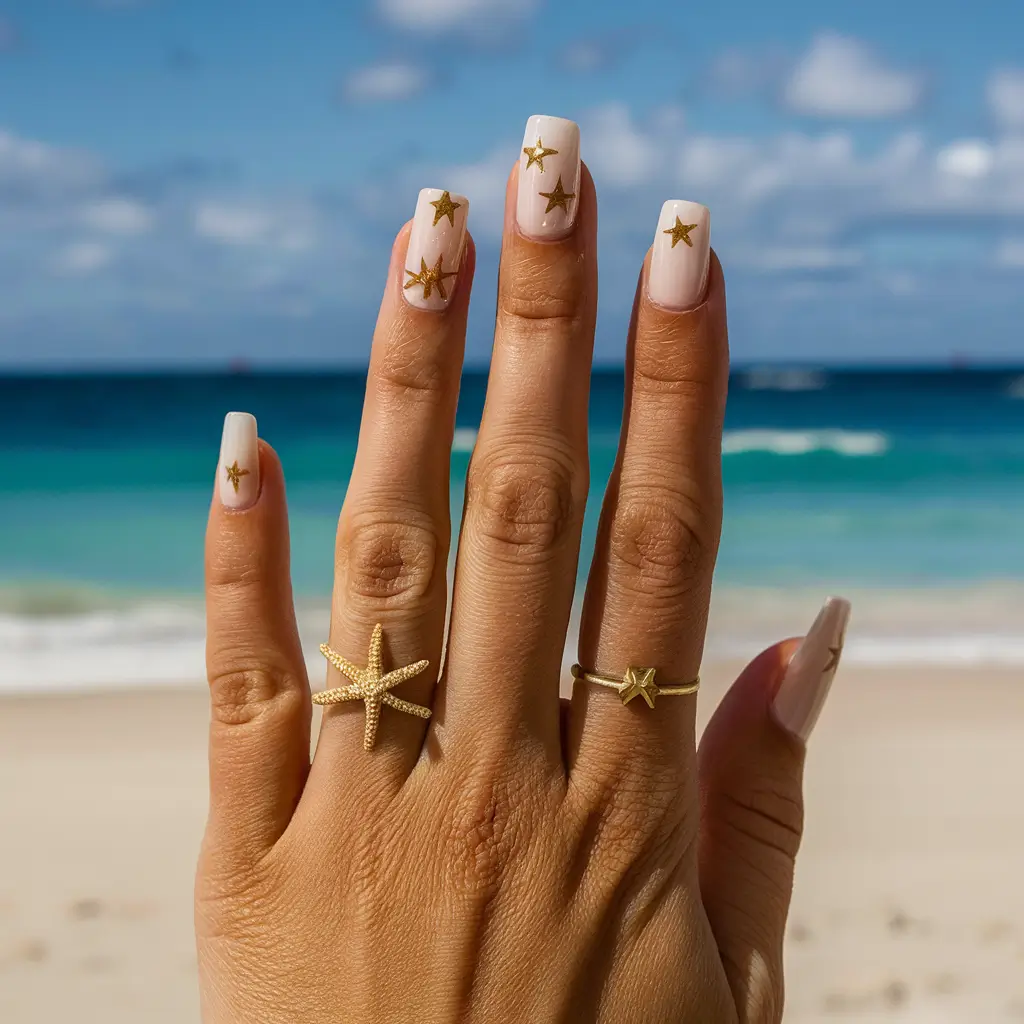
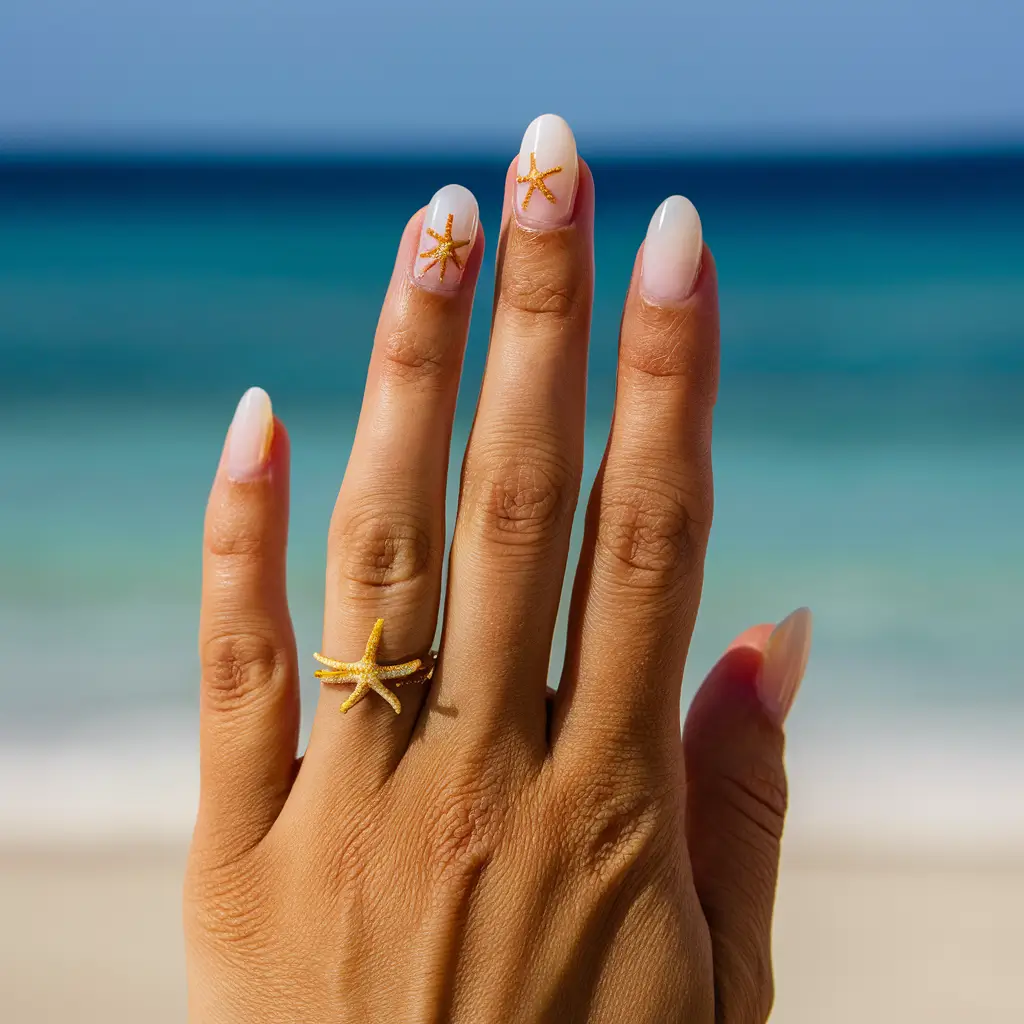
I love the look of a beach sand base with a starfish accent. This design starts with a sandy-colored polish, giving an earthy, beachy feel.
For the starfish accent, I usually choose one or two nails to highlight. I apply tiny starfish decals or hand-paint starfish for added detail.
These designs capture the essence of a day spent by the sea. The mix of neutral and intricate elements makes it perfect for summer. Using glitter can also add a bit of sparkle to mimic the sun hitting the sand.
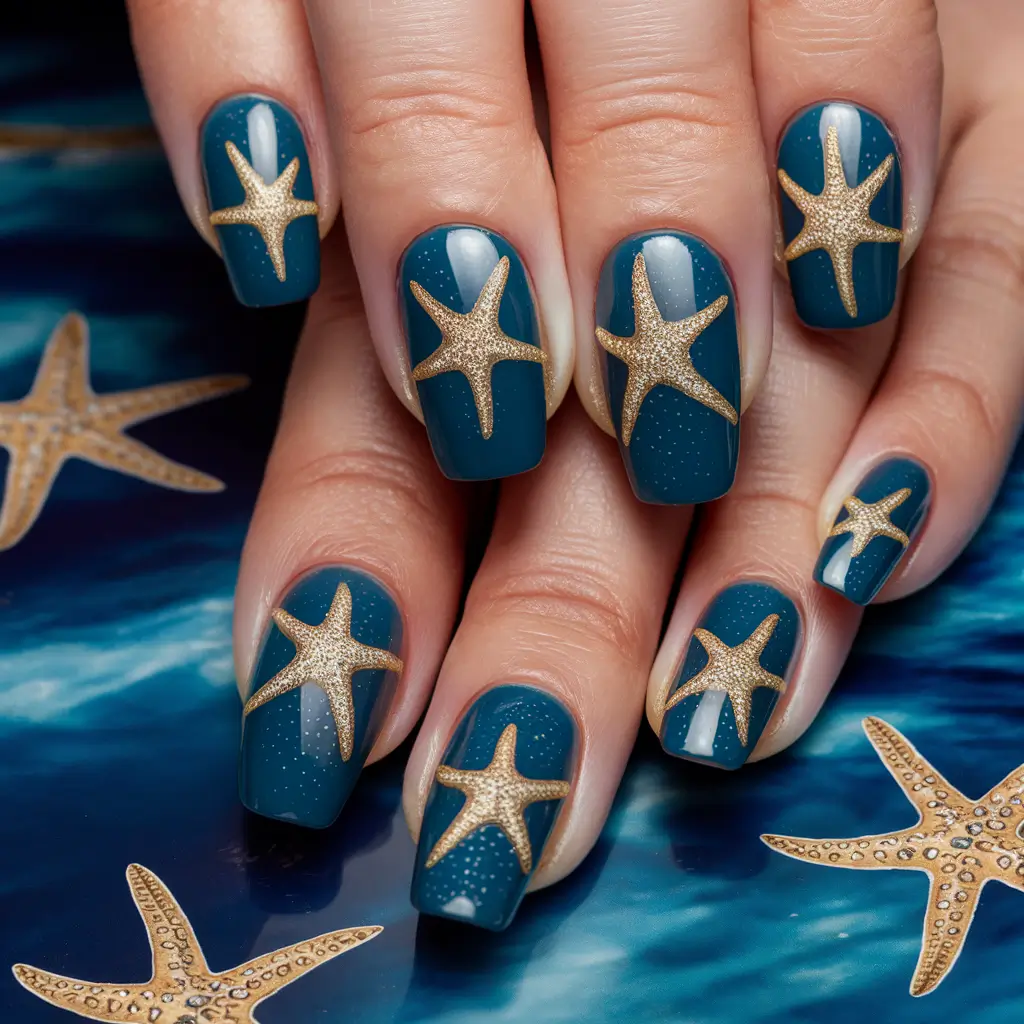
4: Ocean Blue with Gold Starfish
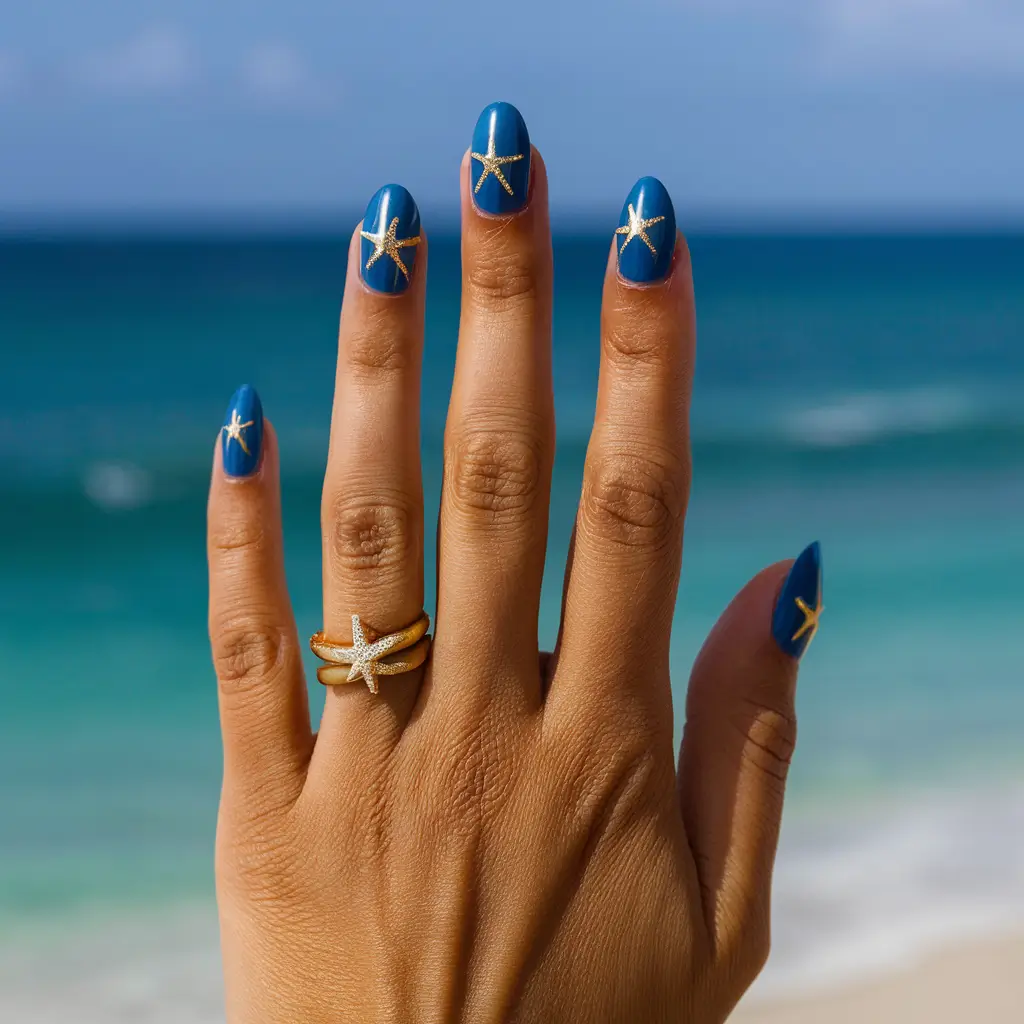
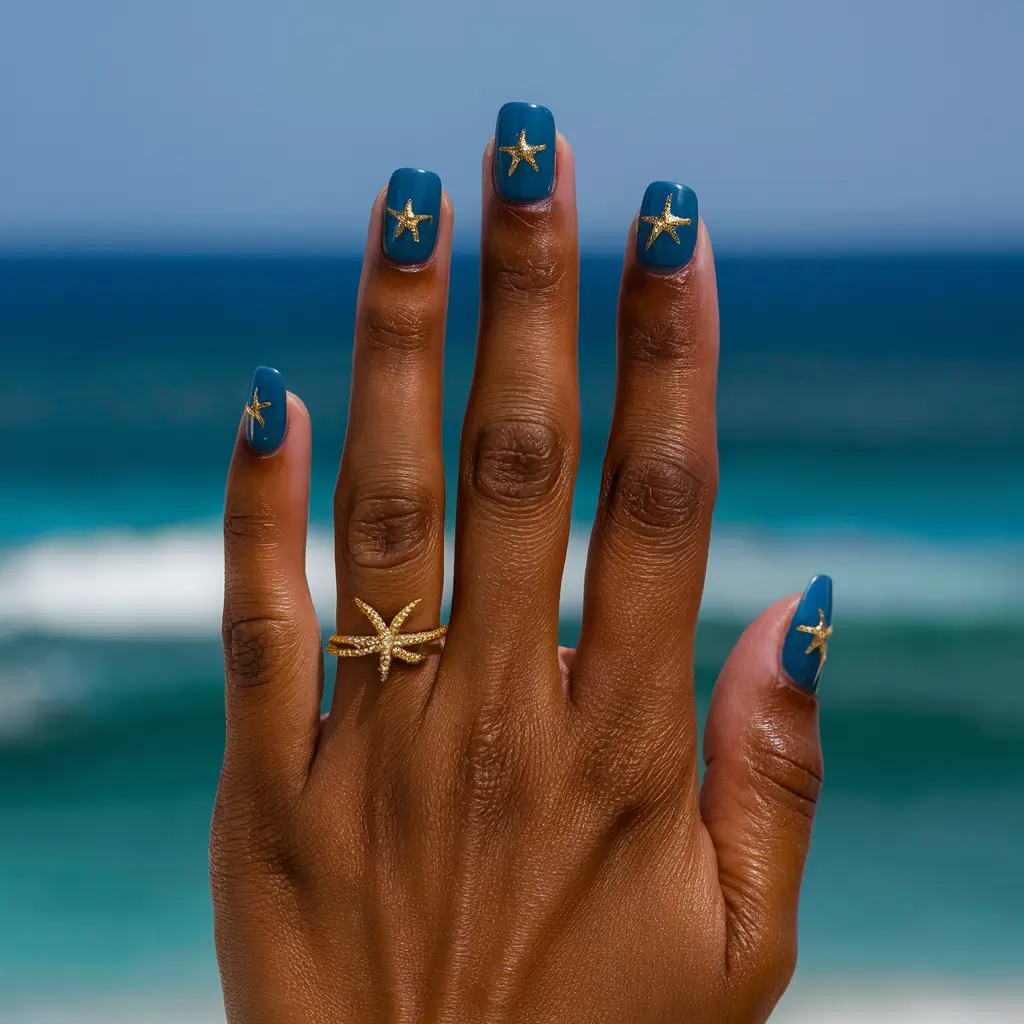
I love the combination of ocean blue and gold starfish for nail art. The deep blue color reminds me of the sea, while the gold adds a touch of elegance.
Adding gold starfish on top of ocean blue nails creates a striking contrast. The gold detail stands out perfectly against the blue.
I sometimes use small gold rhinestones or nail stickers to pop the gold starfish. This design is perfect for summer beach days or any ocean-themed event.
5: Starfish on Gradient Nails
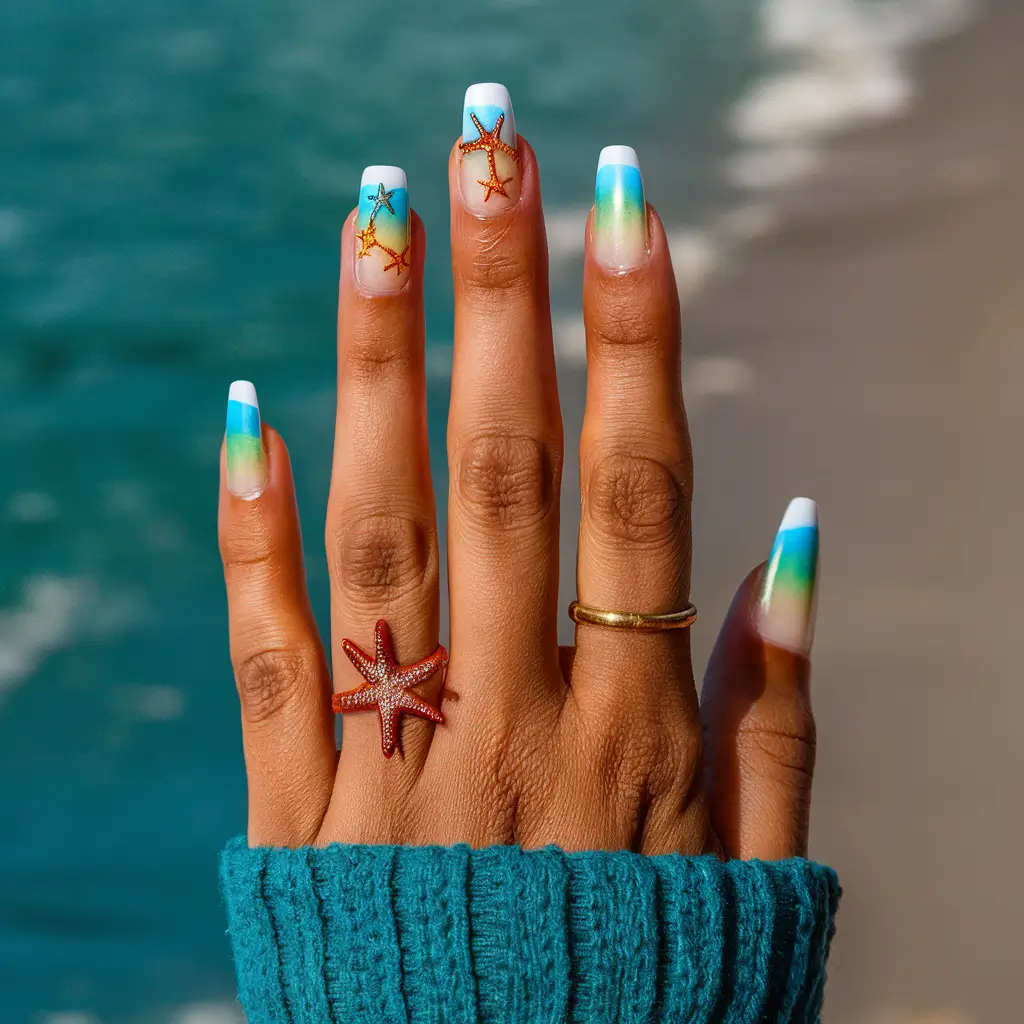
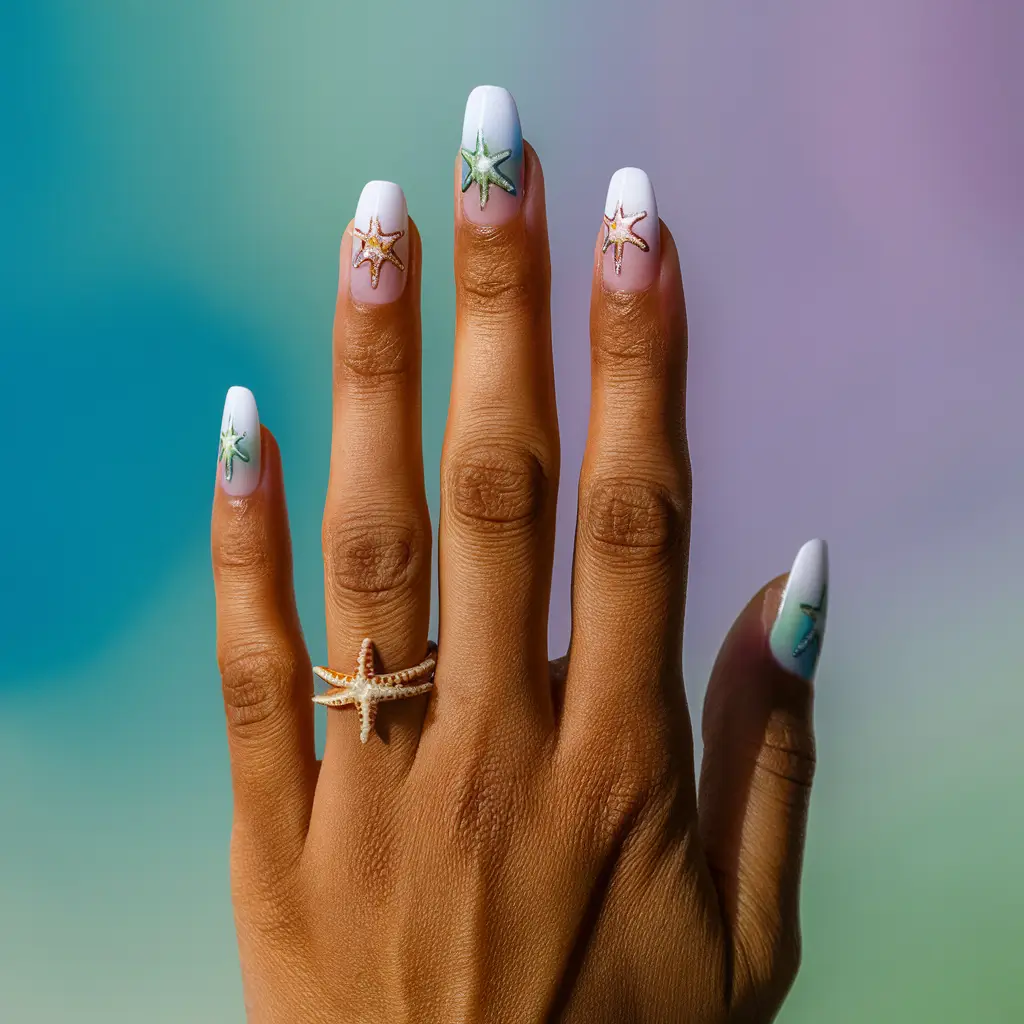
Starfish on gradient nails creates a striking look that combines the natural beauty of the ocean with colorful art. I love how the gradient background can mimic the shades of the sea.
I start with a gradient base using blues, greens, and whites to achieve this. Small, detailed starfish designs on top of the gradient adds a whimsical touch.
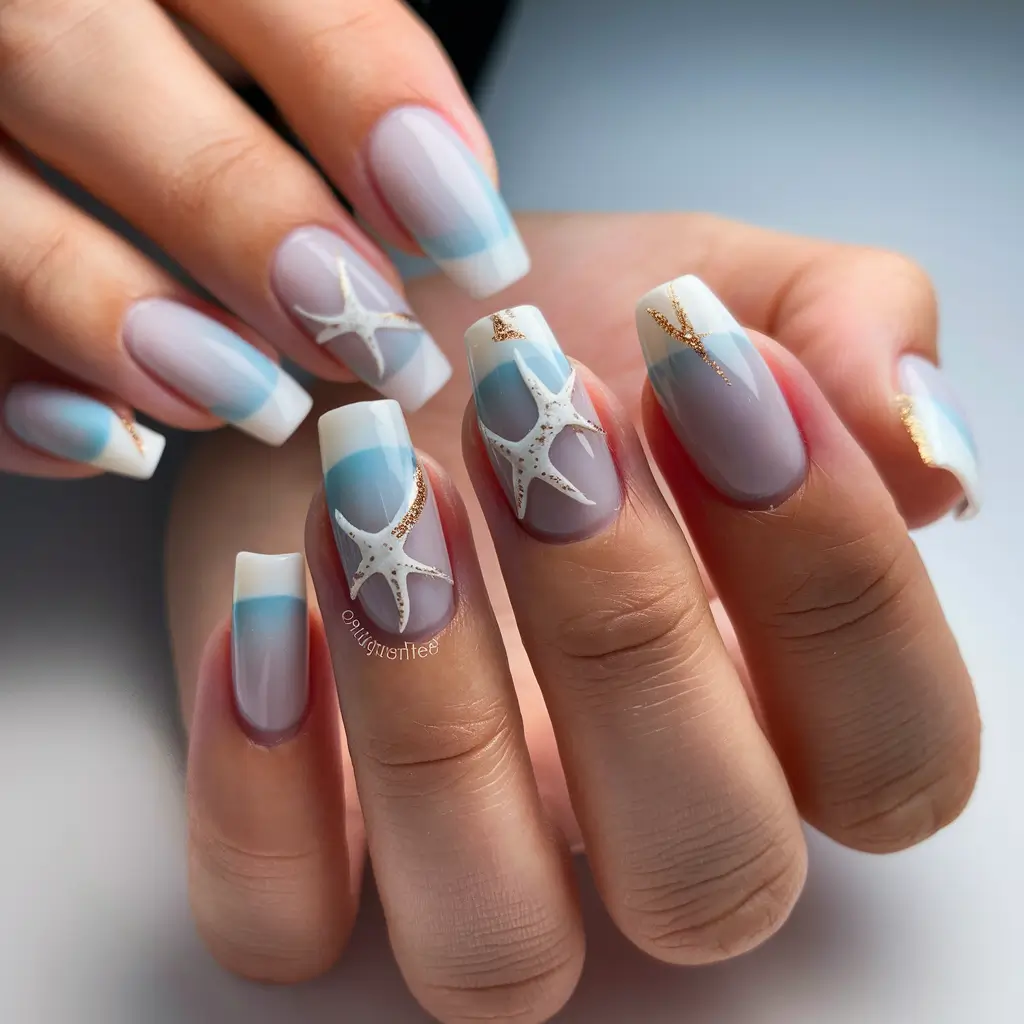
6: Elegant Starfish French Tips
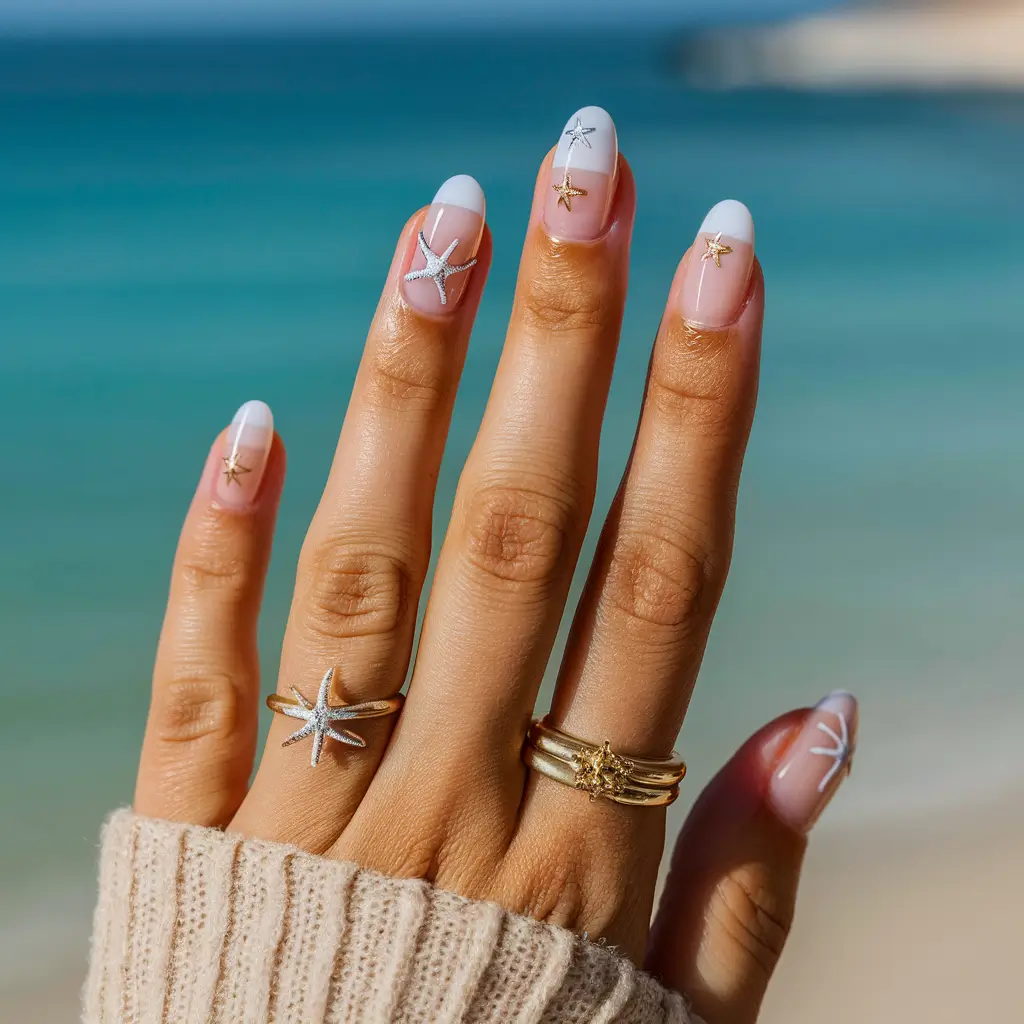
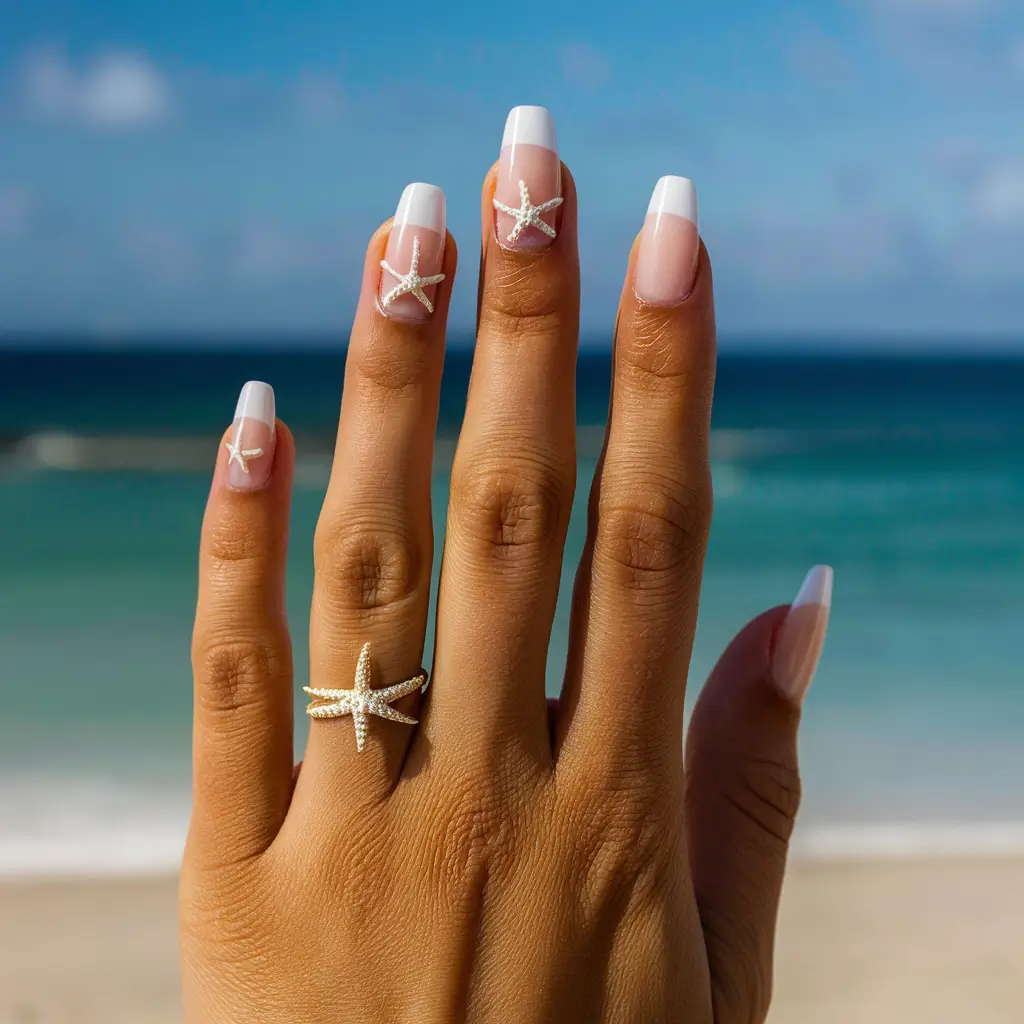
I love the simplicity and oceanic charm of Elegant Starfish French Tips. These tips upgrade the classic French tip with small starfish designs.
You can use soft, pastel colors for the base and tips. Then, add tiny starfish in white or gold for a sophisticated touch.
Another option is to use glitter polish for the starfish. This adds a bit of sparkle without overwhelming the simple elegance of the French tip.
These designs are perfect for casual beach days and more formal summer events. Keeping the starfish small and detailed maintains a classy look.
You can choose nail stickers or hand-paint the starfish for a more personalized appearance. Either way, you’ll have a chic and stylish look.
7: Starfish and Shells Design


When I think about the perfect beachy nail art, starfish and shells come to mind. This design blends both elements to create a stunning look.
Combining the starfish’s unique shape and the intricate details of seashells always makes it look beautiful. I usually choose soft pastel colors to highlight the sea theme.
Adding a bit of shimmer or glitter can make the starfish and shells pop, giving the nails a festive look. I like experimenting with different sizes and styles to keep my designs fresh and unique.
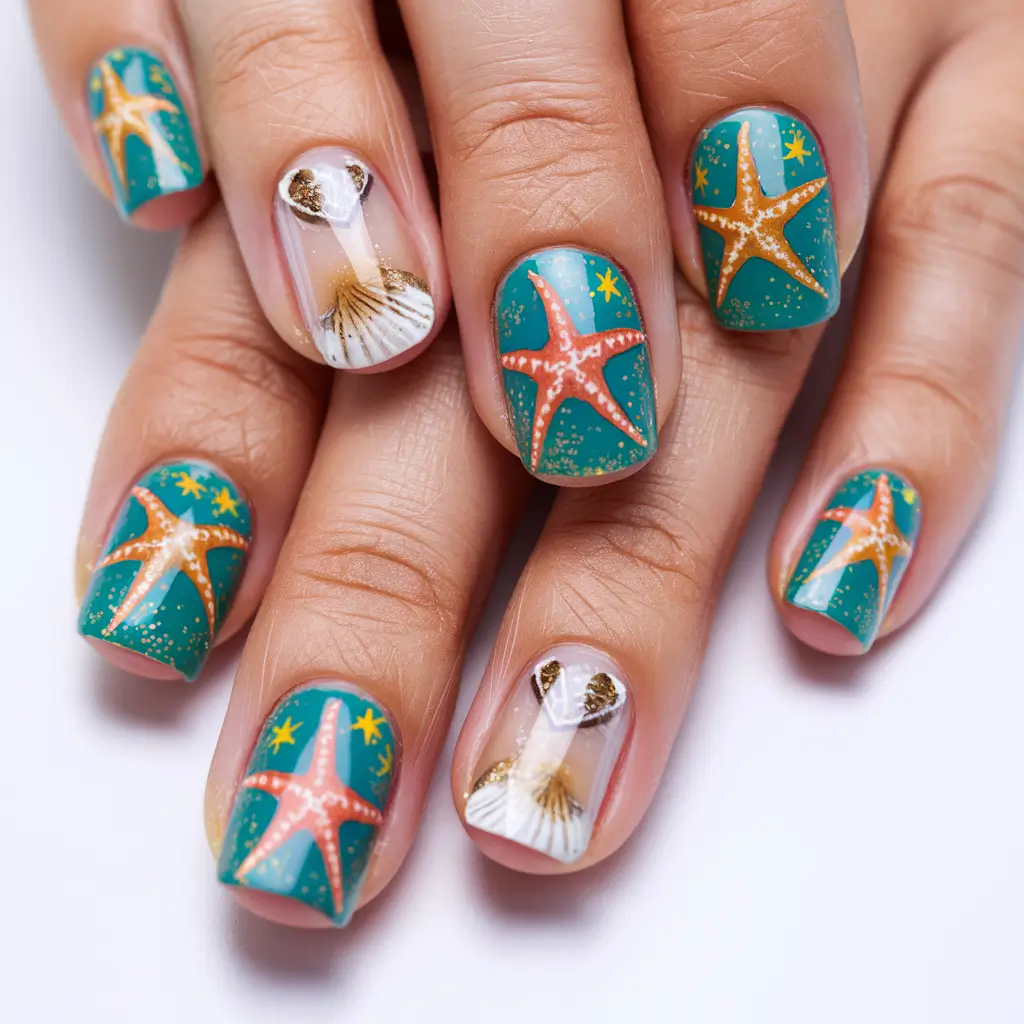
8: Tropical Starfish Pattern
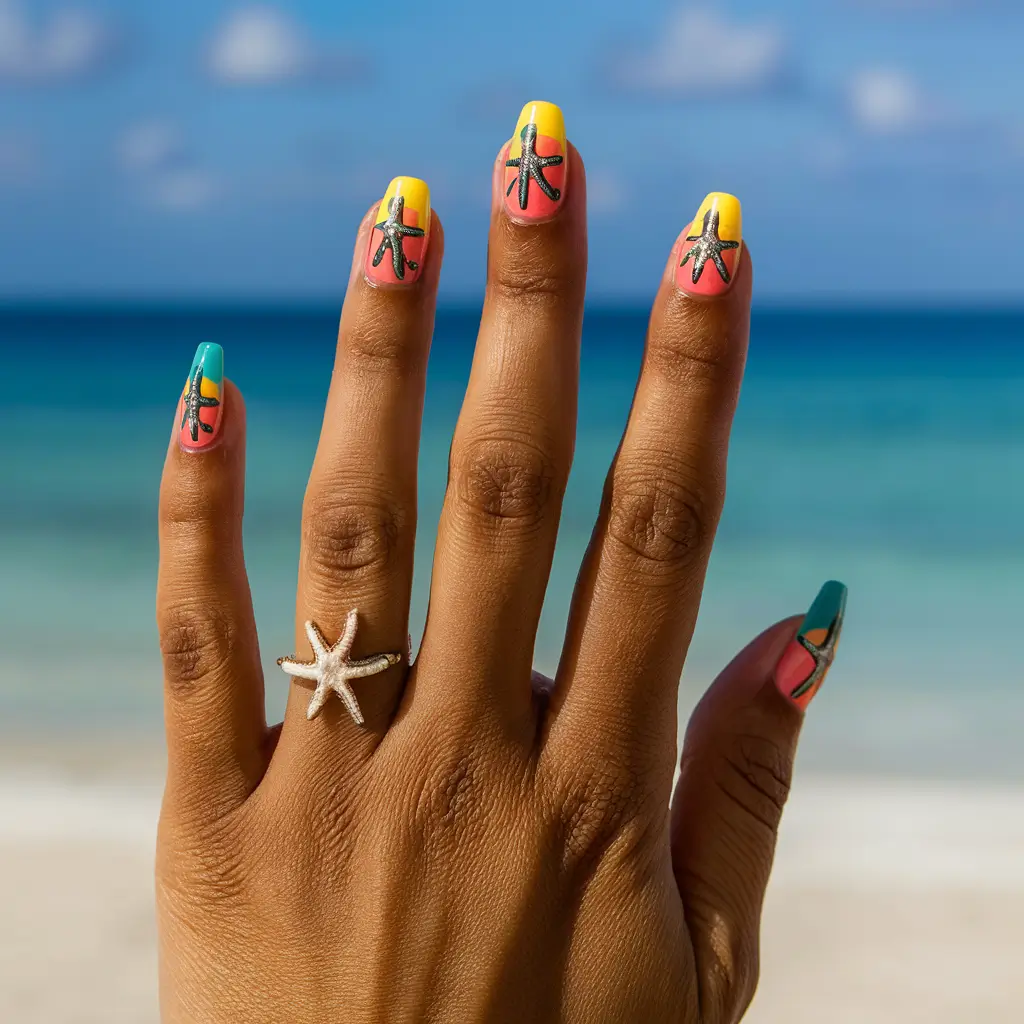

The tropical starfish pattern is perfect when I’m looking for a fun and lively design.
This design features bright colors like teal, coral, and yellow. Each nail often showcases a starfish with detailed patterns, giving a beachy vibe.
Adding small accents like seashell stickers or glitter can make the design pop even more.
9: Pastel Starfish Art
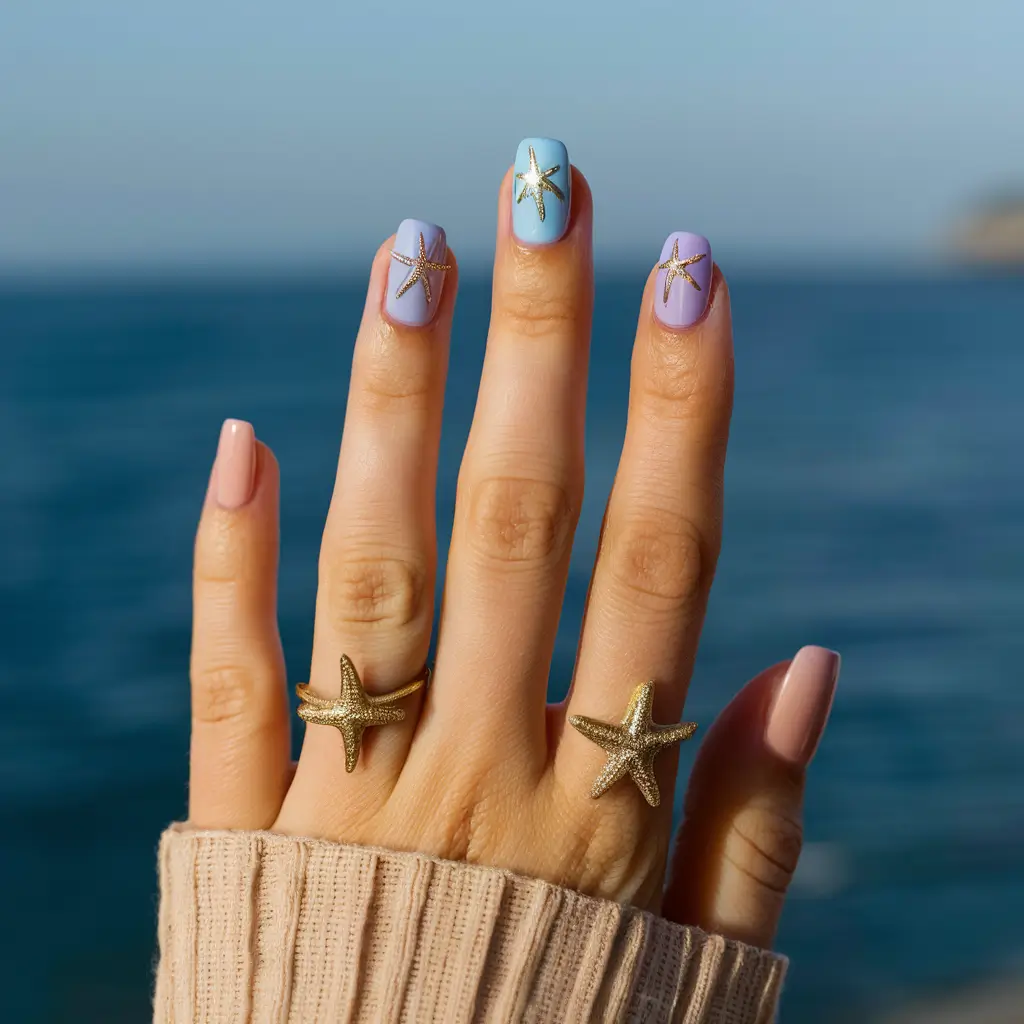
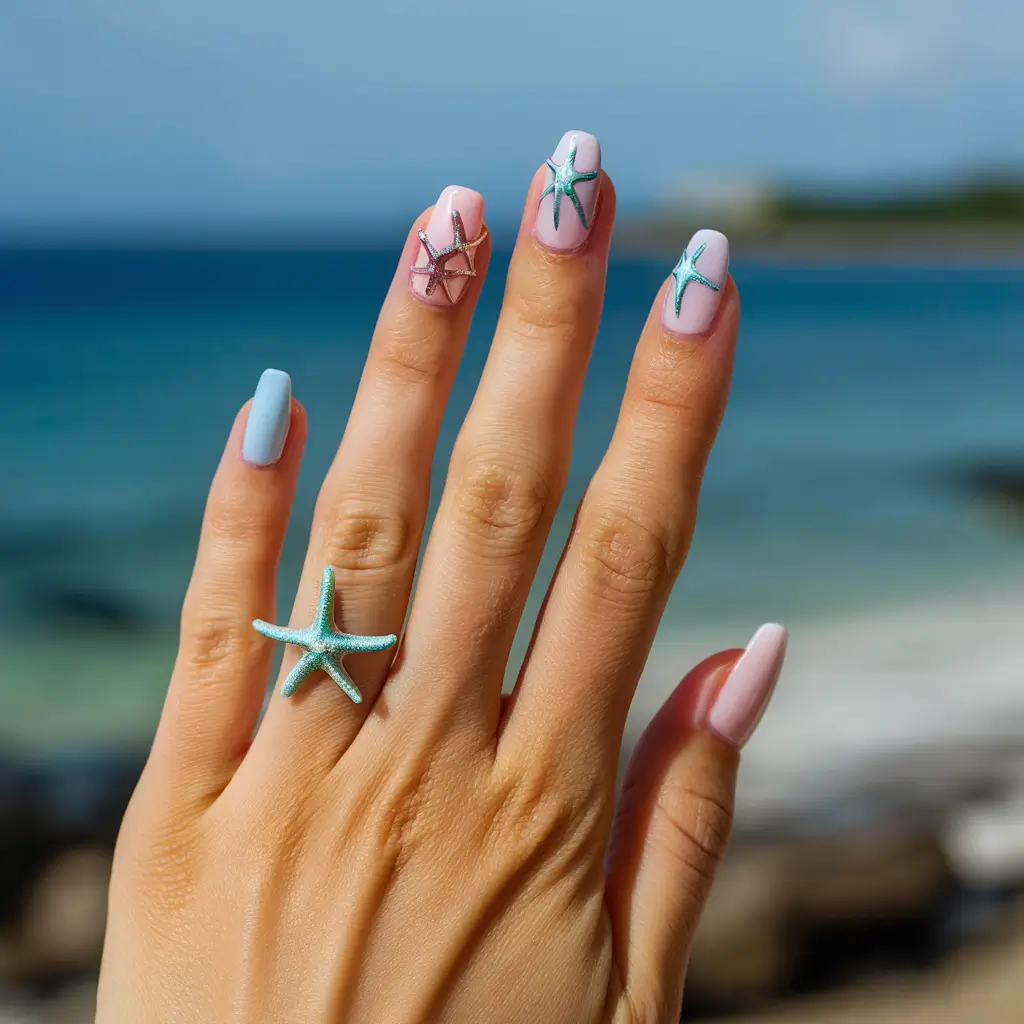
I love how pastel colors bring starfish nail art a soft and dreamy feel. The gentle pink, blue, and lavender hues make your nails look delicate yet stylish.
Using pastel starfish accents on a white or nude base enhances their charm. These designs are perfect for a subtle beachy look.
10: Glitter Starfish Nails
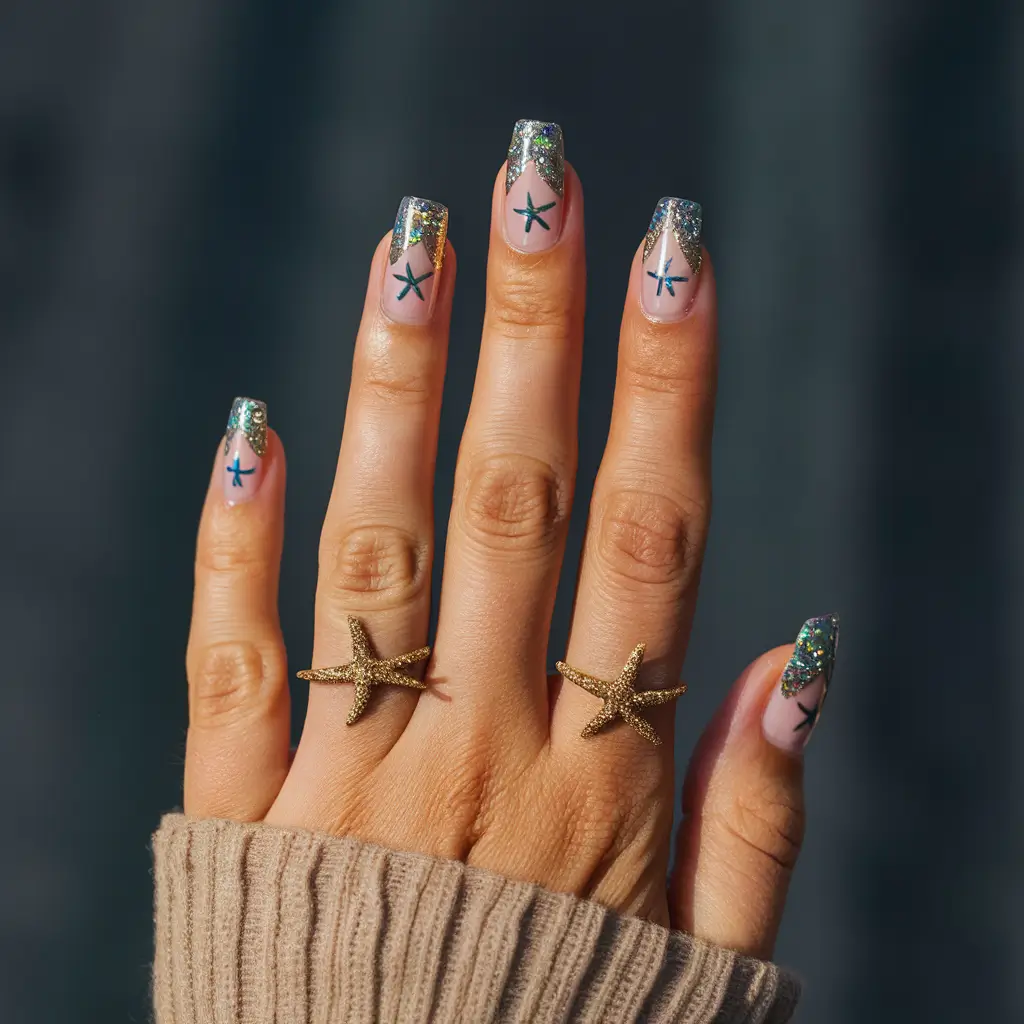
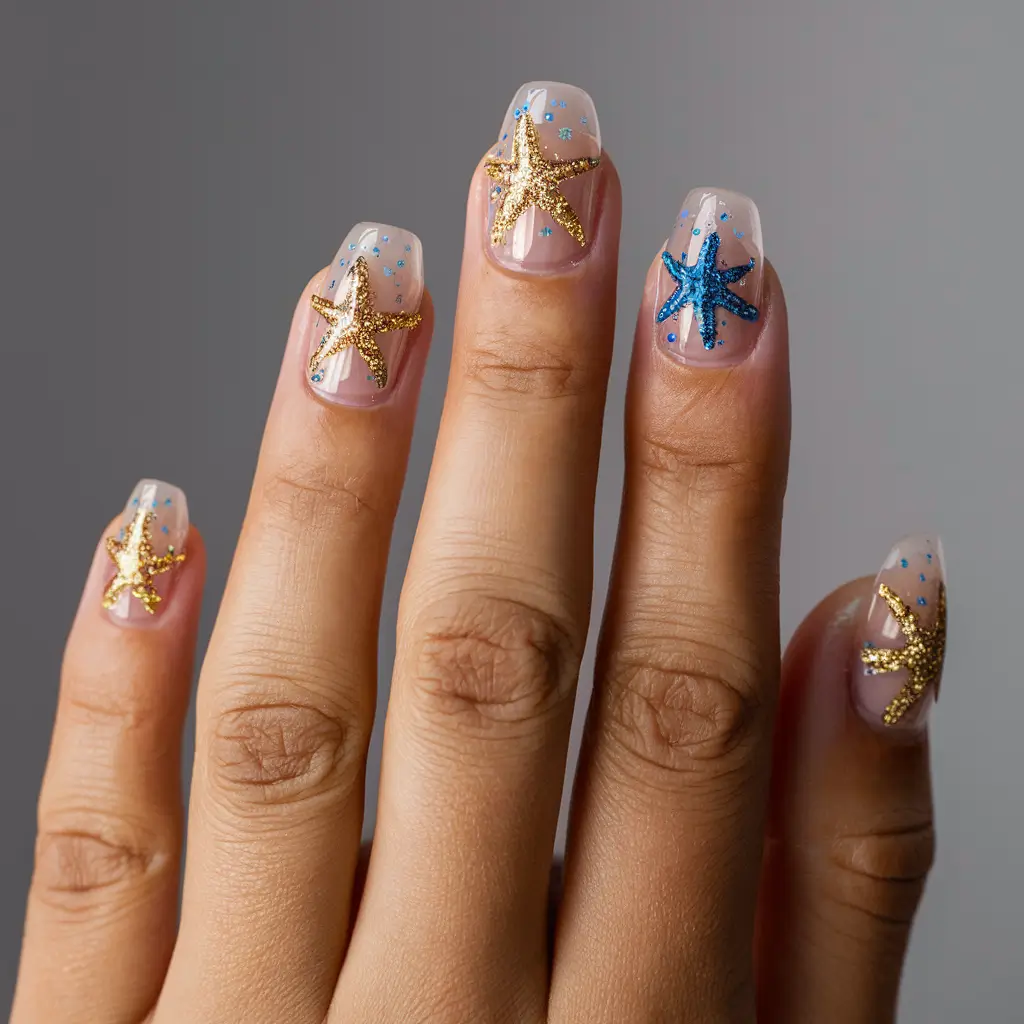
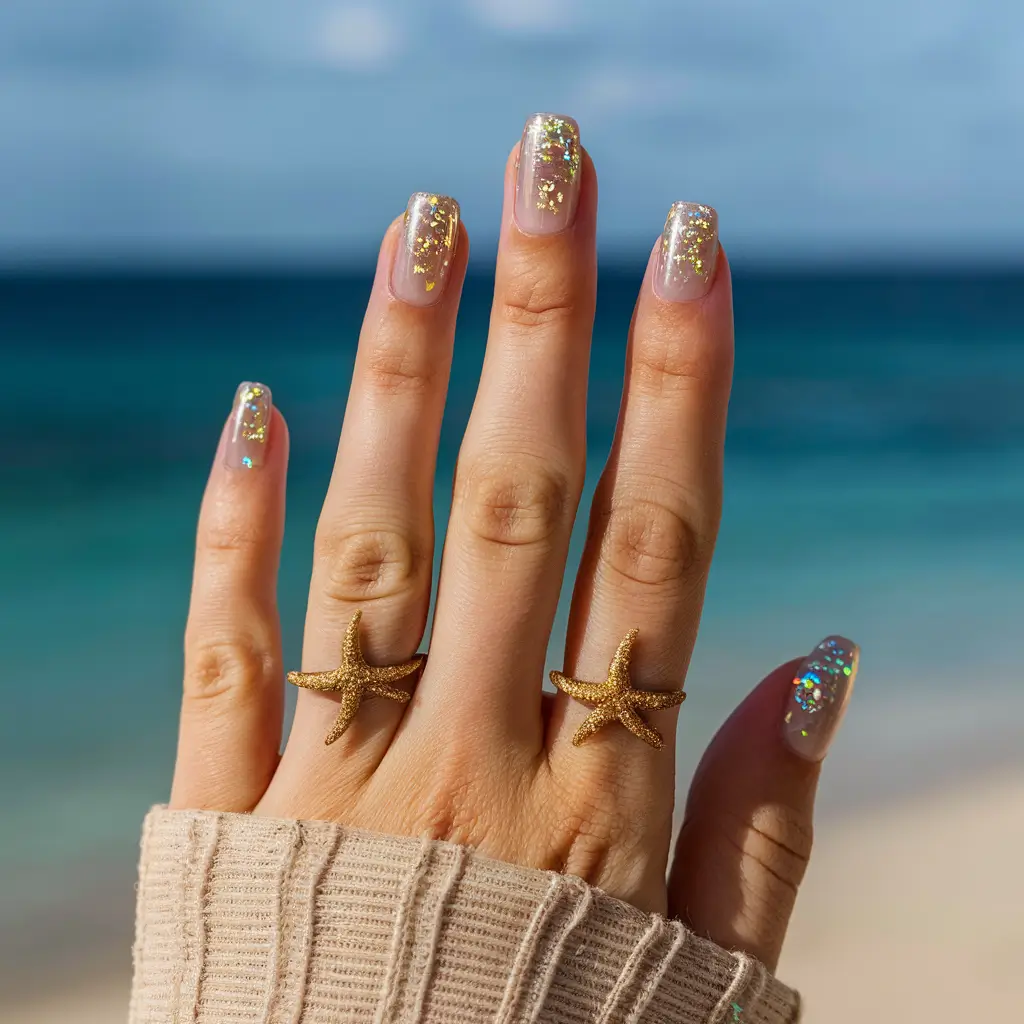
Glitter starfish nails are a fun way to sparkle in your beach-inspired look. I often opt for a clear or light-colored base to let the glitter really shine.
I like to add tiny starfish accents, using a combination of glitter polish and small decals. They create a stunning effect without being too overwhelming.
Different shades of glitter, like gold or blue, can give your nails a dynamic feel. This is a simple yet eye-catching design.
11: Watercolor Starfish Art

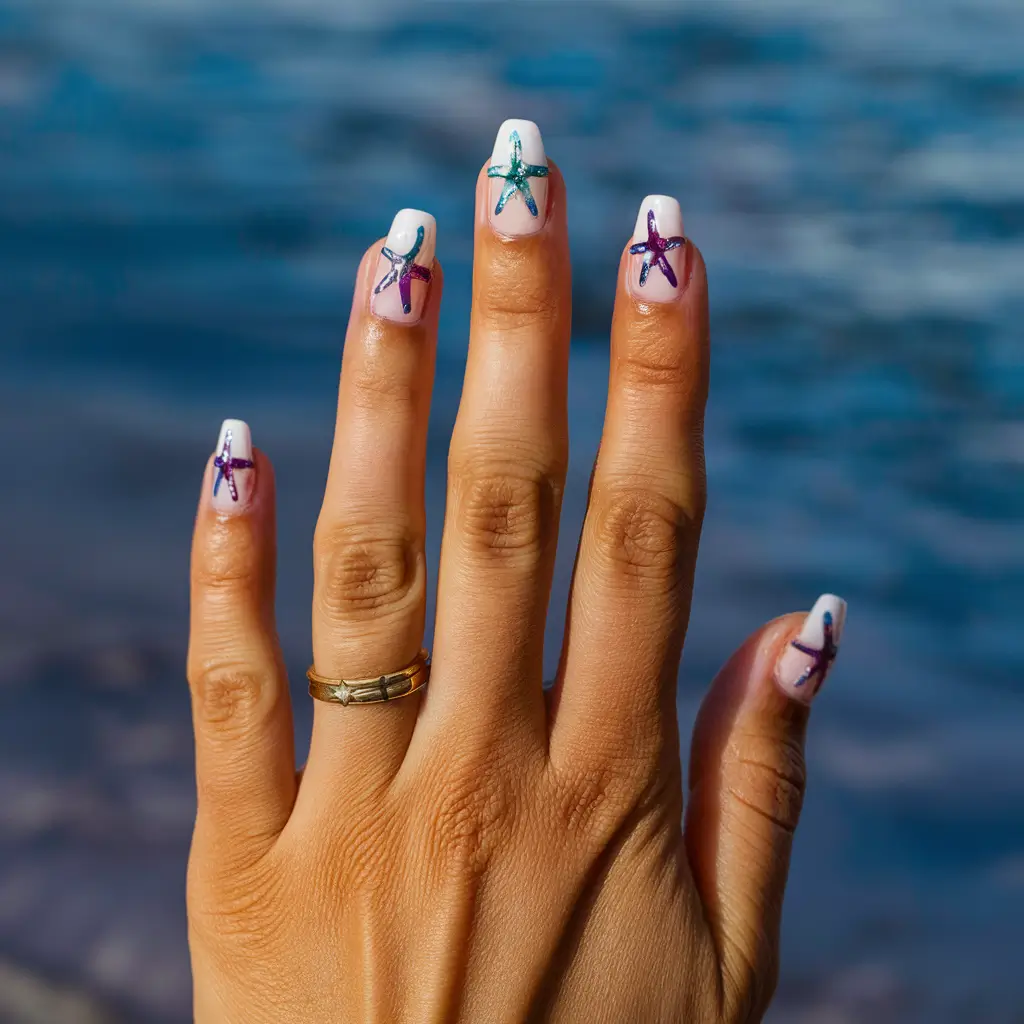
Watercolor starfish art on nails gives a soft, dreamy look. I love how the watercolor technique blends colors, creating a natural and flowy design.
I mix blues, pinks, and purples to mimic the ocean. This style makes each starfish look unique, making my nails stand out. This technique also feels very artistic and gentle.
12: Starfish on Ombre Background
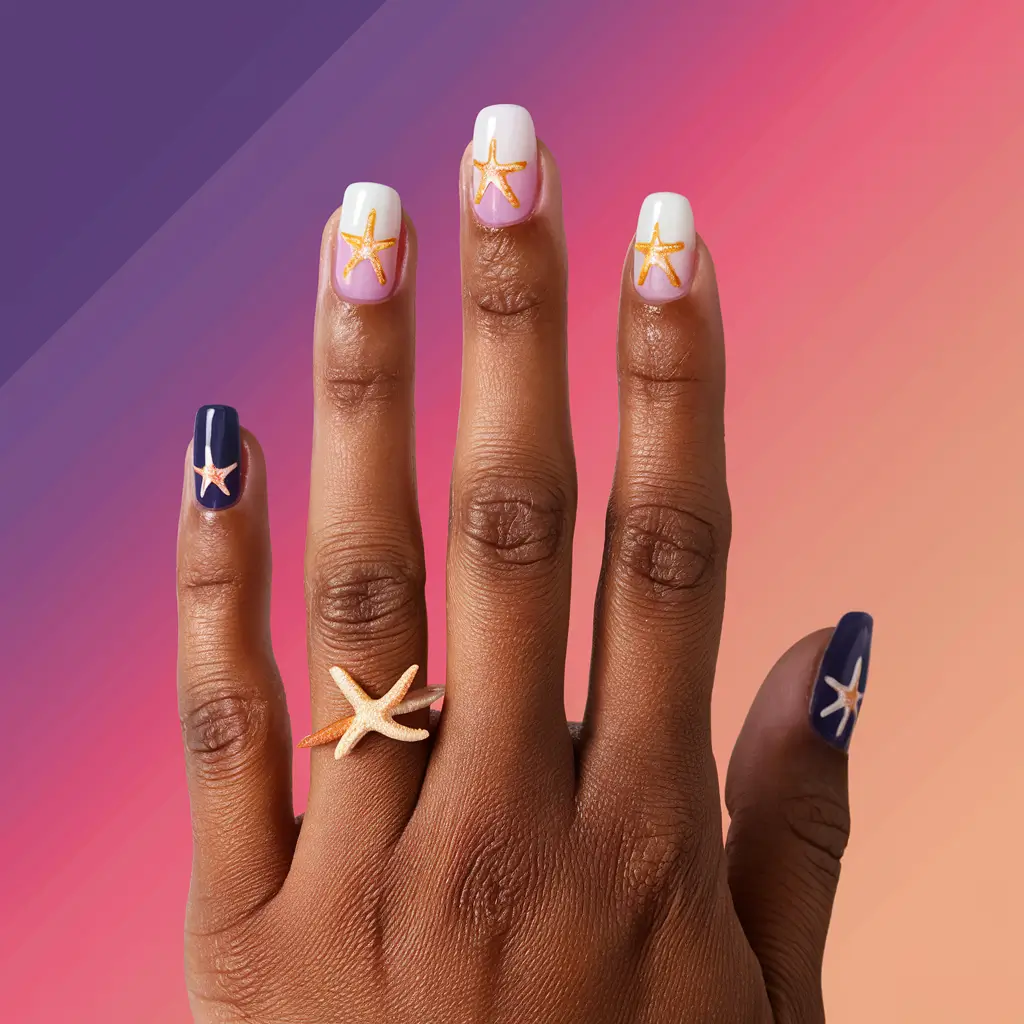

I love the look of starfish on an ombre background. It combines the gradient effect with charming sea motifs. I start with a color gradient, fading from dark to light on each nail.
Next, I add small starfish designs. These can be hand-painted, or decals can be used for more precision. The final touch is a clear top coat to seal and add shine.
This design is perfect for summer. It brings a touch of the ocean to your nails, and the combination of ombre and starfish creates a unique and stylish look.
13: Metallic Starfish Decals


Metallic starfish decals can add a chic and shiny touch to your nails. I love how the metallic finish makes the starfish design stand out, adding a bit of glamour to the beachy theme. These decals are easy to apply and instantly elevate your nail art.
I can achieve a professional look using metallic decals without advanced nail art skills. The reflective surface of these decals catches the light beautifully. It’s perfect for day and night looks, making your nails a focal point.
14: Starfish with Pearls

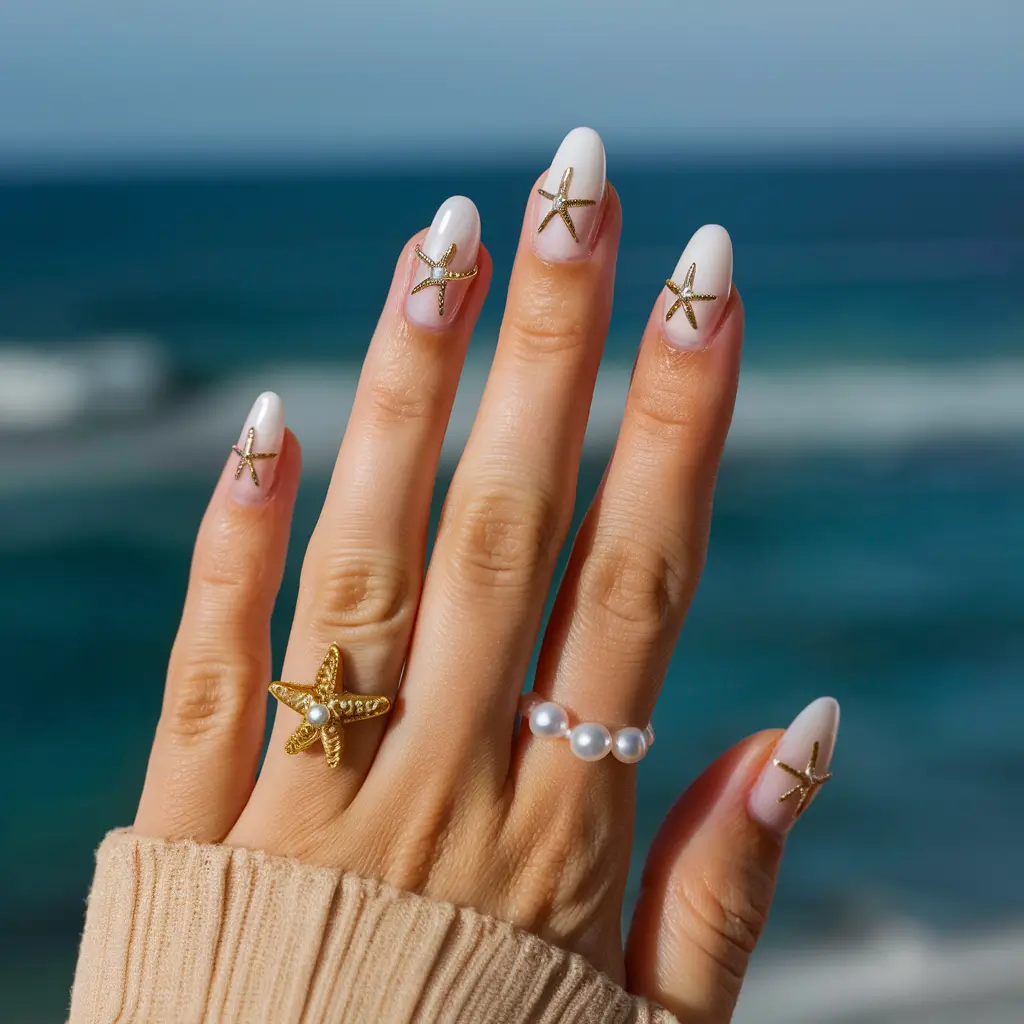
I love the elegant combination of starfish motifs with pearl accents. This design is perfect for adding a touch of sophistication to your nails.
You can achieve this look using small pearl embellishments and delicately painted starfish. Placement is key; pearls often look best near the base or along the sides of the starfish.
15: Starfish and Seaweed Design

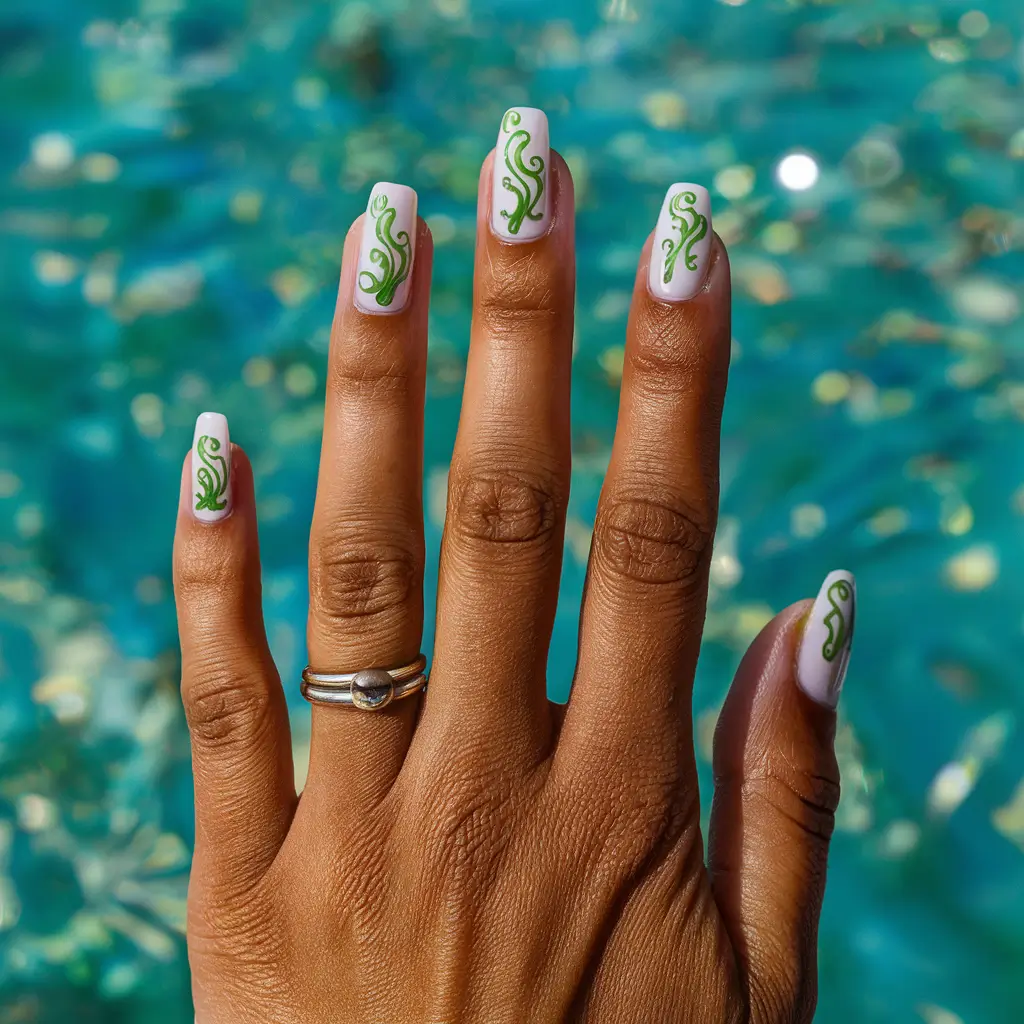
I love the combination of starfish and seaweed for a nail design. With its iconic five-pointed shape, the starfish stands out beautifully against the delicate swirls of green seaweed.
In this design, I use fine brushes to paint the seaweed. Adding small details like bubbles can enhance the underwater effect. A clear top coat will protect the intricate designs and provide a glossy finish.
Getting Started How To Do Starfish Nail Art
Starfish nail art is a fun and creative way to add a touch of the ocean to your nails. Whether you’re new to nail art or a seasoned pro, starting with starfish designs can be easy and enjoyable. This guide will walk you through the essential steps and tips to create stunning starfish nail art.
Nail Preparation
Proper nail preparation is crucial for any nail art design. Follow these steps to ensure your nails are ready for the starfish design:
- Clean Your Nails: Use a nail polish remover to remove any old polish. Make sure your nails are free of oils and dirt.
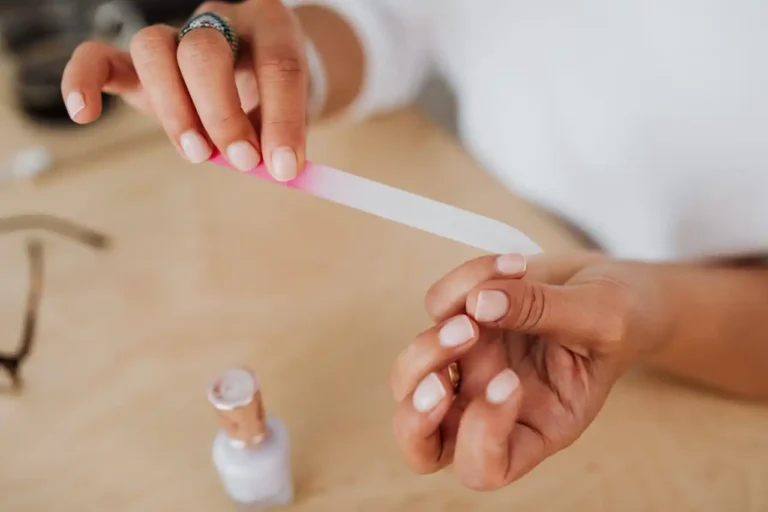
- Trim and File: Trim your nails to your desired length. Use a nail file to shape them neatly.
- Buff the Surface: Gently buff the surface of your nails with a nail buffer to remove any ridges and create a smooth canvas.
- Push-Back Cuticles: Use a cuticle pusher to push back your cuticles gently. This gives you more space to work with the design.
- Apply a Base Coat: Apply a thin layer of base coat to your nails. This helps the polish adhere better and protects your nails from staining.
Here’s a quick table to summarize the nail preparation steps:
| Step | Description |
|---|---|
| Clean Your Nails | Remove old polish, oils, and dirt |
| Trim and File | Trim to desired length and shape |
| Buff the Surface | Remove ridges and smooth out nails |
| Push Back Cuticles | Gently push back for more nail space |
| Apply a Base Coat | Protects nails and helps polish adhere |
Choosing Colors
Choosing the right colors is key to creating a beautiful starfish nail art design. Consider these tips when selecting your colors:
- Base Color: Start with a light, neutral base color. Shades like white, light blue, or sandy beige work well as they mimic the ocean and beach.
- Starfish Color: Choose vibrant colors for the starfish. Bright oranges, yellows, and reds can make your design pop.
- Accent Colors: Add small accents with different colors. Use glitter or metallic shades for an extra touch of sparkle.
Here’s a sample color combination:
| Element | Recommended Colors |
|---|---|
| Base Color | Light blue, white, sandy beige |
| Starfish Color | Bright orange, yellow, red |
| Accent Colors | Glitter, metallic shades |
Tip: Test your colors on paper before applying them to your nails. This way, you can see how they look together and make any necessary adjustments.
Have fun with your color choices, and let your creativity shine through!
:max_bytes(150000):strip_icc()/gelnails-6811b5a29b2148a28d9e316a753cc774.jpg)
Creating The Base
Starfish Nail Art is a stunning and playful design that brings a touch of the ocean to your fingertips.
This guide will walk you through creating the perfect base for your starfish nail art. A solid base ensures your design lasts longer and looks flawless.
Applying Base Coat
Applying a base coat is the first step in creating a long-lasting starfish nail art. A base coat protects your natural nails and provides a smooth surface for the polish. Follow these steps for a perfect base coat application:
- Clean Your Nails: Remove any old polish and wash your hands thoroughly. Make sure your nails are dry before applying the base coat.
- Shape Your Nails: Use a nail file to shape your nails to your desired length and shape. Smooth out any rough edges.
- Buff the Surface: Lightly buff your nails to remove any ridges. This helps the base coat adhere better.
Once your nails are prepped, apply a thin layer of base coat. Make sure to cover the entire nail, including the edges. Allow the base coat to dry completely before moving on to the next step. A good base coat will:
| Benefit | Description |
|---|---|
| Protects Nails | Prevents staining and strengthens nails. |
| Improves Adherence | Helps polish stick better and last longer. |
| Smooths Surface | Creates an even base for polish application. |
Remember, the key to a great manicure is patience. Let each layer dry completely to avoid smudging and ensure a clean, professional look.
Choosing A Design
Choosing a design for your starfish nail art is an exciting step. Consider the following tips to help you pick the perfect design:
- Color Scheme: Select colors that remind you of the ocean, like blues, greens, and sandy neutrals.
- Starfish Details: Decide if you want a detailed, realistic starfish or a more abstract, whimsical look.
- Accent Nails: Choose one or two nails to feature the starfish design prominently while keeping the rest simple.
Here are some popular design ideas:
- Classic Starfish: A single starfish on each nail, surrounded by tiny bubbles or seaweed.
- Beach Scene: A sandy beach with starfish scattered around, complete with tiny seashells.
- Underwater Fantasy: A deep blue background with starfish, coral, and other sea creatures.
Use glitter polish or tiny rhinestones to make your starfish sparkle for added flair. For an easier application of intricate details, use a fine nail art brush or nail stickers. Experiment with different designs until you find one that you love.
Remember, the goal is to have fun and express your creativity. Starfish nail art is all about capturing the beauty and whimsy of the ocean.
Drawing The Starfish
Starfish Nail Art can transform your nails into a stunning, beach-inspired masterpiece. The design involves drawing intricate starfish patterns that bring the ocean to your fingertips.
To achieve the perfect starfish, you can use various tools and techniques. This guide will focus on two popular methods: using a nail art pen and a thin brush.
Using A Nail Art Pen
A nail art pen makes drawing a starfish easy and precise. The pen offers excellent control and allows for detailed designs. Here’s how to use it:
- Prepare your nails: Start with a clean, dry base. Apply a base coat to protect your nails and ensure the design lasts longer.
- Choose your colors: Select a bright color for the starfish and a contrasting color for the background.
- Draw the starfish: Hold the pen like a regular pen. Start by drawing a small central dot on the nail. Draw five lines extending outward from this dot, forming the starfish’s arms.
- Add details: Add small dots or lines on each arm to mimic the texture of a real starfish.
- Seal the design: Finish with a top coat to protect your artwork and add shine.
Using a nail art pen offers several benefits:
| Benefit | Description |
|---|---|
| Precision | The fine tip allows for detailed work. |
| Ease of Use | Even beginners can create intricate designs. |
| Versatility | Works well with various nail polish types. |
Using A Thin Brush
A thin brush provides flexibility and control, perfect for detailed starfish designs. Here’s how to use it:
- Prepare your nails: Clean your nails and apply a base coat to protect them.
- Select your polish: Choose colors that contrast well with the starfish and the background.
- Load the brush: Dip the thin brush into the starfish color. Wipe off excess polish to avoid blobs.
- Draw the starfish: Start with a small dot in the center of the nail. Draw five thin lines extending outward to form the arms.
- Add details: Use the brush tip to add tiny dots or lines on the arms, creating a textured look.
- Seal the design: Apply a top coat to protect your artwork and give it a glossy finish.
Using a thin brush offers several advantages:
| Advantage | Description |
|---|---|
| Flexibility | The brush can create various line thicknesses. |
| Detailing | Allows for fine details and textures. |
| Creativity | Enables more creative freedom in designs. |
Both tools have their unique benefits. Whether you choose a nail art pen or a thin brush, you can create beautiful starfish nail art with a little practice and patience.
:max_bytes(150000):strip_icc()/292109784_1092781491653130_2909873384968396688_n-a92928e99bc341c5af1ac1029f832712.jpg)
Adding Details
Starfish nail art is a stunning and creative way to showcase your love for the ocean. Adding details to your starfish nail art can elevate your design, making it more intricate and eye-catching.
In this guide, we’ll explore techniques for creating texture and using glitter or rhinestones to enhance your starfish nail art.
Creating Texture
Adding texture to your starfish nail art makes it more realistic and visually appealing. Here are some steps to create texture:
- Use a dotting tool: Use a dotting tool to create small dots on the starfish. This mimics the natural bumps found on a real starfish.
- Apply a textured polish: Special textured nail polishes can add a sandy or gritty effect to your design.
- Use a fine brush: Draw tiny lines or patterns on the starfish to add more detail.
Here’s a helpful table to summarize these techniques:
| Technique | Description |
|---|---|
| Dotting Tool | Creates small, raised dots for a bumpy texture. |
| Textured Polish | Adds a gritty or sandy effect to the nail art. |
| Fine Brush | Draws intricate lines and patterns for added detail. |
Experimenting with different tools and techniques can help you achieve the perfect textured look for your starfish nail art.

Using Glitter Or Rhinestones
Glitter and rhinestones can add sparkle and dimension to your starfish nail art. Follow these tips to incorporate them into your design:
- Glitter polish: Apply a glitter polish over your starfish design for a shimmering effect. Choose colors that complement your base color.
- Loose glitter: Sprinkle loose glitter onto wet nail polish. Use a small brush to remove excess glitter and ensure even coverage.
- Rhinestones: To mimic the appearance of natural sea creatures, place small rhinestones on the starfish and secure them with nail glue.
Here’s a summary of these glitter and rhinestone techniques:
| Technique | Description |
|---|---|
| Glitter Polish | Applies a shimmering effect over the starfish design. |
| Loose Glitter | Sprinkles glitter onto wet polish for a sparkling finish. |
| Rhinestones | Places small stones to add dimension and shine. |
Using glitter and rhinestones can make your starfish nail art stand out. Experiment with different colors and placements to find your perfect look.
Finishing Touches
Nail art designs bring creativity to your fingertips. Starfish nail art is a delightful choice, especially for summer.
The design process can be intricate, but the finishing touches make the difference. These final steps ensure your starfish nail art looks perfect and lasts longer.
Applying Top Coat
Applying a top coat is essential for any nail art. It seals your design and adds shine. Follow these steps for a flawless finish:
- Choose a high-quality top coat: A good top coat protects your nail art from chipping.
- Apply a thin layer: A thick layer can cause bubbles. For best results, use a thin, even layer.
- Seal the edges: Don’t forget the edges and tips of your nails. This prevents peeling.
- Let it dry completely: Ensure your nails are fully dry before touching anything.
Here is a quick guide for the top coat application:
| Step | Action | Tip |
|---|---|---|
| 1 | Choose top coat | Opt for a quick-dry formula |
| 2 | Apply thin layer | Use smooth strokes |
| 3 | Seal edges | Run brush along tips |
| 4 | Let it dry | Allow 15 minutes to dry |
Cleaning Up
Once your top coat is dry, clean up any mistakes. This step ensures your starfish nail art looks professional:
- Use a small brush: Dip a small brush in nail polish remover. This helps you clean up small mistakes around the edges.
- Be gentle: Gently remove any excess polish from your skin. Avoid touching the nail art.
- Check for smudges: Look closely at your nails for any smudges or uneven areas.
- Fix any imperfections: If you see any issues, use the small brush to fix them.
Here are some tips for a perfect clean-up:
- Use acetone-free remover: It’s gentler on your skin.
- Have good lighting: Good lighting helps you see small mistakes.
- Take your time: Rushing can ruin your design. Go slow and be precise.
These tips will make your starfish nail art look neat and professional, ready to show off!
Tips And Tricks
Are you excited to add a touch of the ocean to your nails with starfish nail art? Creating beautiful starfish designs is a fun and rewarding process.
This guide will provide valuable tips and tricks for making your starfish nail art look stunning. Whether you are a beginner or a pro, these insights can enhance your nail art skills.
Practice Makes Perfect
Consistent practice is essential for mastering starfish nail art. Start with simple designs and gradually move to more complex ones. Here are some key tips:
- Start with a base coat: Always apply a base coat to protect your nails and make the polish last longer.
- Use a dotting tool: Create the starfish shape using a dotting tool. Practice making even dots.
- Draw light outlines: Use a fine brush to draw light outlines of the starfish before filling them in.
Here’s a table to help you track your practice:
| Day | Practice Task | Duration |
|---|---|---|
| Monday | Basic starfish shapes | 30 minutes |
| Wednesday | Adding details | 45 minutes |
| Friday | Combining colors | 1 hour |
Remember, practice makes perfect. Keep practicing regularly, and you’ll see improvements in your designs.
Experiment With Different Techniques
Trying different techniques can make your starfish nail art unique. Here are some ideas to experiment with:
- Gradient background: Create a gradient background using different shades of blue to mimic the ocean.
- Texture effects: Use glitter or sand-textured polish to add a realistic touch to your starfish.
- Stamping tools: Use stamping tools for intricate starfish patterns if freehand drawing is challenging.
You can also try using different colors and combinations. For example:
| Starfish Color | Background Color | Effect |
|---|---|---|
| Orange | Blue | Vibrant contrast |
| Pink | White | Soft and subtle |
| Purple | Black | Bold and striking |
Experimenting with different techniques can help you find your unique style. Don’t be afraid to try new ideas and see what works best for you.

Frequently Asked Questions
How To Make A Star Nail Design?
To create a star nail design, apply a base coat. Paint nails with a desired color. Use a thin brush or nail stencil to draw stars. Seal with a top coat.
How To Design Nails Step By Step?
1. Clean and trim your nails.
2. Apply a base coat.
3. Paint your nails with the desired color.
4. Create designs using nail art tools.
5. Finish with a top coat for shine.
What Is The Procedure Of Nail Art?
The nail art procedure starts with cleaning and shaping nails. Then, a base coat is applied, and designs are created using nail polish or tools. Finally, a top coat is applied for protection and shine.
What Are The 5 Basic Nail Art Designs?
The 5 basic nail art designs are polka dots, stripes, ombre, floral, and geometric patterns. These designs are popular and easy to create.
Conclusion
Creating starfish nail art is fun and easy with the right tips. Remember to gather all your materials beforehand. Practice makes perfect, so don’t be afraid to experiment.
These ocean-inspired designs will look stunning on your nails. Enjoy showcasing your creativity and impressing everyone with your beautiful starfish nail art!


