15+ Watermelon Nail Designs: Fresh and Fun Ideas for Summer
As we enter the bright and sunny summer days, it’s the perfect time to get creative with our nail designs. Nothing says summer quite like the refreshing look of watermelon, both in taste and style.
One of the most exciting ways to embrace the season is by trying out trendy watermelon nail designs.
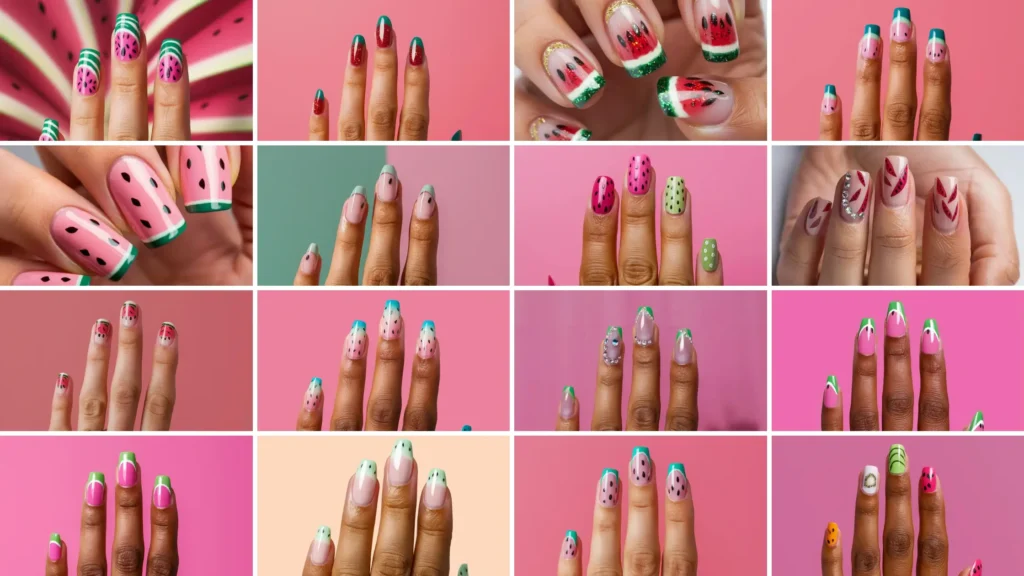
I’ve curated a list of 15 unique watermelon nail designs to keep your manicure looking fresh and vibrant all summer.
These designs range from simple, minimalist accents to more elaborate and glittery styles, ensuring there’s something for everyone to enjoy.
1: Polka Dot Tips

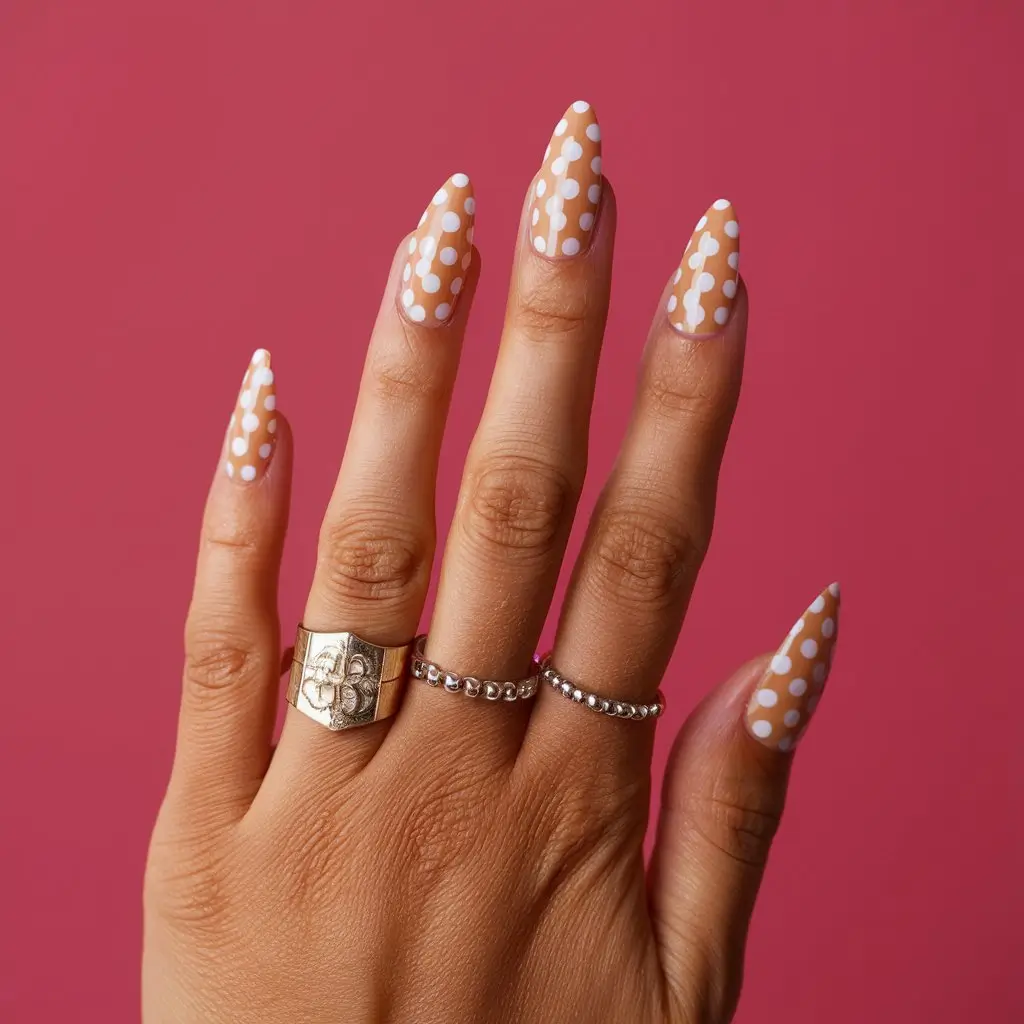
I love adding a playful twist to my nails with polka-dot tips.
To get this look, I start with a neutral base coat. Then, I use a dotting tool to add bright green polka dots along the tips. A few black dots for watermelon seeds complete the design.
2: Glitter Accents

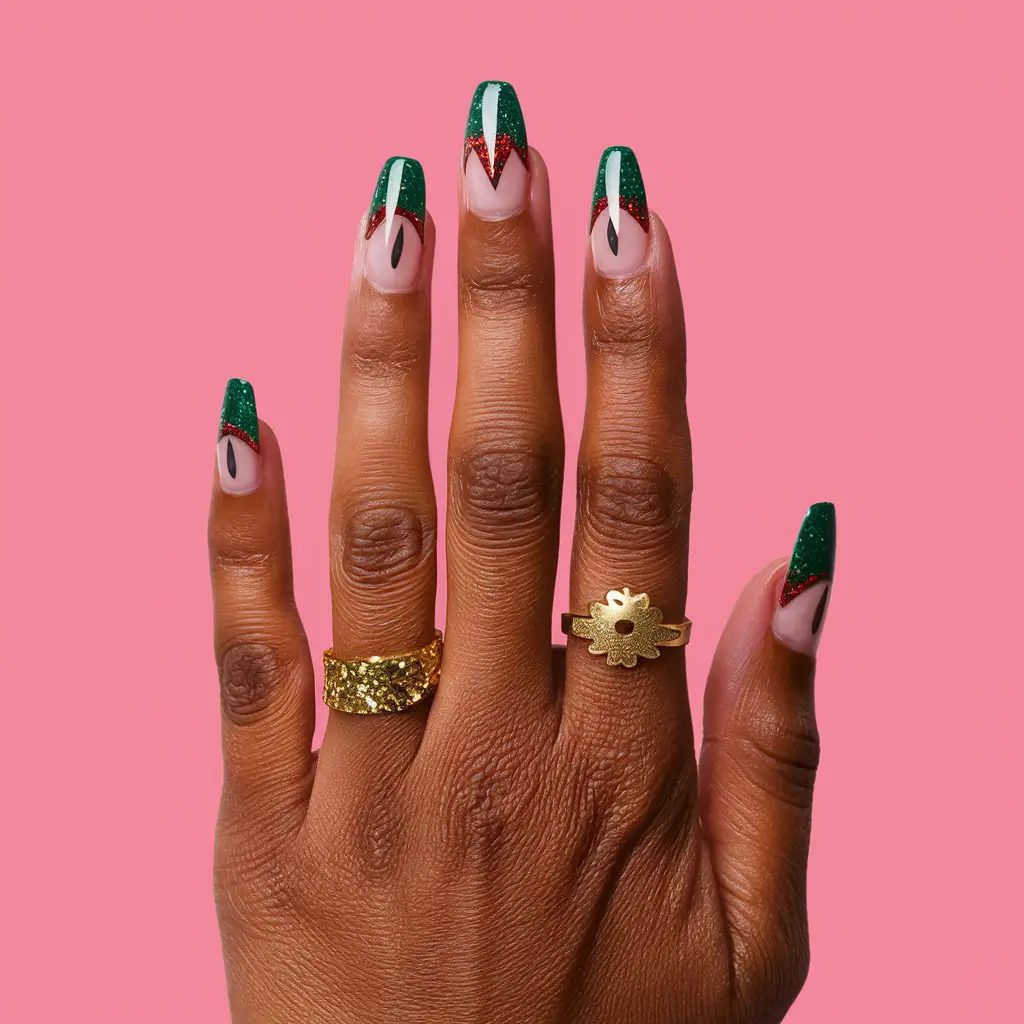
Adding glitter accents to watermelon nail designs can make them stand out. I love using red and green glitter to match the vibrant colors of the fruit.
A touch of gold glitter at the edges can add a festive touch. It works especially well for special summer events and parties.
3: Watermelon Slices
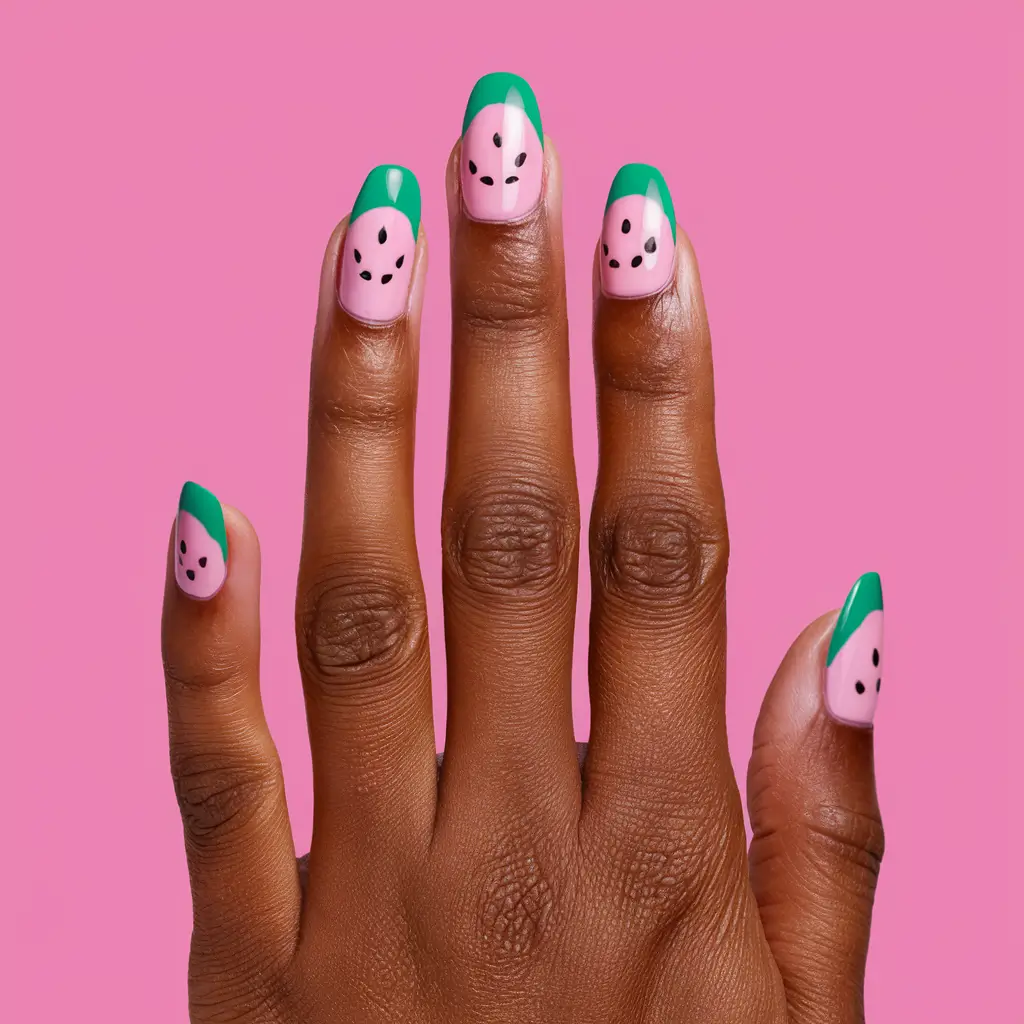
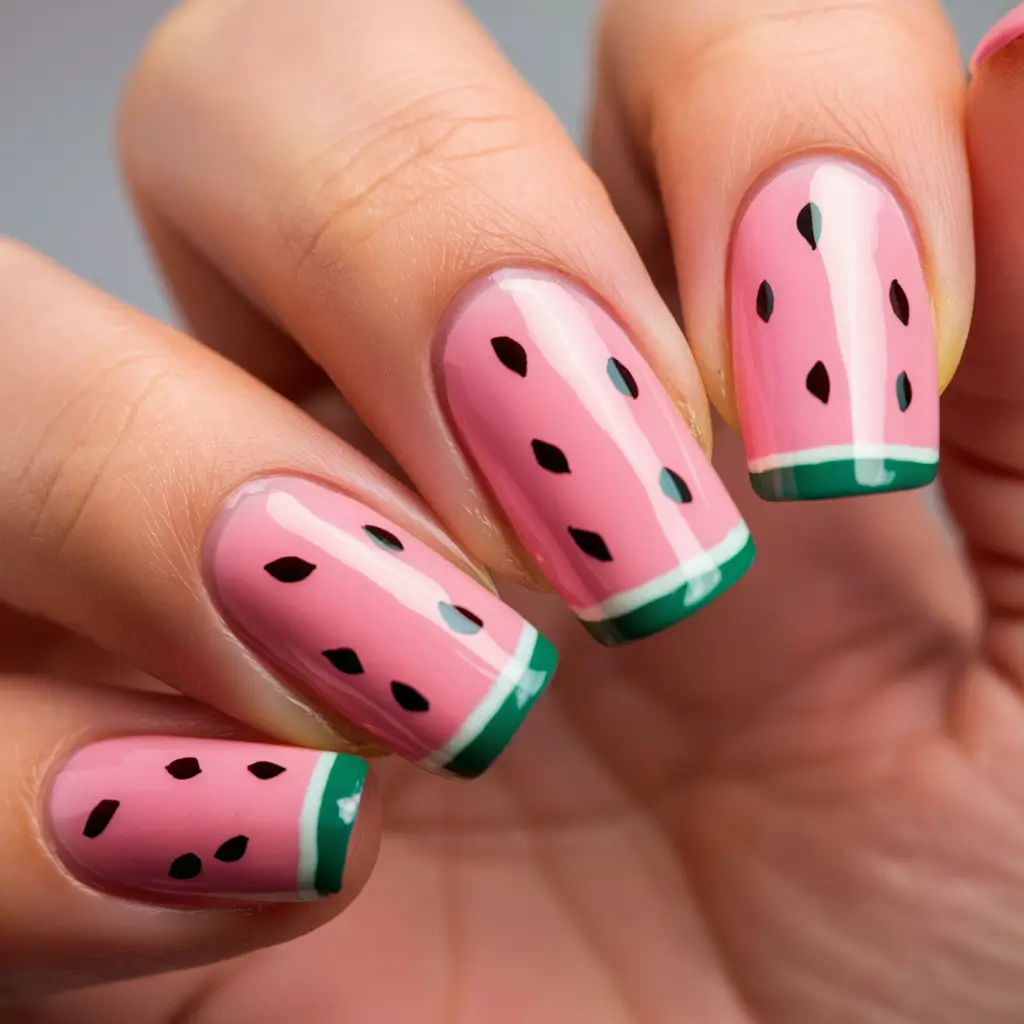
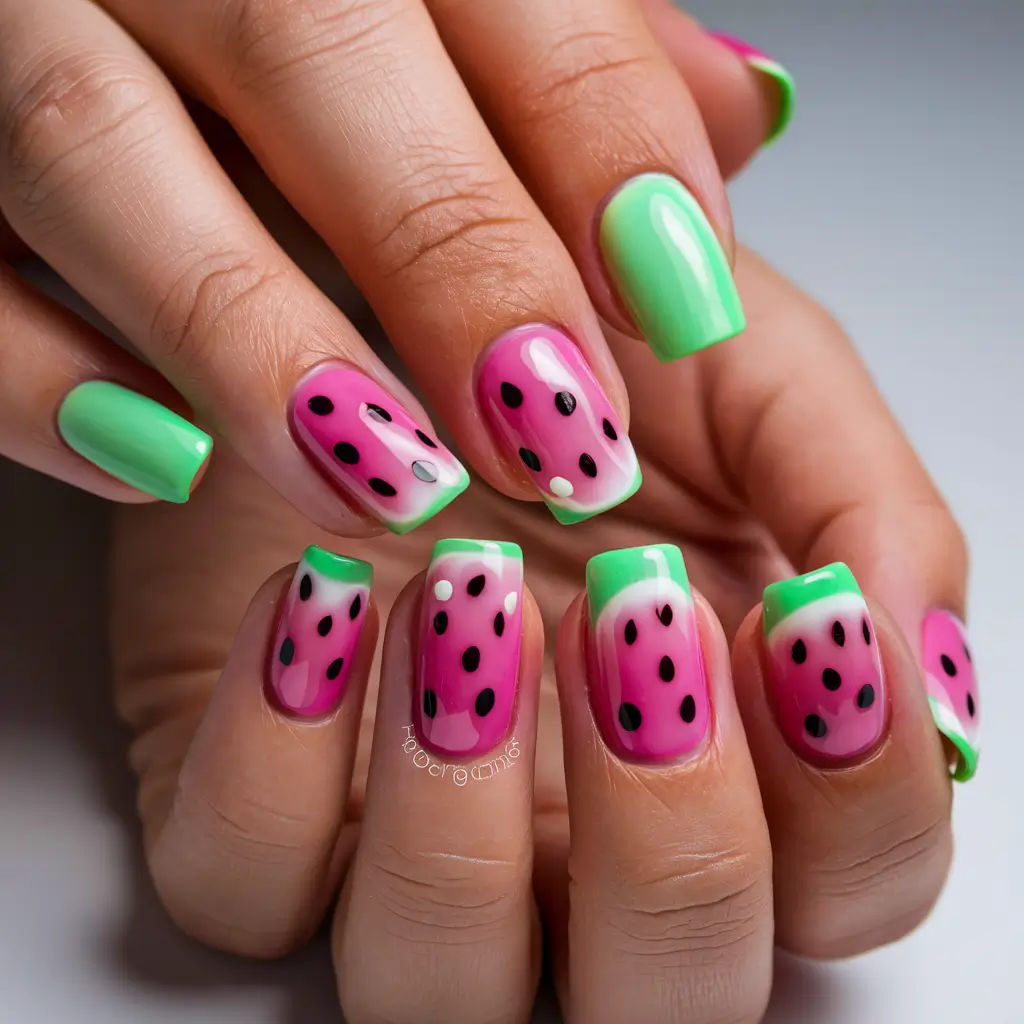
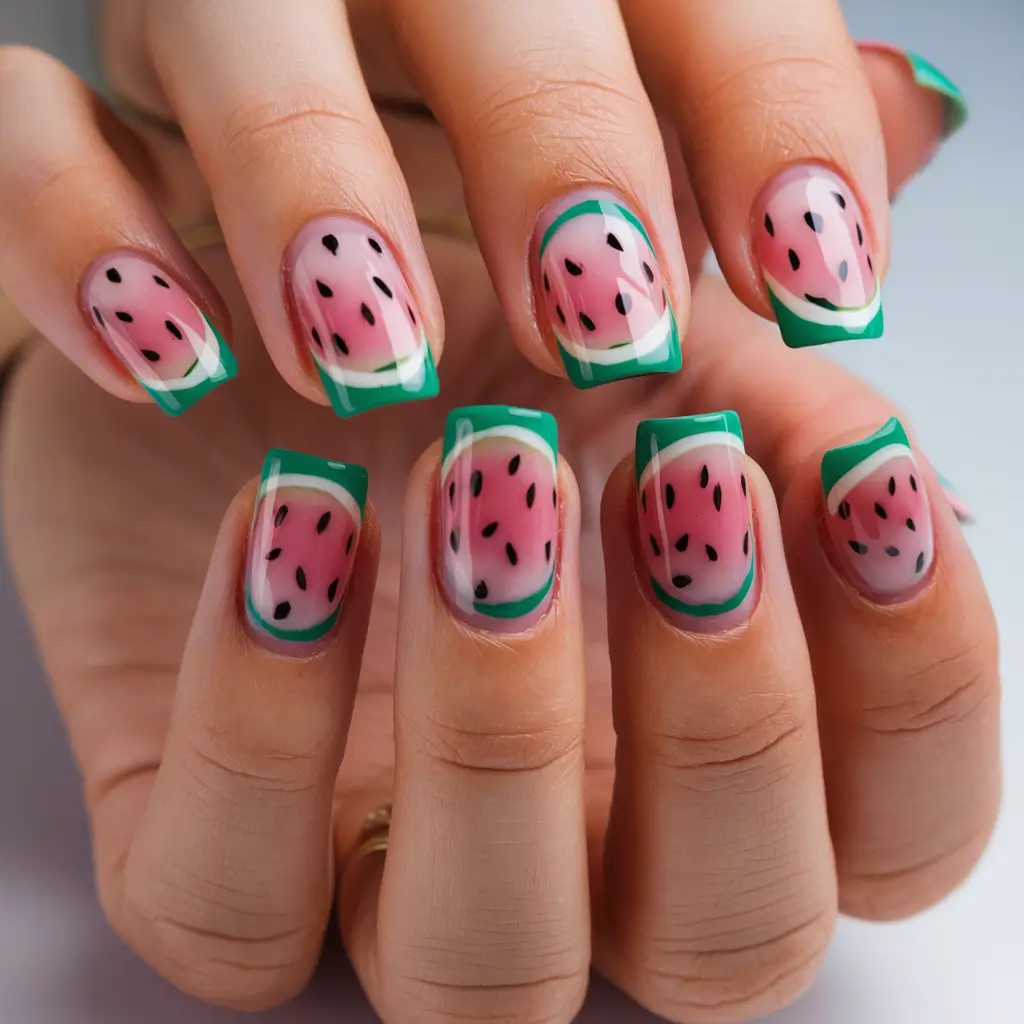
I love the playful look of watermelon slice nails. They perfectly capture the juicy fruit’s charm by mimicking its vibrant colors.
To achieve this design, I paint a bright pink semicircle at the nail tip, which becomes the watermelon flesh.
Next, I add a thin green stripe below the pink area to mimic the rind. Finally, tiny black dots, adding a cute and realistic touch, complete the look as seeds.
4: Matte Finish
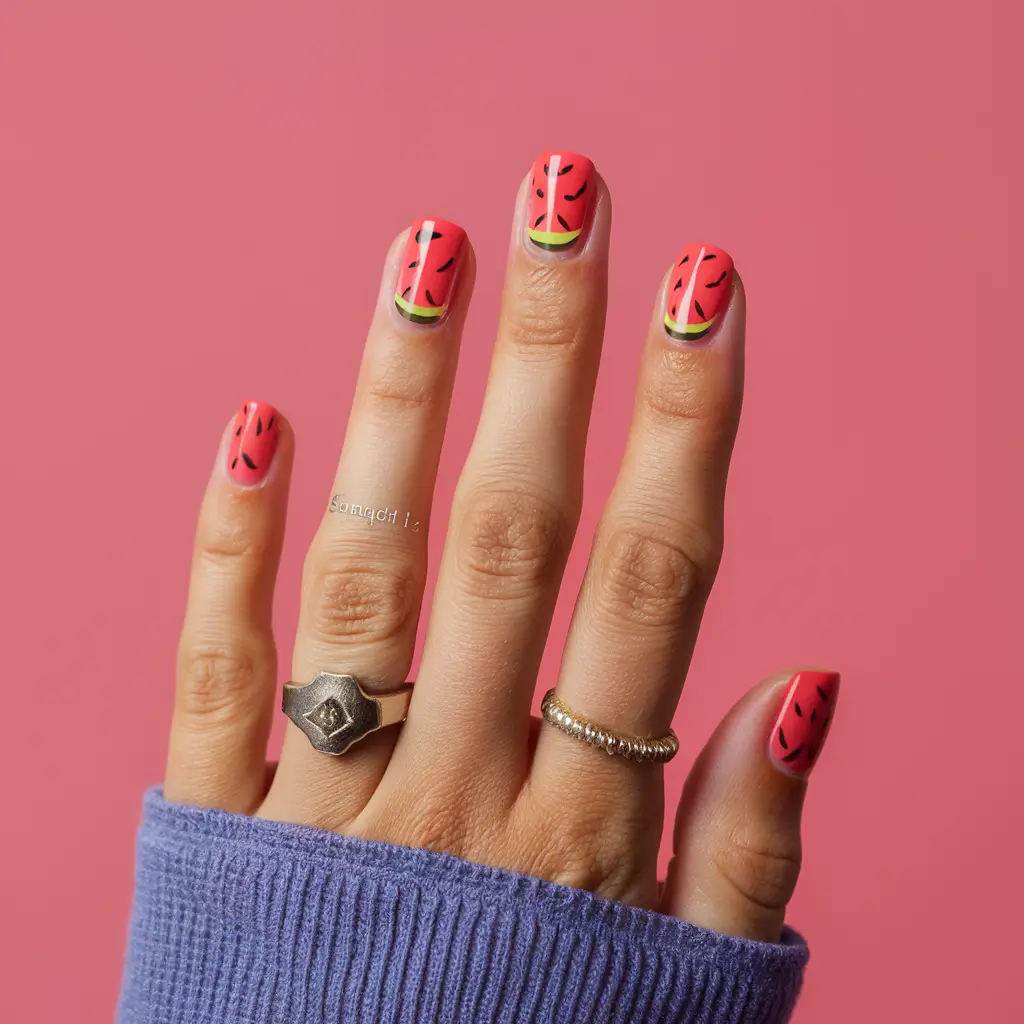
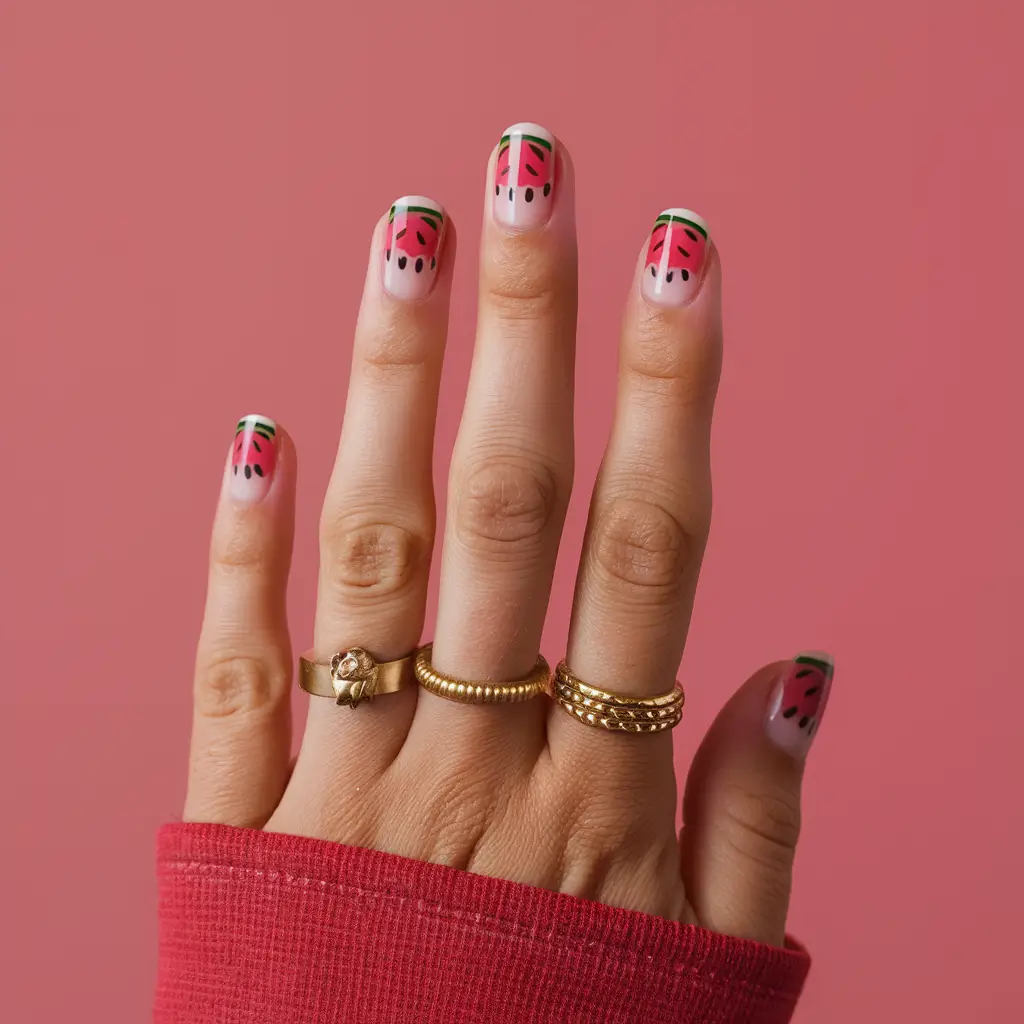
When I opt for a matte finish on watermelon nails, it instantly adds a modern touch. The matte texture provides a chic, understated look while showcasing the playful watermelon design.
A matte topcoat looks stylish and can help the design last longer. The finish minimizes visible imperfections and offers a durable option for everyday wear.
5: Neon Watermelons
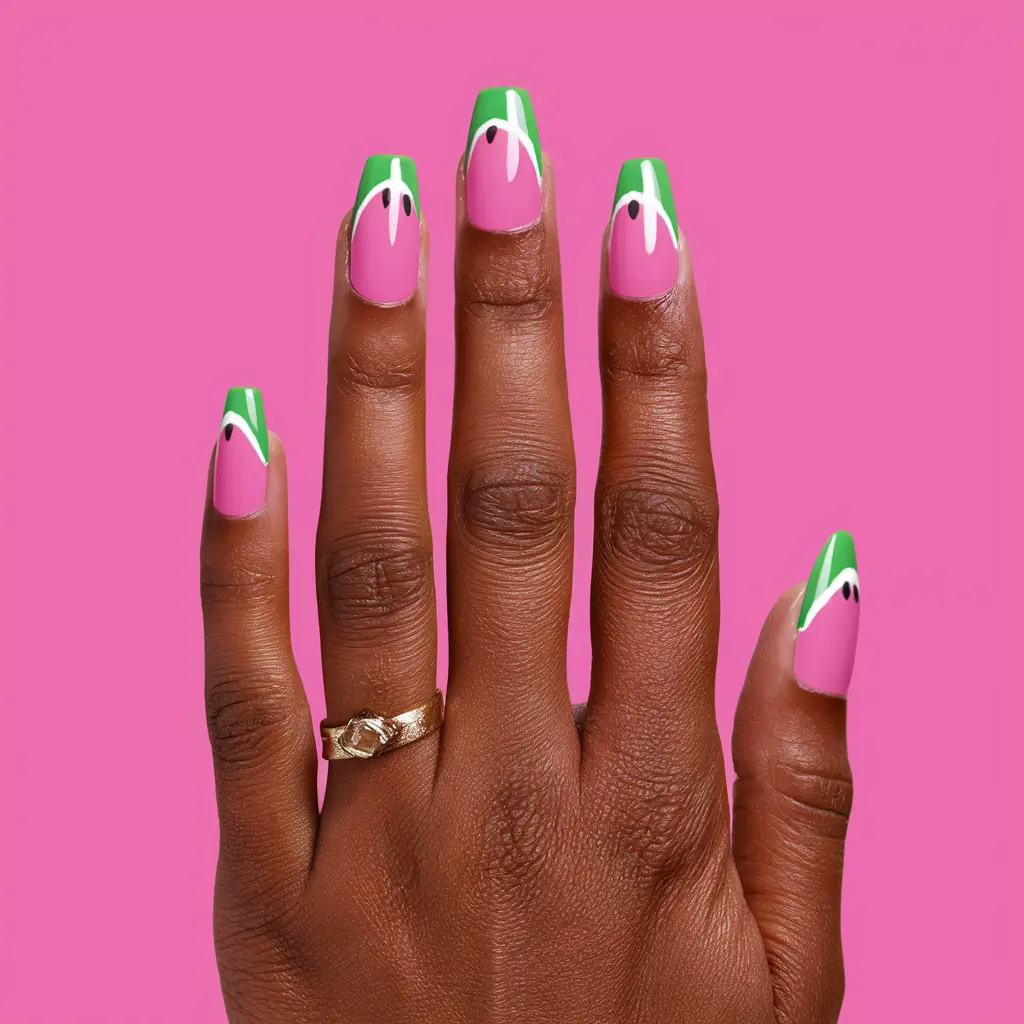
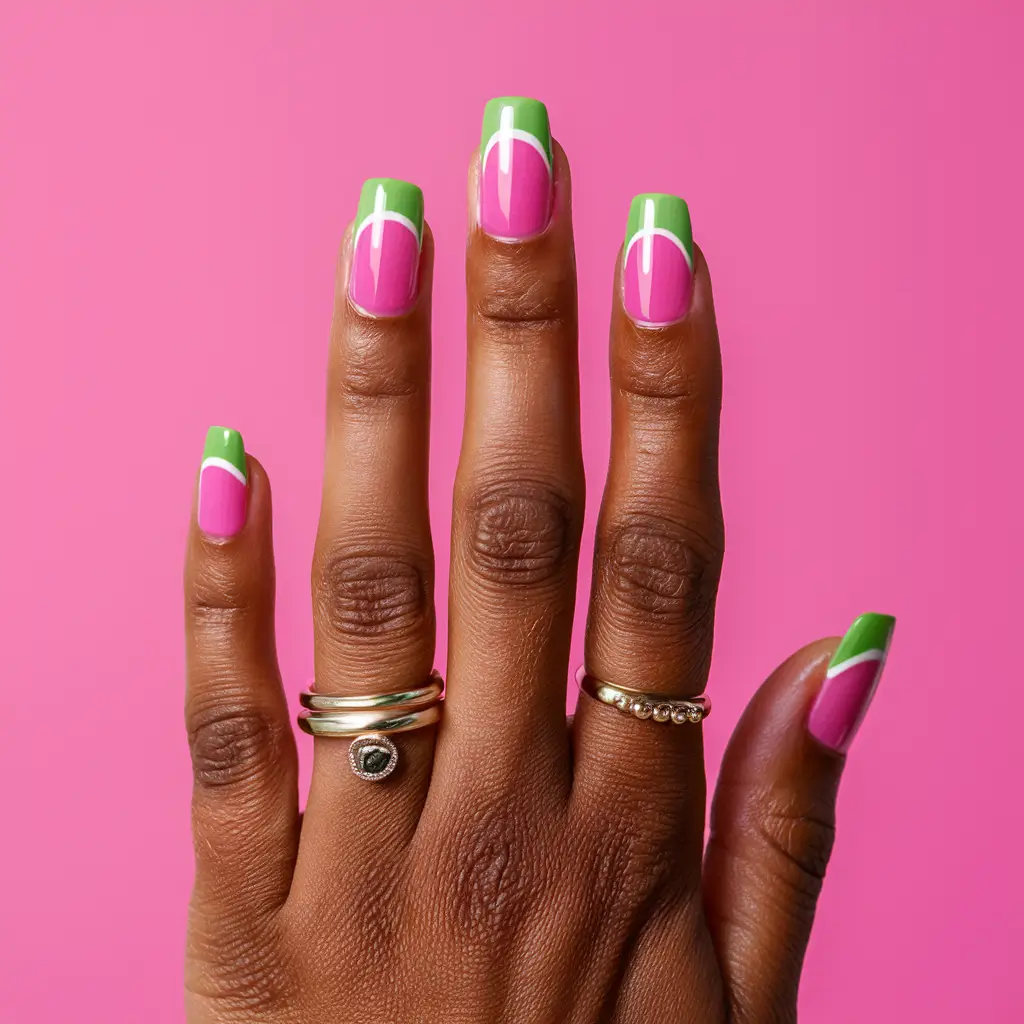
Neon watermelon nails are perfect for those who love bright, eye-catching colors.
I start by using a neon pink polish as the base color. Then, I add green tips to mimic the watermelon rind.
For extra fun, I paint white dots and black seeds over the neon pink to give it a realistic yet playful touch.
6: Fruit Salad Mix
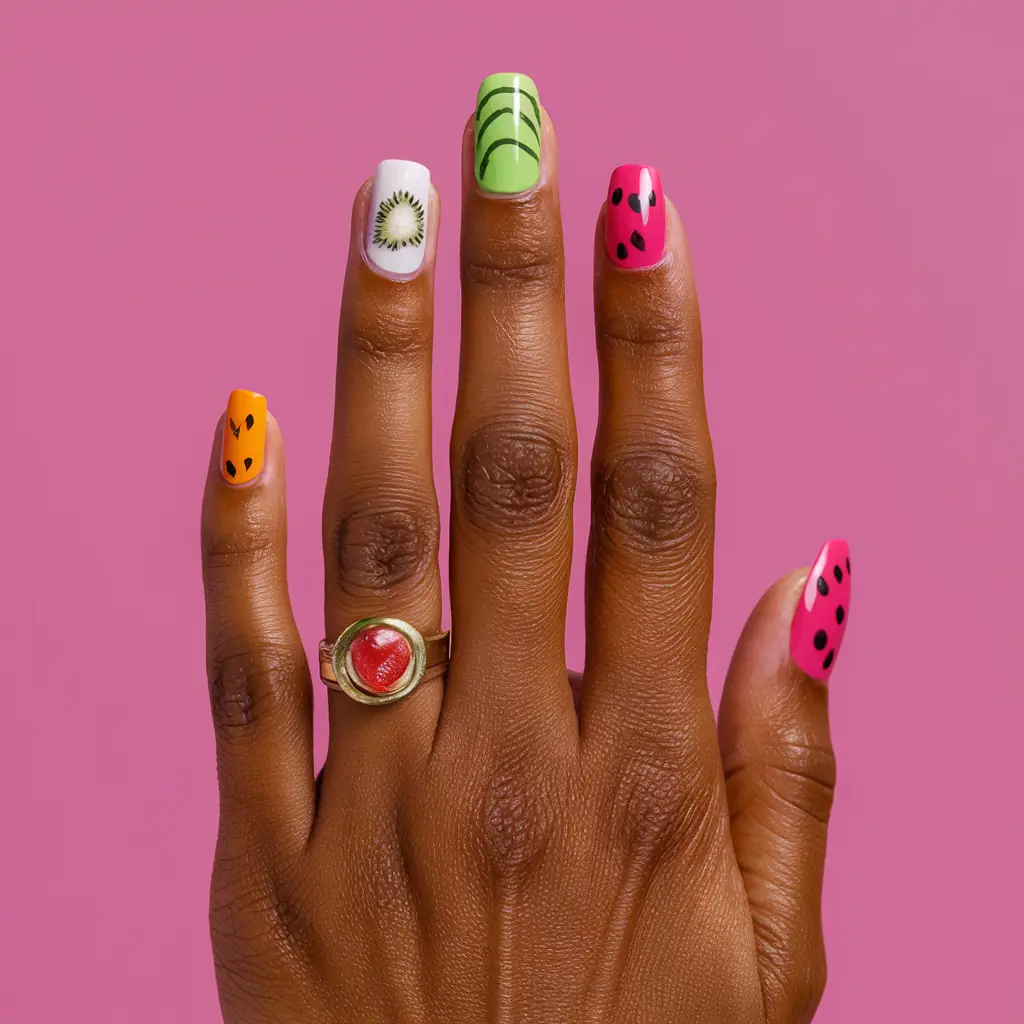
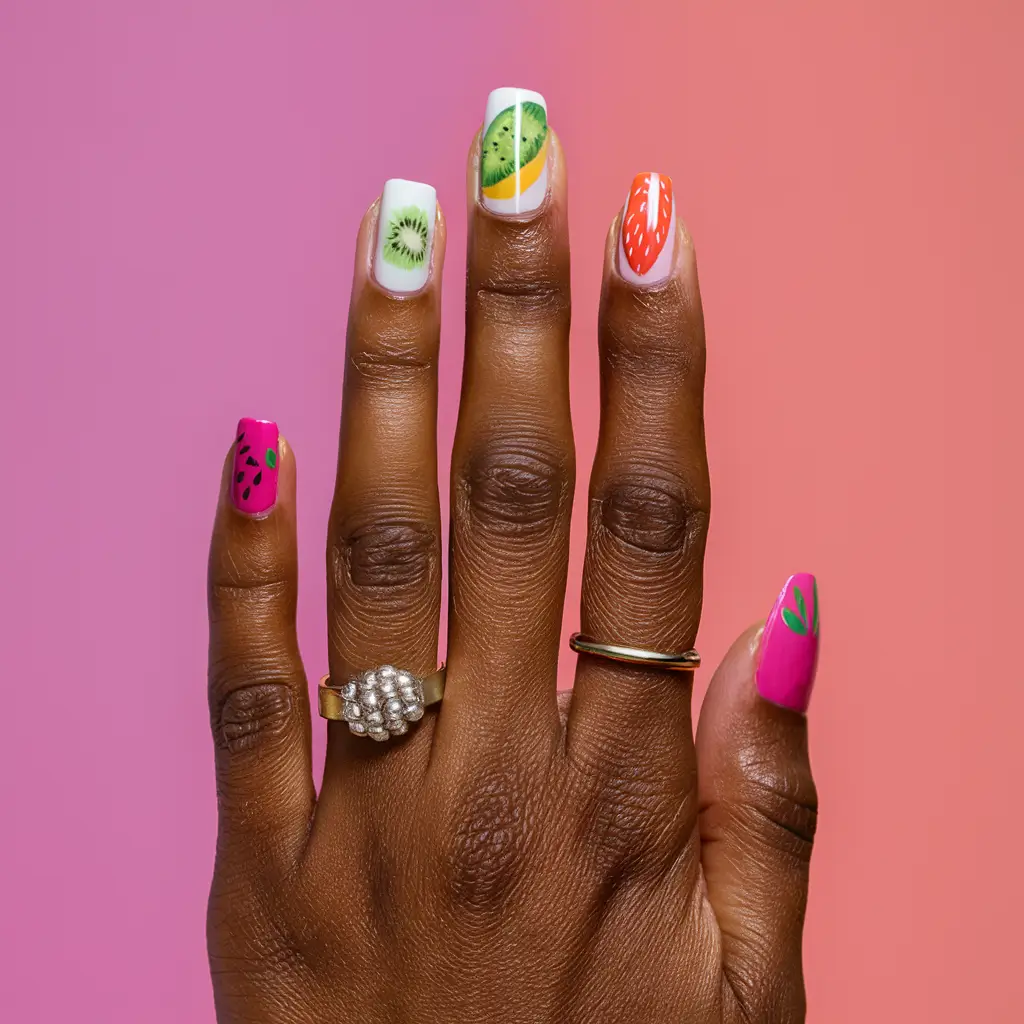
I love how the Fruit Salad Mix design combines various summer fruits on a single canvas. It’s like having a mini fruit salad right on my nails.
This design combines watermelon, kiwi, strawberries, and more. It’s colorful and fun, perfect for sunny days. I use bright nail polishes to make each fruit pop.
7: Abstract Art
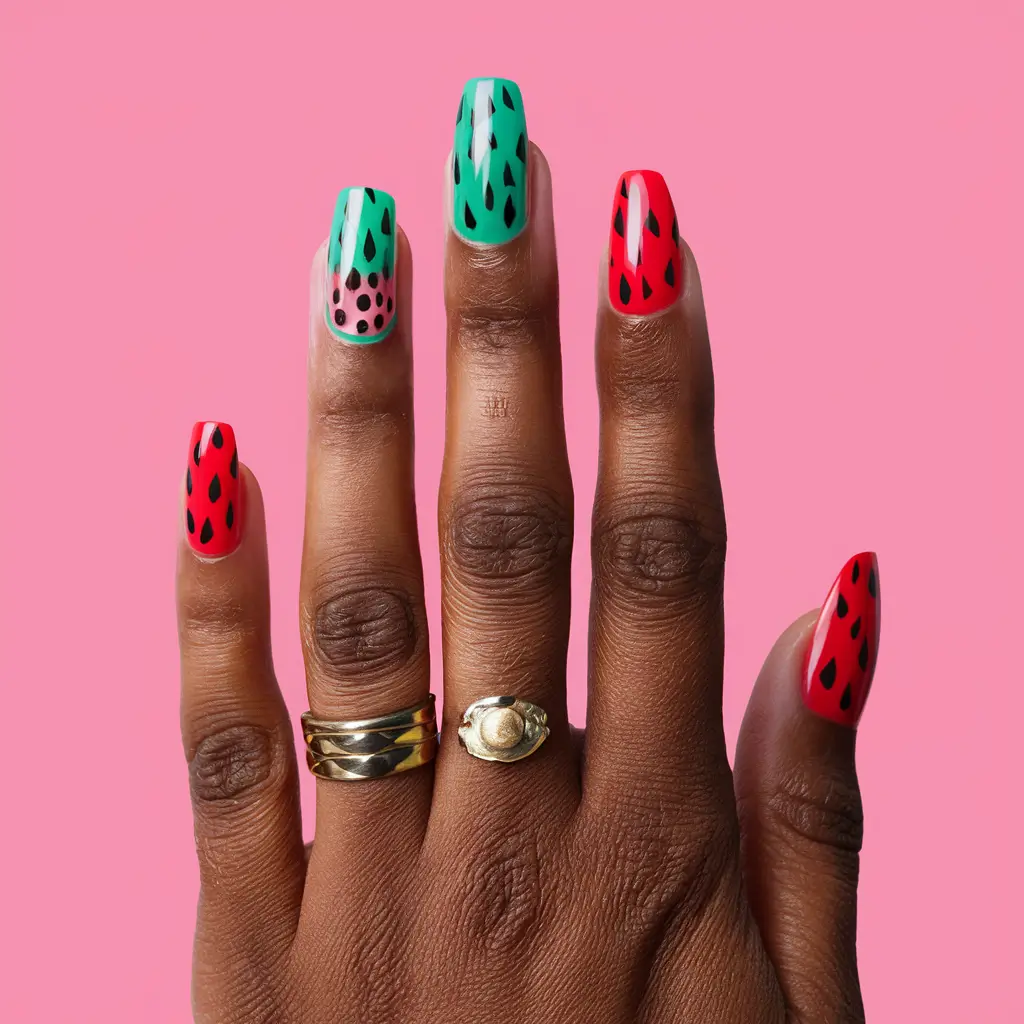
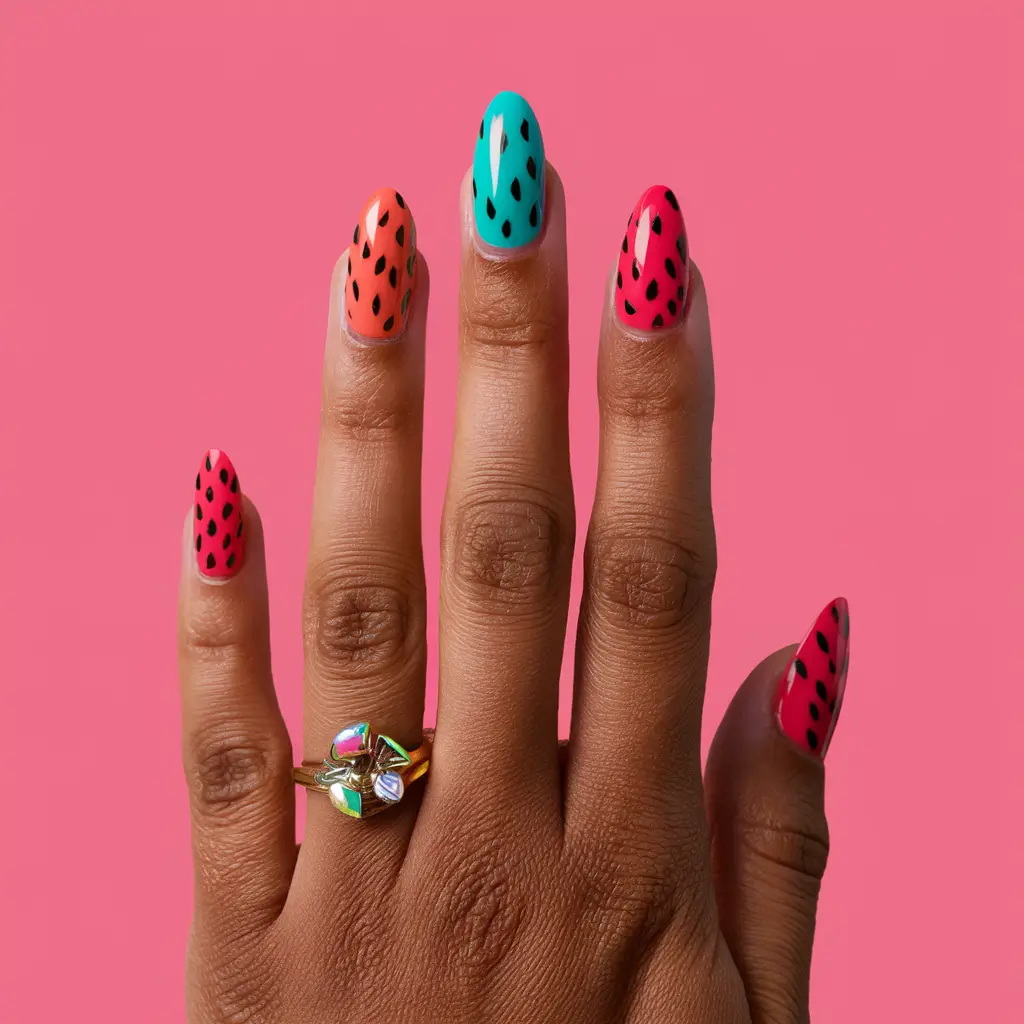
When it comes to abstract art on nails, creativity knows no bounds. I love how abstract watermelon designs play with colors and shapes.
I often use a mix of vibrant reds, greens, and black dots to represent the fruit. Sometimes, I add unexpected elements like holographic finishes or geometric patterns for a unique twist.
8: French Tip Twist

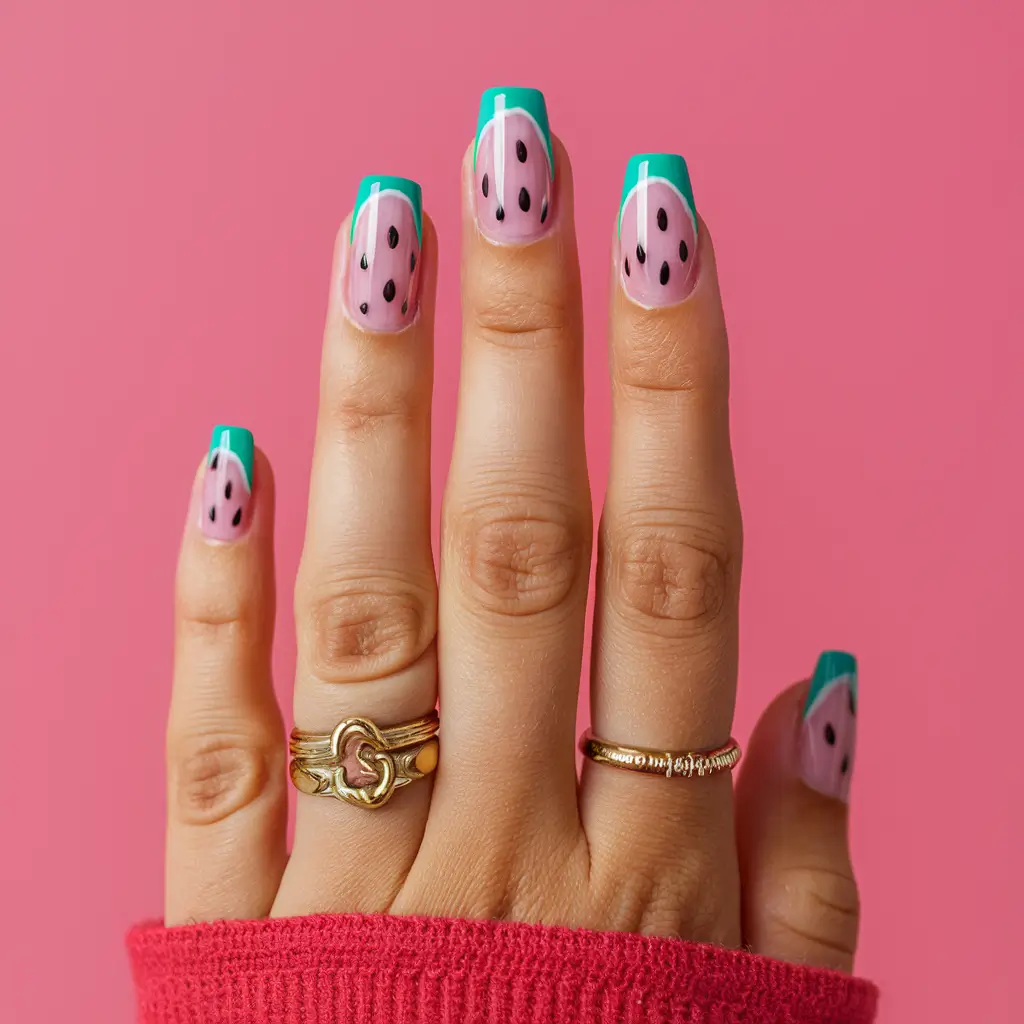
I love using watermelon colors to give a fresh twist to classic French tips. The pinkish-red base and vibrant green tips create a fun and refreshing look. Tiny black seed dots finish the design, making it perfect for summer.
This look is not only cute but also versatile. Whether you have long or short nails, adding watermelon colors to French tips can brighten your style.
To achieve this look, start with a pink or red color as the base. Then, use green polish to create the tips. Add black dots to mimic seeds, and you’re ready for summer fun!
9: Watermelon Ombre
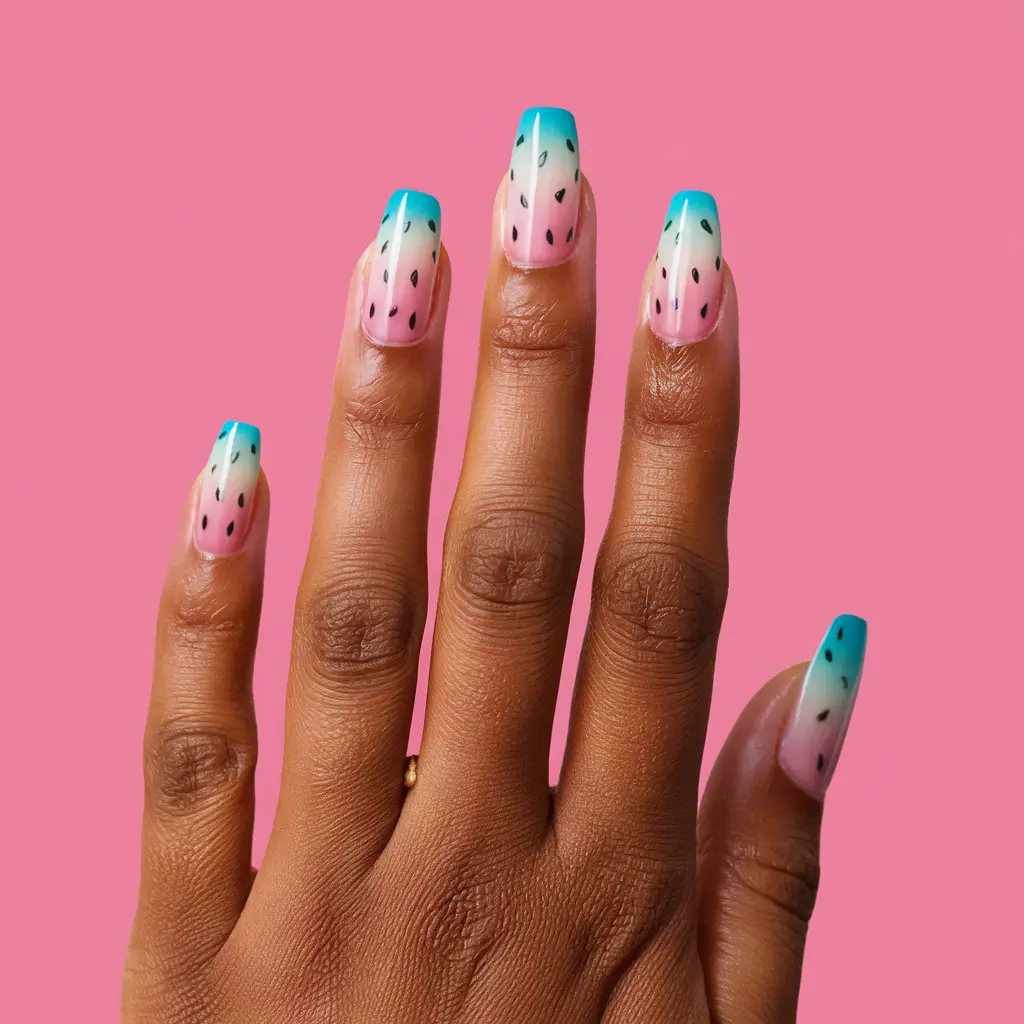
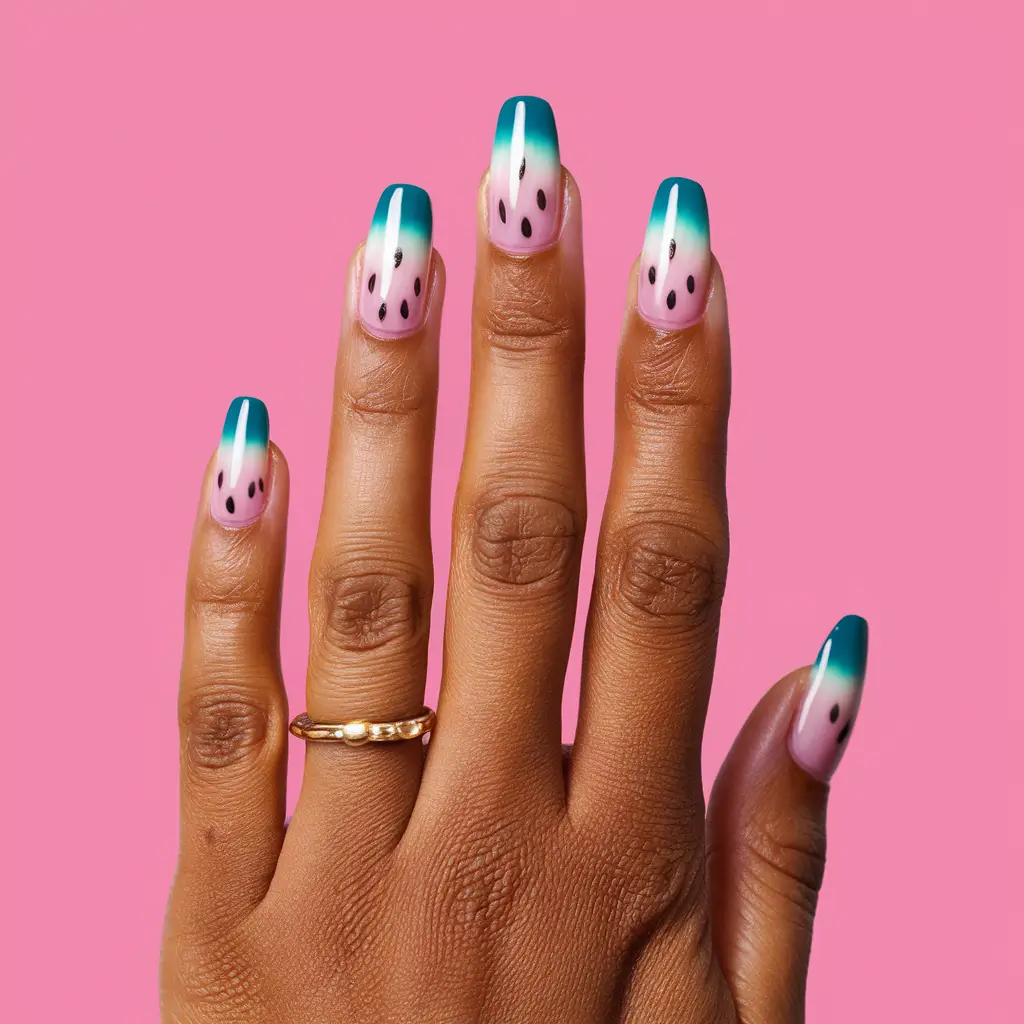
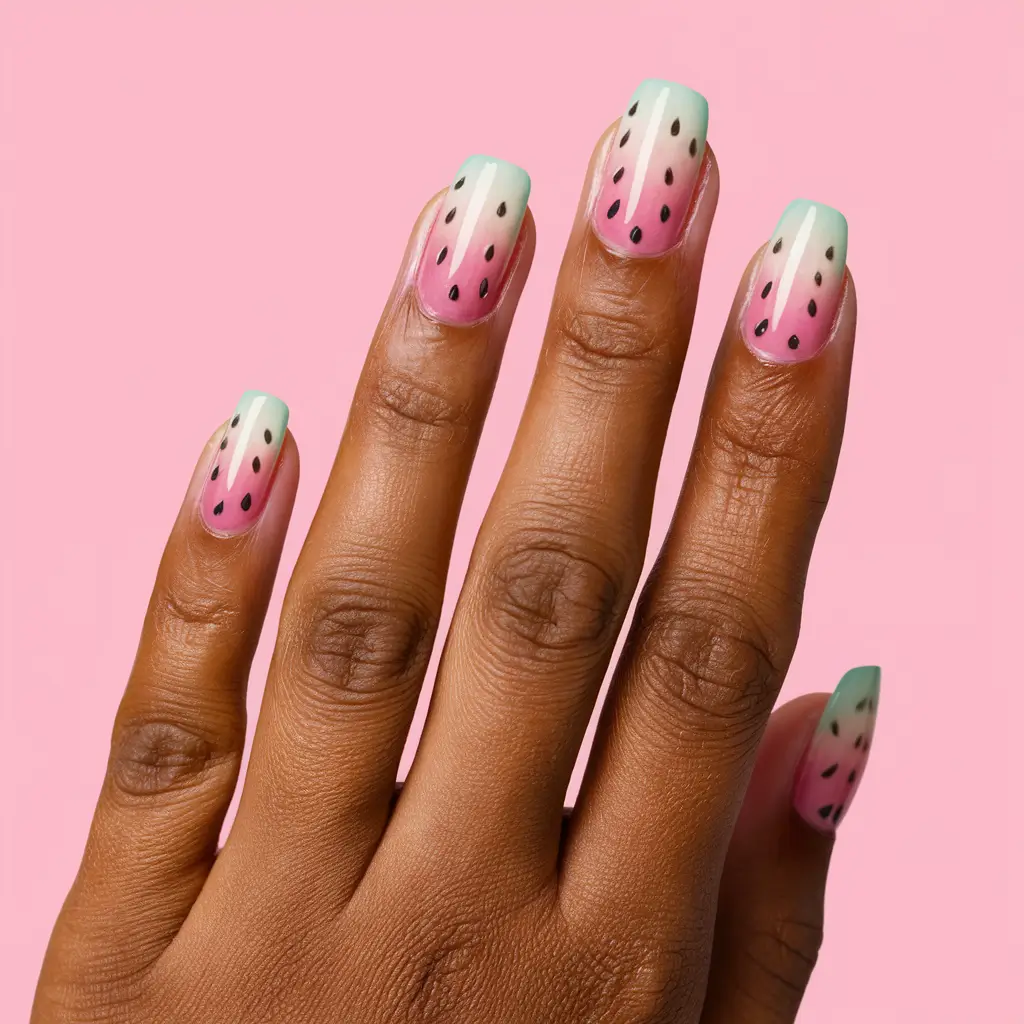
Watermelon ombre nails look both fresh and stylish. I love how the colors blend together, creating a gradient effect that mimics the look of a juicy watermelon.
The design usually starts with a light pink or green base and transitions into a deeper shade toward the tips.
Adding tiny black dots as seeds makes the look more realistic and fun. A shiny top coat will give it a glossy finish, perfect for summer days.
10: Juicy Reds and Greens

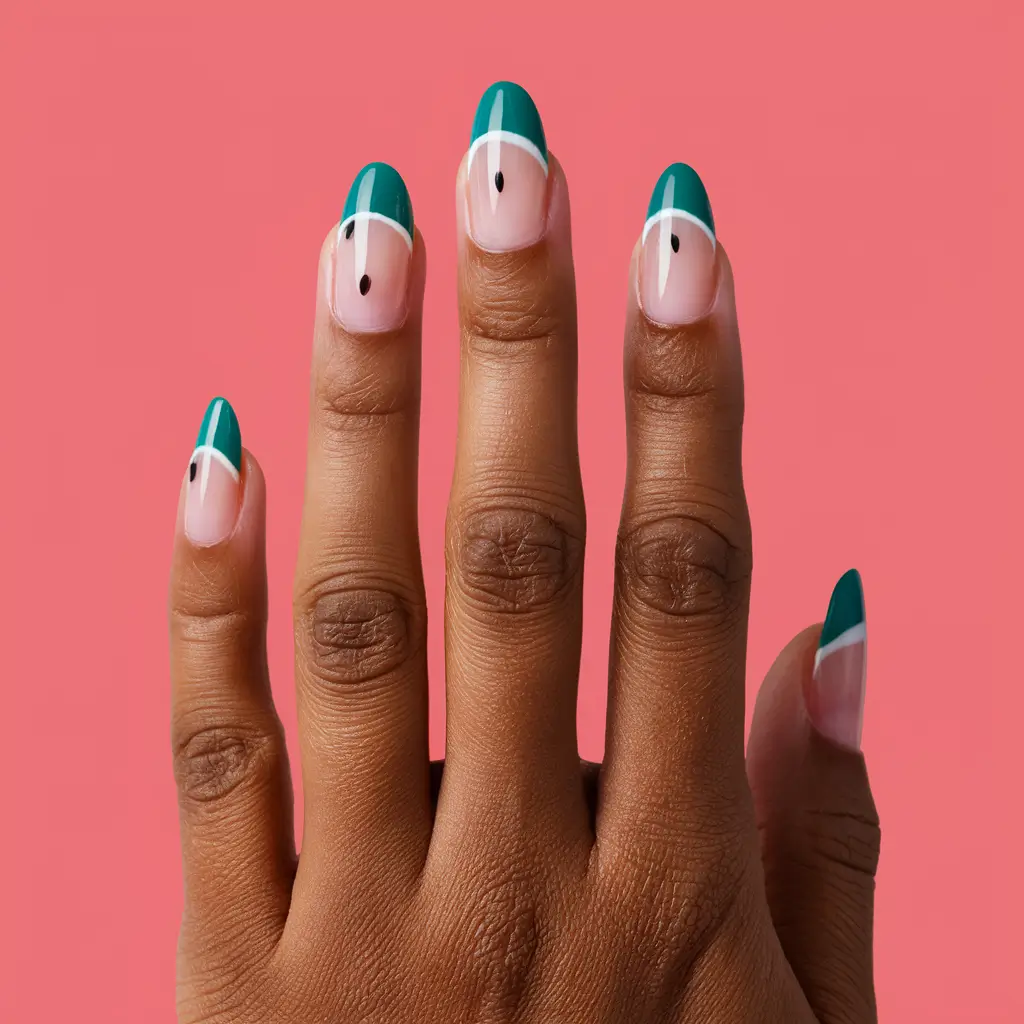
When I think of watermelons, vibrant reds, and greens, it comes to mind immediately. To achieve this juicy look, start with a red base color that mimics the inside of the watermelon.
Next, add a green tip at the edge of each nail, resembling the rind. Using a fine brush, you can also create thin white stripes between the red and green sections to enhance the look.
Finally, don’t forget the black seeds. A few small dots on each nail will complete the watermelon effect, making them look fresh and fun for summer.
11: Gemstone Accents
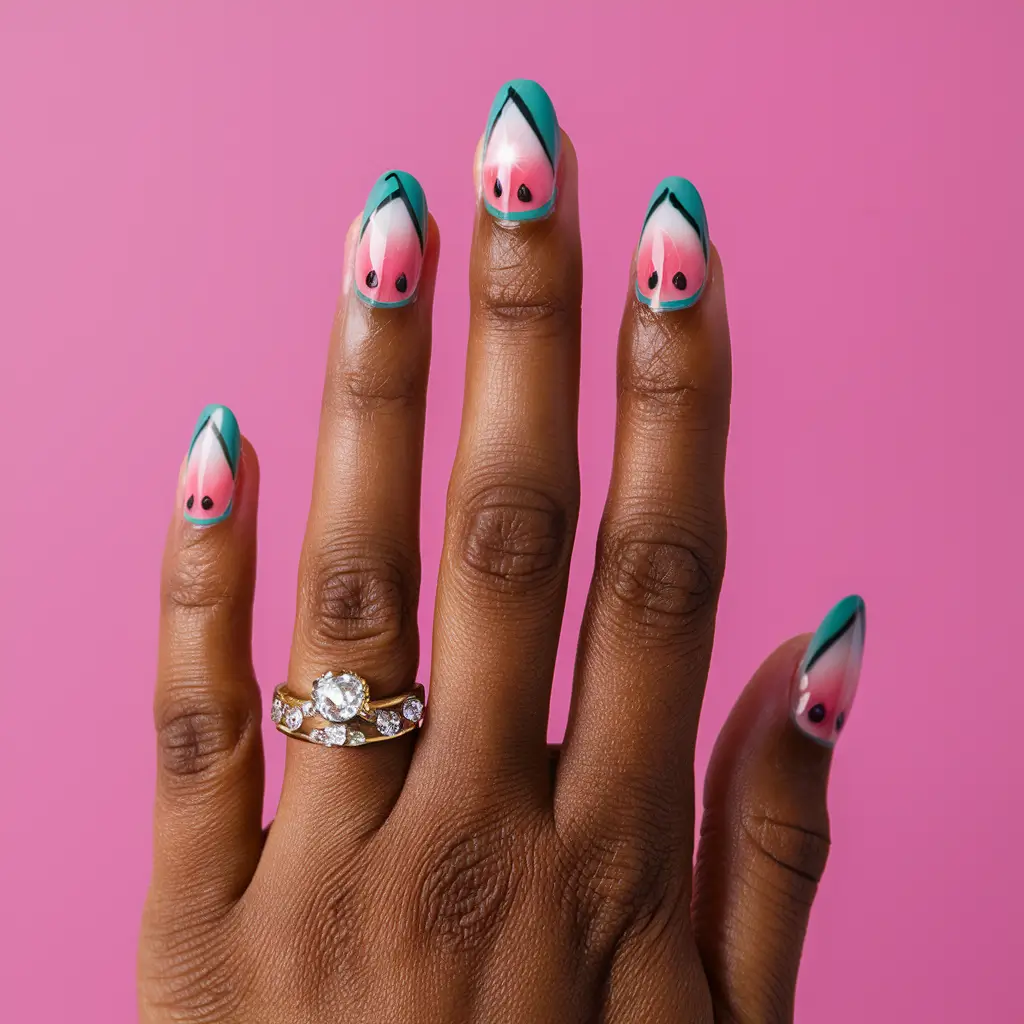
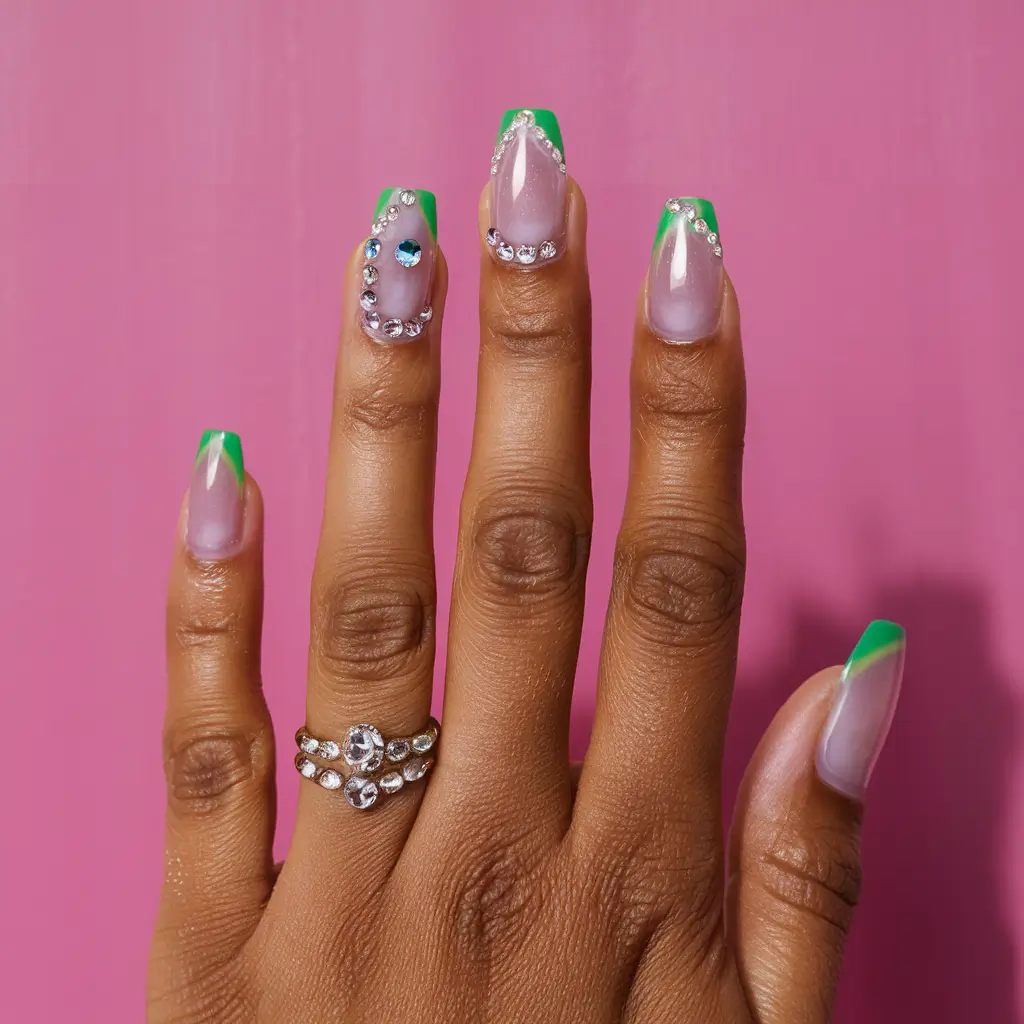
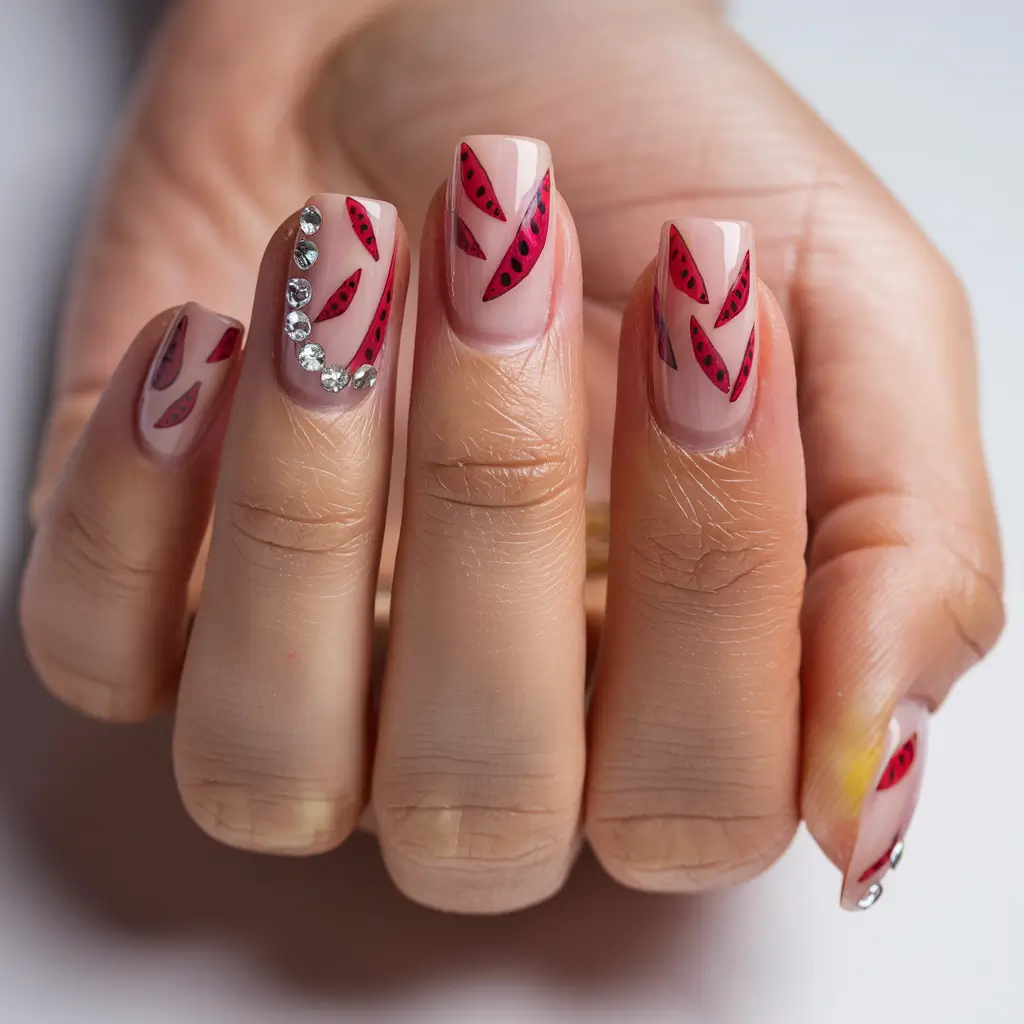
Adding gemstone accents to watermelon nail designs can make them sparkle and shine. I love how small rhinestones or gems can be placed to mimic watermelon seeds or highlight the edges.
These accents add a touch of luxury to playful watermelon art. With gemstones, your nails will look both fun and glamorous.
12: Watermelon and Kiwi Split
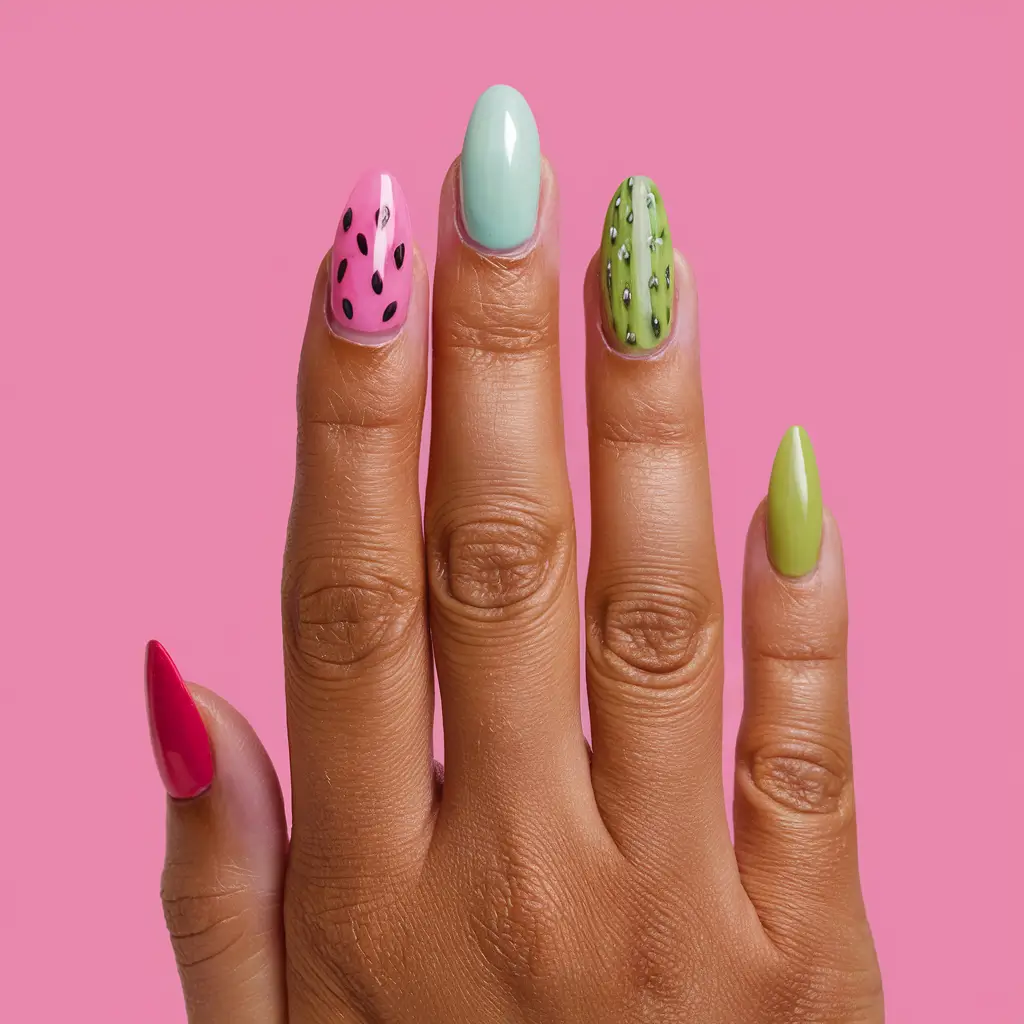
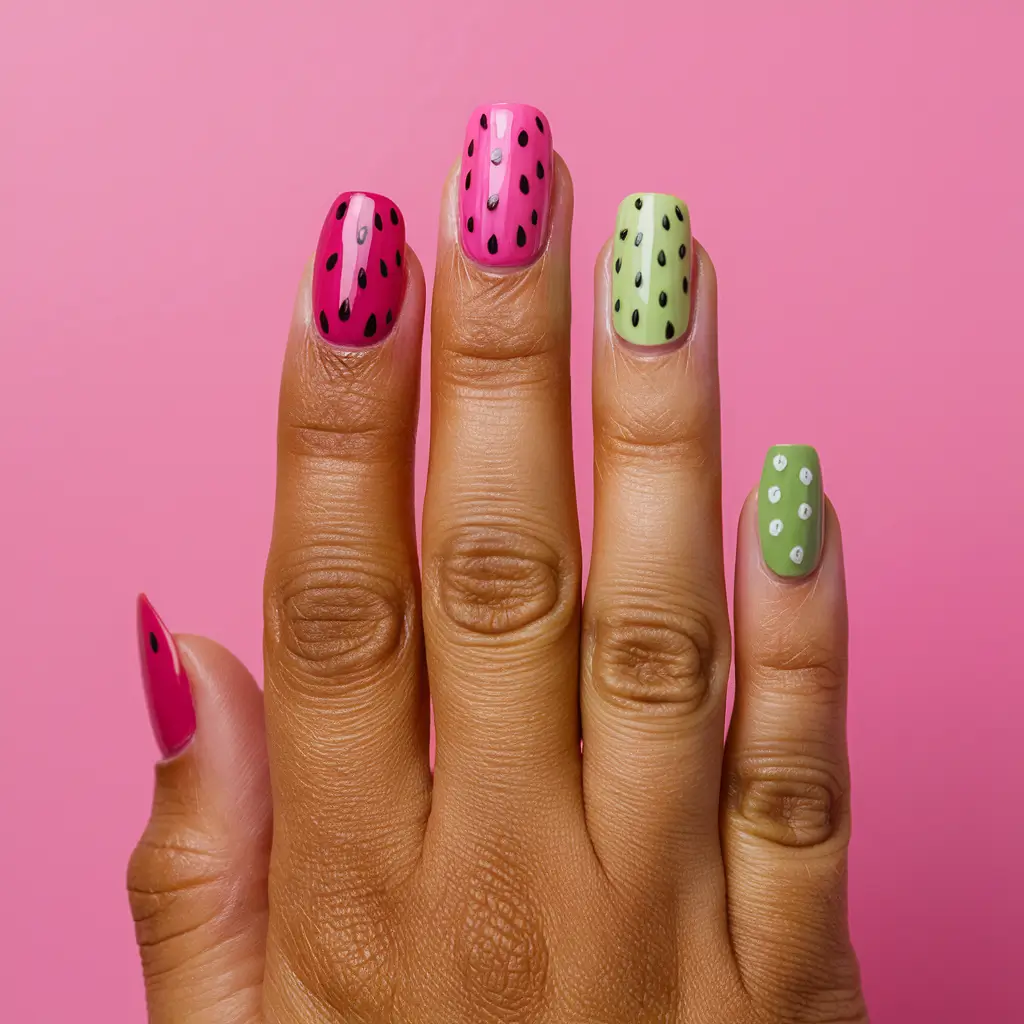
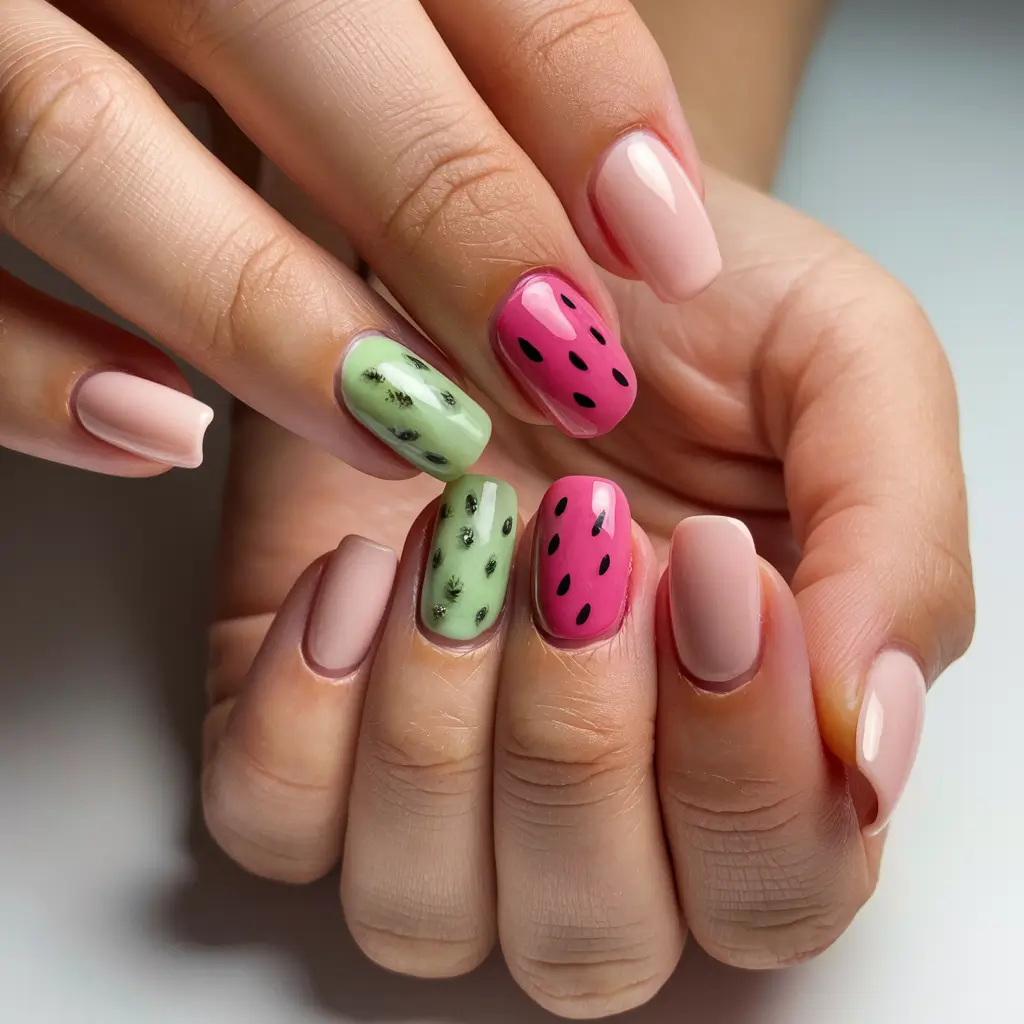
I love the combination of watermelon and kiwi on nails because they combine two vibrant fruits in one design. A bright pink watermelon design with tiny black seeds stands out on one half of the nail.
On the other hand, a fresh green kiwi with little white seeds adds a nice contrast. The result is a colorful, eye-catching manicure perfect for summer.
13: Geometric Patterns
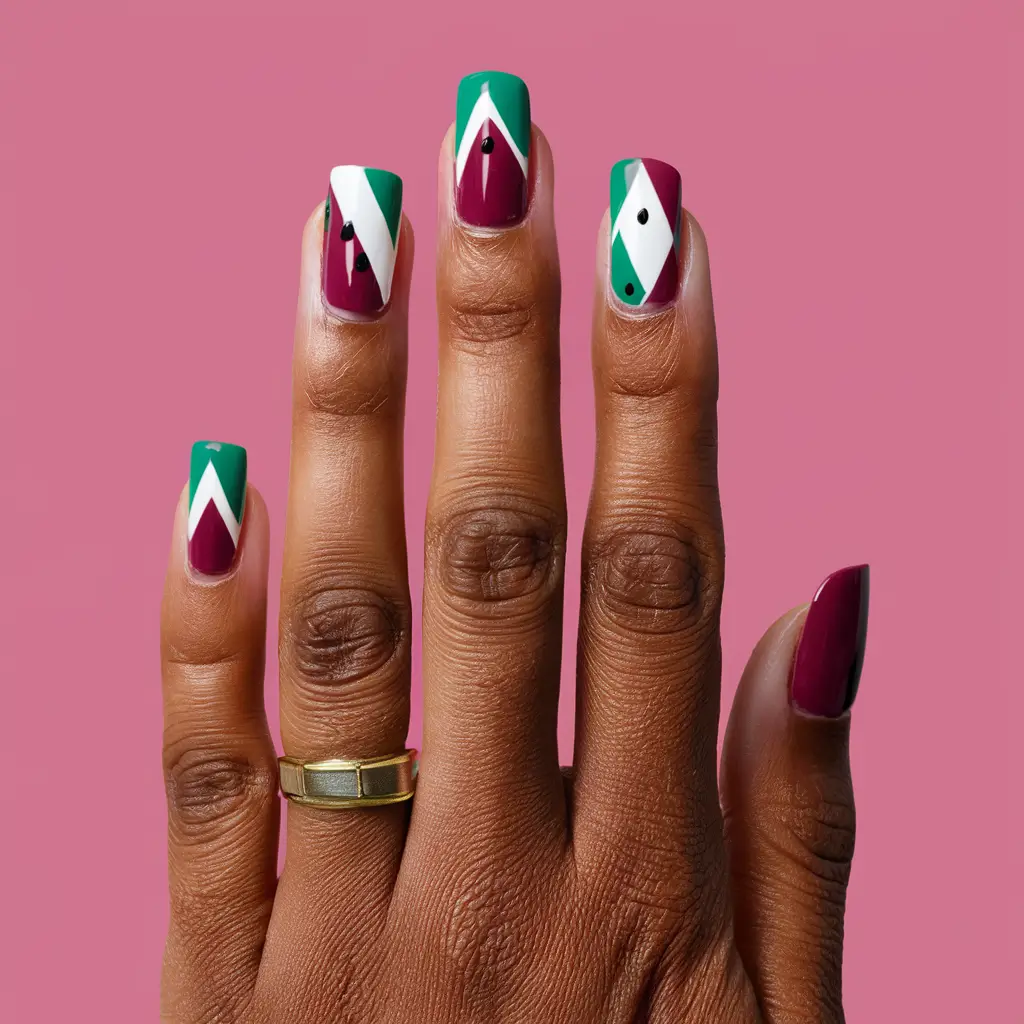
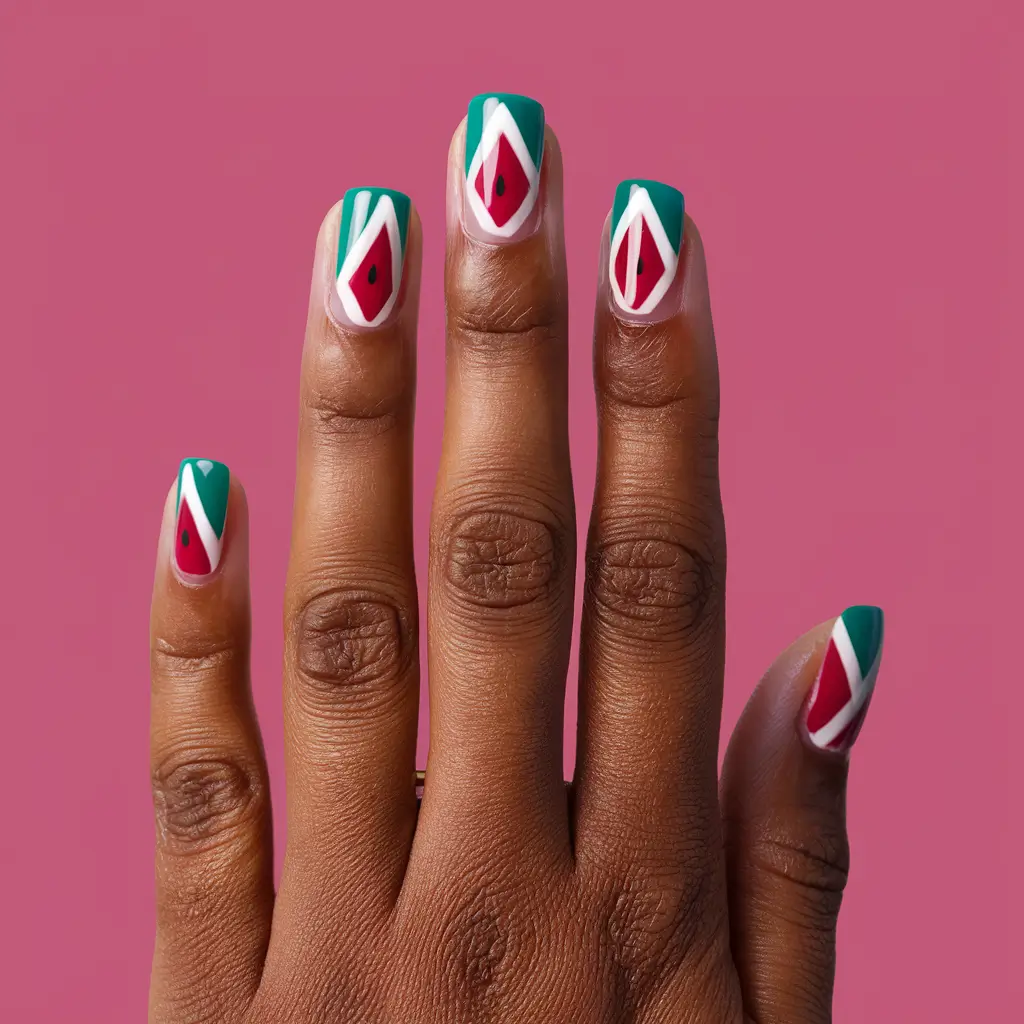
I love using geometric patterns for watermelon nail designs. The clean lines and bold shapes make it stand out. To create this look, I start with a burgundy base coat.
Using tape, I make triangular or diamond shapes. I then fill these shapes with green, red, and white colors to mimic watermelon. Black dots for seeds finish the design.
A matte top coat can give it a modern, sleek look.
14: Swirly Stripes
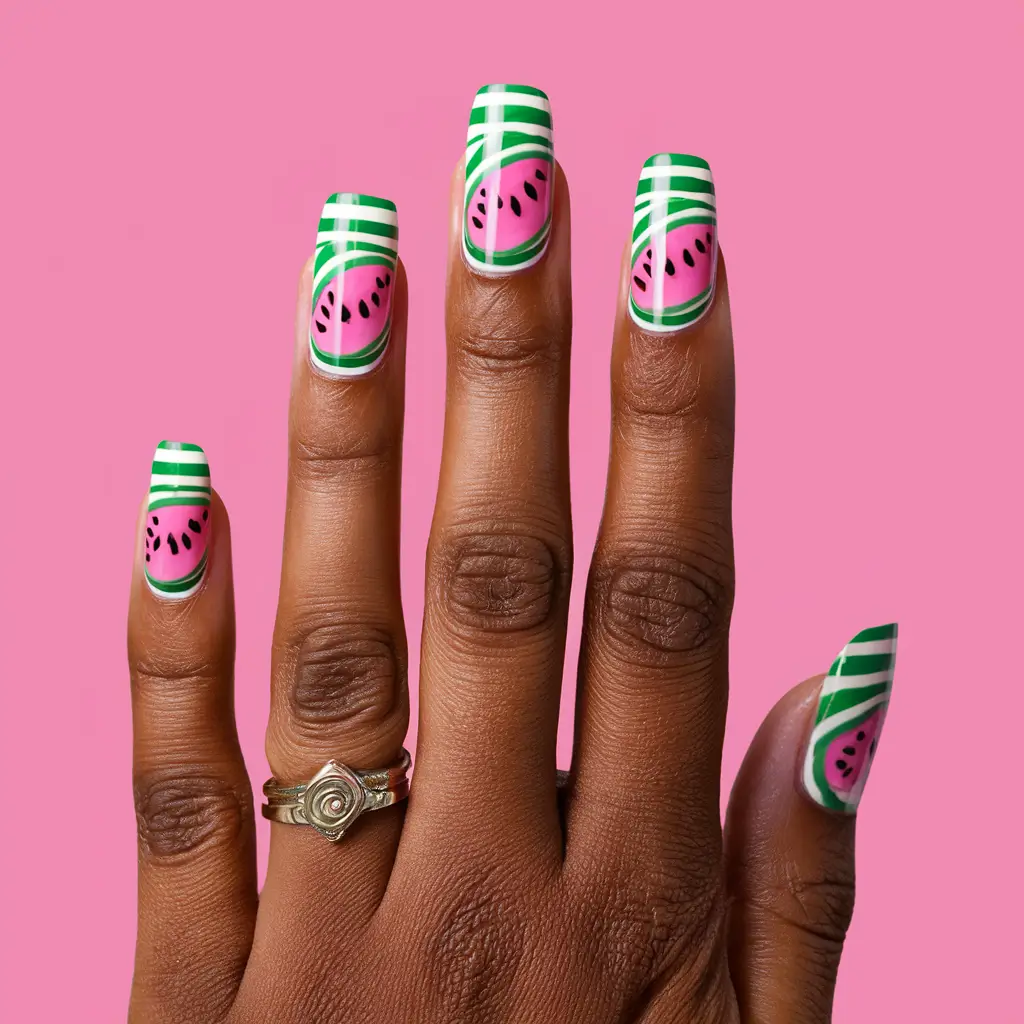
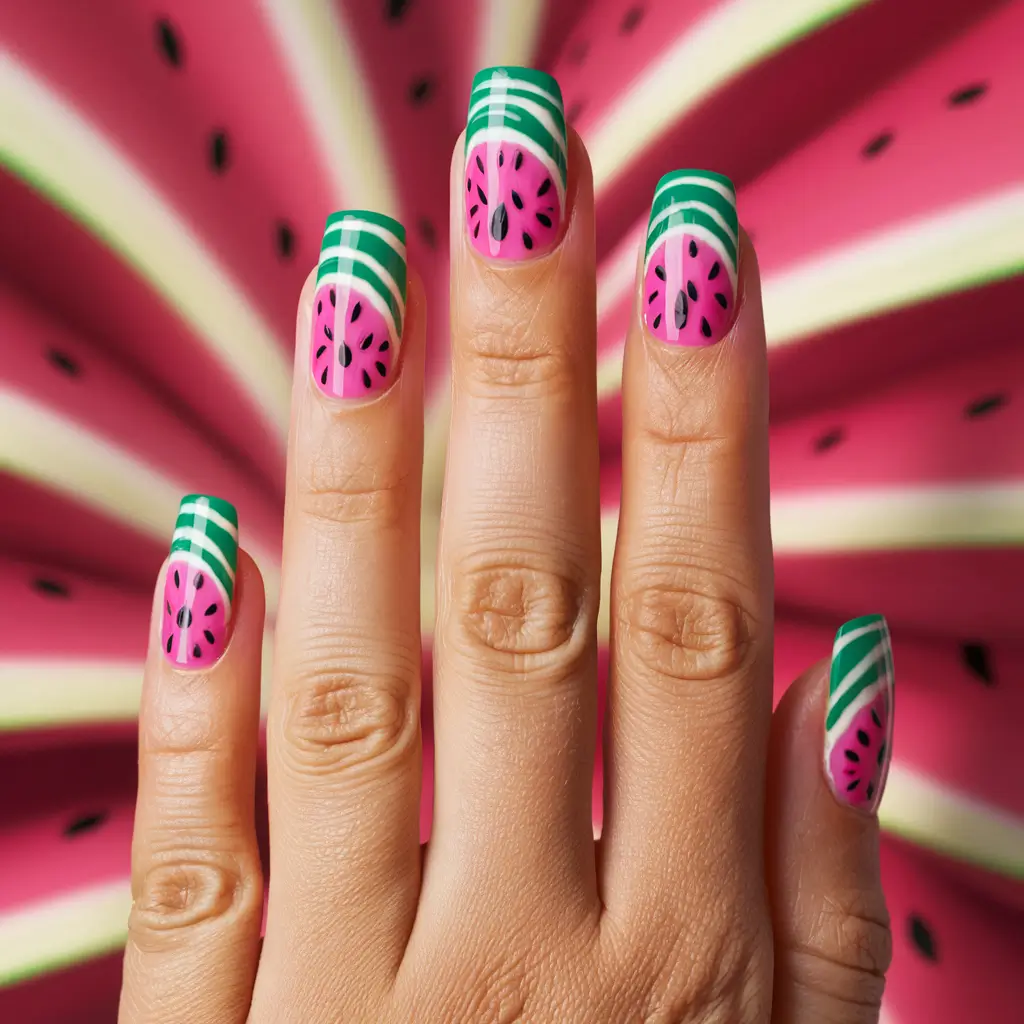
Swirly stripes are a fun take on the watermelon theme. These nails feature green and pink stripes that twist and turn across the nail. Each swirl mimics the natural patterns found on watermelon rinds.
I love how the black seeds dot the middle of the pink swirls, adding an authentic touch. These nails stand out at summer events and get-togethers.
15: Summer Picnic Vibes

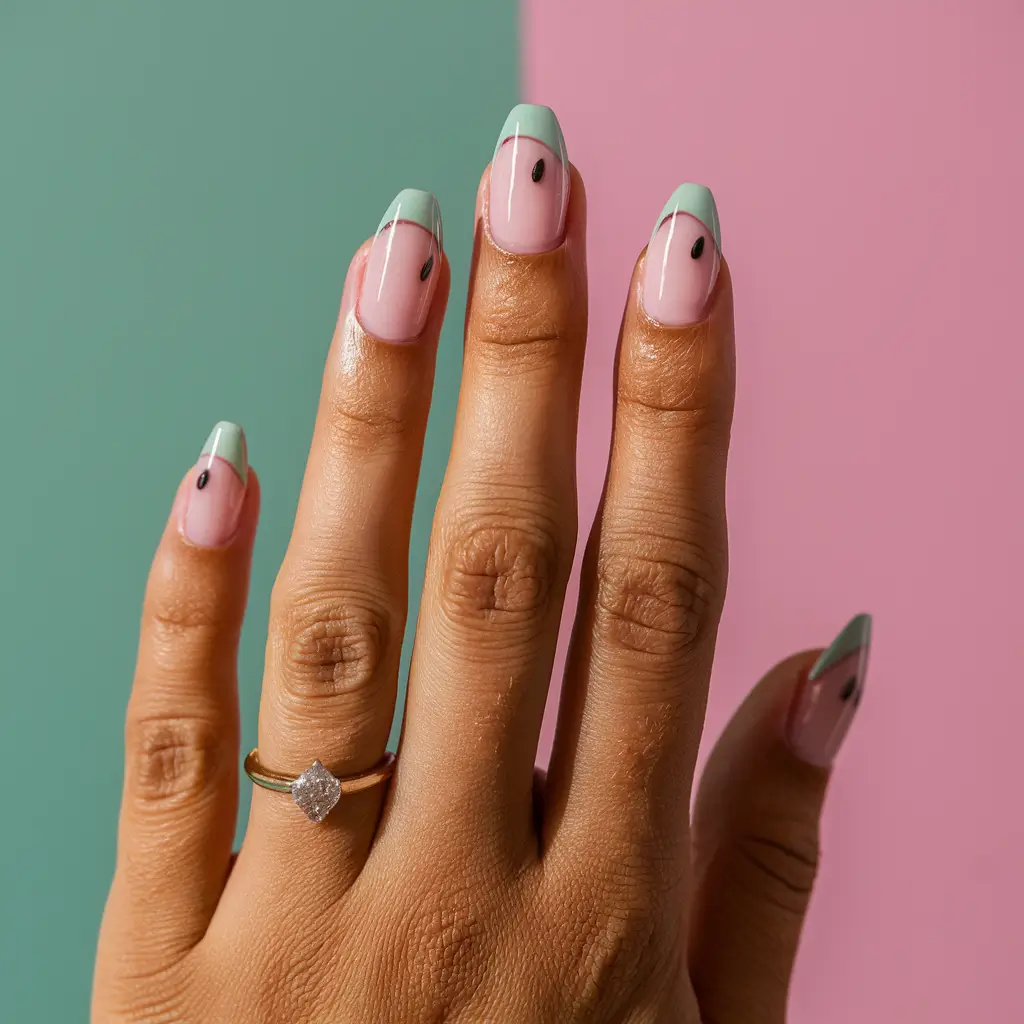
For this look, I start with a light green base. It reminds me of the rind of a watermelon. I then add soft pink tips, representing the juicy fruit inside.
Small, black dots mimic the seeds. They add just the right touch of detail.
It’s a refreshing and fun design. I love how these nails capture the essence of a summer picnic. The colors pop and make me feel like I’m enjoying a slice of watermelon, no matter where I am.
Preparation For Watermelon Nail Designs
Watermelon nail designs are perfect for summer! The vibrant colors and fun patterns can make your nails stand out. Proper preparation is key to getting the best results.
This section will guide you through essential steps to prepare your nails for a stunning watermelon design.
Clean And Shape Your Nails
Start with clean nails to ensure the polish adheres well. Remove any old nail polish using a non-acetone remover. Non-acetone is gentler on your nails.
- Wash your hands with soap and water.
- Dry your nails thoroughly.
Next, shape your nails. Use a nail file to get the desired shape. Oval or rounded shapes work best for watermelon designs. Avoid too much filing to prevent weakening your nails.
| Shape | Best For |
|---|---|
| Oval | Sleek and feminine look |
| Rounded | Natural and durable |
After shaping, use a buffing block to smooth the surface. This step helps remove ridges and gives a smooth canvas for your design.
- Start with the rough side of the buffer.
- Move to the medium side for smoothing.
- Finish with the fine side for a shiny surface.
Ensure your nails are completely dry before moving to the next step.
Apply A Base Coat
Applying a base coat is crucial. It protects your nails and makes the polish last longer. Choose a high-quality base coat for the best results.
- Apply a thin layer of base coat.
- Allow it to dry completely.
A base coat helps in two ways:
- Prevents staining: Watermelon designs use bright colors that can stain your nails.
- Improves adhesion: The polish sticks better, reducing chipping.
After applying the base coat, wait for it to dry. This usually takes about 2-3 minutes. You can use a quick-dry base coat to speed up the process.
Once the base coat is dry, your nails are ready for the colorful watermelon design. This preparation ensures your nails look fabulous and the design lasts longer.
Creating The Watermelon Design
Watermelon nail designs are fun and perfect for summer. They add a splash of color to your nails, making them look fresh and vibrant.
Creating the watermelon design can be easy with the right tips and tricks. Let’s explore the step-by-step process for achieving this fruity nail art.
Paint The Base Color
The first step to creating a watermelon nail design is to paint the base color. A white base coat is recommended. It helps the other colors pop and last longer. Here are the steps to follow:
- Start with clean, dry nails.
- Apply a thin layer of clear base coat. This prevents staining and helps the polish adhere better.
- Let the base coat dry completely.
- Apply two coats of white nail polish. Allow each coat to dry before applying the next.
Using a white base ensures that the vibrant colors of the watermelon design will stand out. It also provides a smooth canvas for the next steps.
Add The Green Rind
The next step is to add the green rind at the tips of your nails. This step creates the appearance of the watermelon skin. Follow these steps:
- Use a green nail polish for the rind.
- Apply the green polish to the tips of your nails in a French-tip style.
- For a more realistic look, use a darker green polish to draw thin, wavy lines over the green tips.
| Step | Description |
|---|---|
| 1 | Apply green polish to the tips of your nails. |
| 2 | Draw thin, wavy lines with darker green polish. |
The green rind adds a realistic touch to your watermelon nails, making them look fun and vibrant.
Add The Red Flesh
Now, it’s time to add the red flesh to the watermelon. The red color makes the design pop and look juicy. Here’s how to do it:
- Use a bright red nail polish for this step.
- Apply the red polish below the green rind, covering the rest of your nail.
- Leave a thin white line between the green rind and the red flesh.
- Let the red polish dry completely.
The red flesh is the heart of the watermelon design. It adds a burst of color and makes the design stand out.
Create The Seeds
The final step is to create the watermelon seeds. The seeds complete the look and make it unmistakably watermelon. Follow these steps:
- Use a black nail polish or a black nail art pen.
- Draw small teardrop shapes on the red flesh part of your nails.
- Place the seeds randomly but evenly across the red area.
- Allow the seeds to dry completely.
- Finish with a clear top coat to seal and protect your design.
Creating the seeds is the fun part. It combines the whole design and adds a cute, playful touch to your nails.
Tips And Tricks
Watermelon nail designs are perfect for adding a summer splash to your look. They are fun, vibrant, and surprisingly easy to create at home.
You can quickly achieve professional-looking watermelon nails with the right tips and tricks. Below are some essential tips and tricks to help you get started.
Use A Toothpick For Precision
Using a toothpick is an excellent way to achieve precision in your watermelon nail designs. A toothpick can help you create intricate details without much hassle.
Here are some tips for using a toothpick effectively:
- Outline the Watermelon: Dip the toothpick in black nail polish to outline the watermelon shape. This helps in creating a neat boundary.
- Create the Seeds: After painting your nails with a watermelon base, use the toothpick to add small black seeds. This step is essential for a realistic look.
- Fix Mistakes: A toothpick can also help remove excess polish or fix small mistakes. Dip it in nail polish remover and gently correct the error.
Here’s a quick table to summarize the uses of a toothpick in watermelon nail designs:
| Task | How to Use Toothpick |
|---|---|
| Outline the Watermelon | Dip in black polish for neat boundaries |
| Create the Seeds | Add small black dots |
| Fix Mistakes | Dip in remover for corrections |
Apply Thin Layers
Applying thin layers of nail polish is crucial for a smooth and professional finish. Thick layers take longer to dry and are prone to smudging. Here are some tips to ensure you apply thin layers:
- Use Less Polish: Load your brush with a small amount of nail polish. This helps in applying a thin, even layer.
- Multiple Coats: Apply two to three thin coats instead of one thick coat. This ensures better coverage and a smoother finish.
- Brush Technique: Use long, even strokes to spread the polish evenly. This minimizes streaks and bubbles.
Applying thin layers enhances the appearance and longevity of your nail design. Follow these tips for flawless watermelon nail art.
Let Each Layer Dry Completely
Patience is key to achieving perfect watermelon nails. Letting each layer dry completely before applying the next one is crucial. Here are some steps to ensure proper drying:
- Wait Time: Allow 5-10 minutes for each layer to dry. This prevents smudging and ensures a smooth finish.
- Use a Fan: A small fan can speed up the drying process. Hold your nails in front of the fan for quicker drying.
- Avoid Activities: Refrain from activities that damage your nails while drying. This includes typing, cooking, or cleaning.
Proper drying time is essential for a long-lasting and beautiful watermelon nail design. Follow these tips to ensure each layer sets perfectly.
Maintenance
Watermelon nail designs are vibrant and fun. Proper maintenance is crucial to keeping these fruity nails looking fresh and fabulous.
With a few simple tips and tricks, your watermelon nail art will last longer and remain stunning.
Apply A Top Coat
Applying a top coat is one of the most important steps in maintaining your watermelon nail design. A top coat acts as a protective layer, shielding your design from chipping and fading.
Here’s how to do it:
- Choose a high-quality top coat that promises long-lasting shine and protection.
- Apply the top coat after your nail design is completely dry. This ensures no smudging.
- Reapply the top coat every 2-3 days to maintain the design’s durability and shine.
Benefits of using a top coat:
| Benefit | Description |
|---|---|
| Protection | Prevents chipping and damage to the nail design. |
| Shine | Enhances the overall look with a glossy finish. |
| Longevity | Extends the life of your nail design. |
Avoid Hot Water And Harsh Chemicals
To preserve your watermelon nail design, avoiding hot water and harsh chemicals is essential. These can weaken the nail polish and cause it to chip or fade.
Here are some tips:
- Use gloves when washing dishes or cleaning. This protects your nails from chemicals in cleaning products.
- Avoid soaking your nails in hot water for long periods. Hot water can soften the nail polish and cause it to peel.
- Use gentle hand soaps and avoid alcohol-based sanitizers. These can dry out your nails and damage the design.
Why avoiding hot water and harsh chemicals helps:
- Prevents damage to the nail polish, keeping the design intact.
- Maintains the color and vibrancy of your watermelon nails.
- Increases the lifespan of your nail design, allowing you to enjoy it longer.


Frequently Asked Questions
How To Do Watermelon Nail Art?
Start with a base coat. Apply red polish, then add green tips. Use a thin brush for white lines and black dots. Finish with a top coat.
What Nail Designs Make Them Look Longer?
Opt for vertical stripes, nude shades, and almond or oval shapes. Use light colors and avoid dark or bold designs.
How Can I Get Better At Nail Designs?
Practice regularly, take online tutorials, and follow nail art influencers. Invest in quality tools and products. Experiment with different styles and techniques.
What Fingers Do Nail Designs Go On?
Nail designs can go on any finger. Popular choices are the ring finger and middle finger. Some prefer designs on all nails.
Conclusion
Creating watermelon nail designs can be fun and easy. With these tips and tricks, your nails will look fabulous. Practice and creativity are key.
Share your designs, inspire others, and enjoy your unique, summery look. Dive into the world of nail art and let your creativity shine!


